

Frustrated by missed opportunities in your career? A portfolio website could be the missing piece of the puzzle. However, the technical aspects might seem like a foreign language. How do you choose the right platform, ensure your site is secure, and keep it updated without pulling your hair out?
Don't worry - this guide will walk you through how to build a portfolio website that showcases your talents without the headache. Let's begin.

How to Build a Portfolio Website: Step-by-Step Guide
As a learner, you might find it hard to design your portfolio website. There is a chance you will make silly mistakes that will ruin your time and effort.
So, we have made it extremely easy for you. Just follow the steps below to create your portfolio website.
-
Pick a Website Builder
-
Register a Domain Name
-
Start Building Your Portfolio Website
-
Customize Your Website
-
Configure Site Settings And Integrations
-
Test Your Website Before Going Live
-
Publish Your Portfolio Website
-
Promote Your Portfolio Site
-
Maintain and Upgrade Your Website
[Note: You can make any website, including a portfolio, with Dorik in just 4 steps. However, to perfectly optimize and personalize your portfolio website, adhere to all the steps we discuss here]
Step 1: Pick a Website Builder
Selecting a website-building platform is one of the most crucial steps in this journey. A wrong move may turn the whole scenario upside down.
So, before making your final decision, research the available website builders on the market. Ensure they offer features like design flexibility, customization options, mobile responsiveness, SEO optimization, customer support, etc.
Therefore, you can read our guide on the must-have features of a website builder to determine the best platform.
Some of the popular website builder platforms include Dorik, Webflow, Wix, WordPress, Squarespace, etc.
But which is the best for you?
No doubt, Dorik stands out in the crowd. It is the best alternative to Webflow, Wix, Weebly, and any other no-code website builders.
Let's see what it has got.
-
AI website Builder
-
Text and Image generation
-
Drag & drop builder
-
80+ pre-built templates with 250+ stunning UI blocks and 20+ elements.
-
Unlimited Storage & Bandwidth
-
Free SSL/TLS Certificate
-
Built-in Image Optimizer
-
Completely Responsive & SEO Optimized
-
Built-in Blogging Platform
There are three ways you can create a portfolio website with Dorik — with AI, with portfolio templates, and from scratch. We will show you all three processes in the next segments.
Step 2: Register a Domain Name
Registering a domain name is an essential step in creating your portfolio site. It will be the address of your website. And it is also important to promote your personal brand.
So, while choosing a domain name, you should be smart. You can follow the below tips to select a good domain name.
Tips to help you pick a good domain name
-
Keep it short and memorable
-
Make it easy to spell
-
Consider your personal brand
-
Check availability
-
Choose the right extension
However, you can create and publish your portfolio website using Dorik without purchasing a domain name. Dorik offers a free subdomain (.dcms.site) for each website that you can use in its 14-day trial period.
So, first, you can design your portfolio site. Then, you can buy and connect your preferred domain before the trial ends.
Step 3: Start Building Your Portfolio Website
As we’ll be using Dorik to build your website, you need to create an account on Dorik.
To create a new account on Dorik, you will need only an active email address. So, before proceeding any further, be sure your email ID is working well.
Now, follow the below instructions to create an account on Dorik:
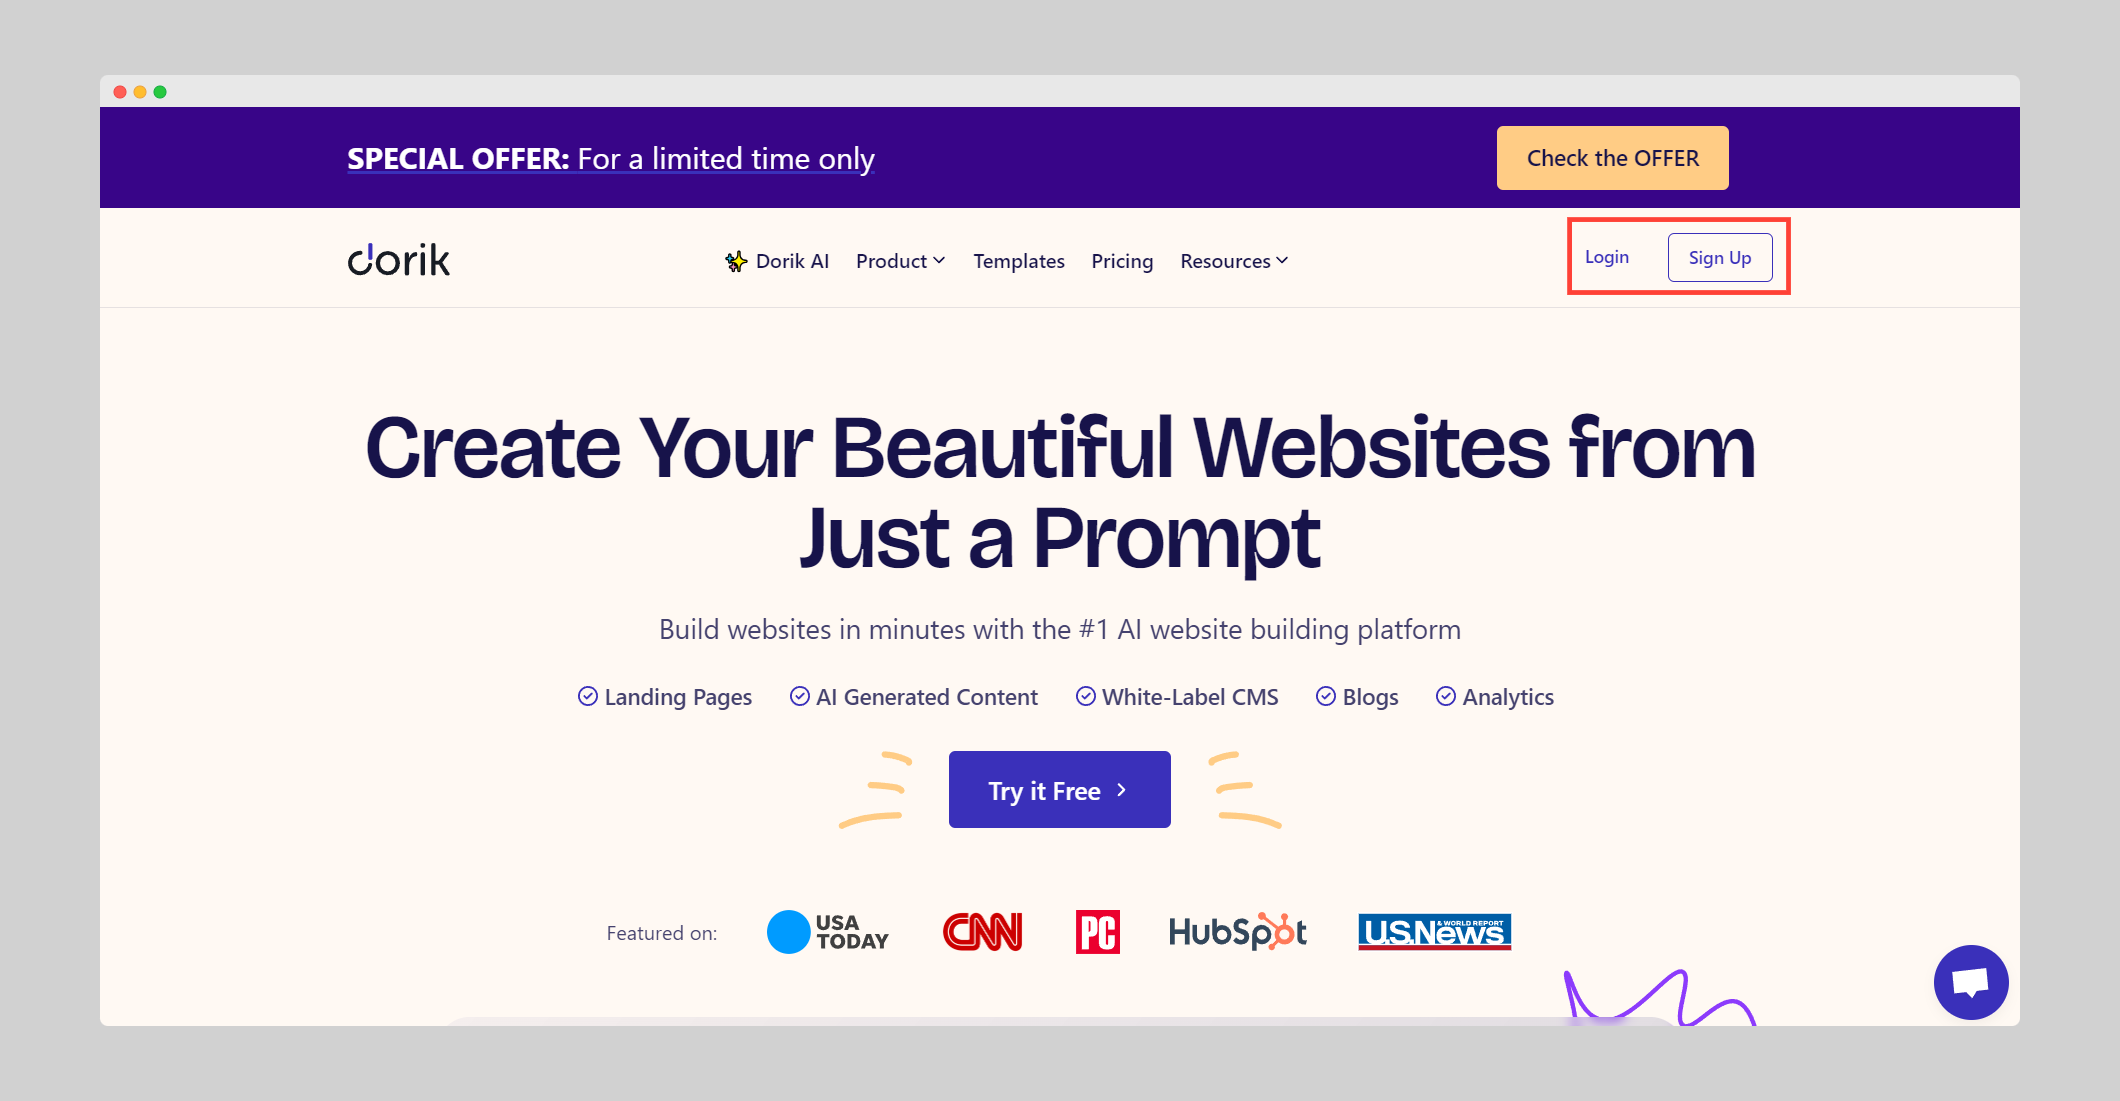
1. Visit Dorik, the most user-friendly AI and No-code website builder, as it is the first step of your website-building process.
2. Head to the Sign-Up button and click on it. It will take you to a new page.
3. Now, click on the Sign up With Google option.
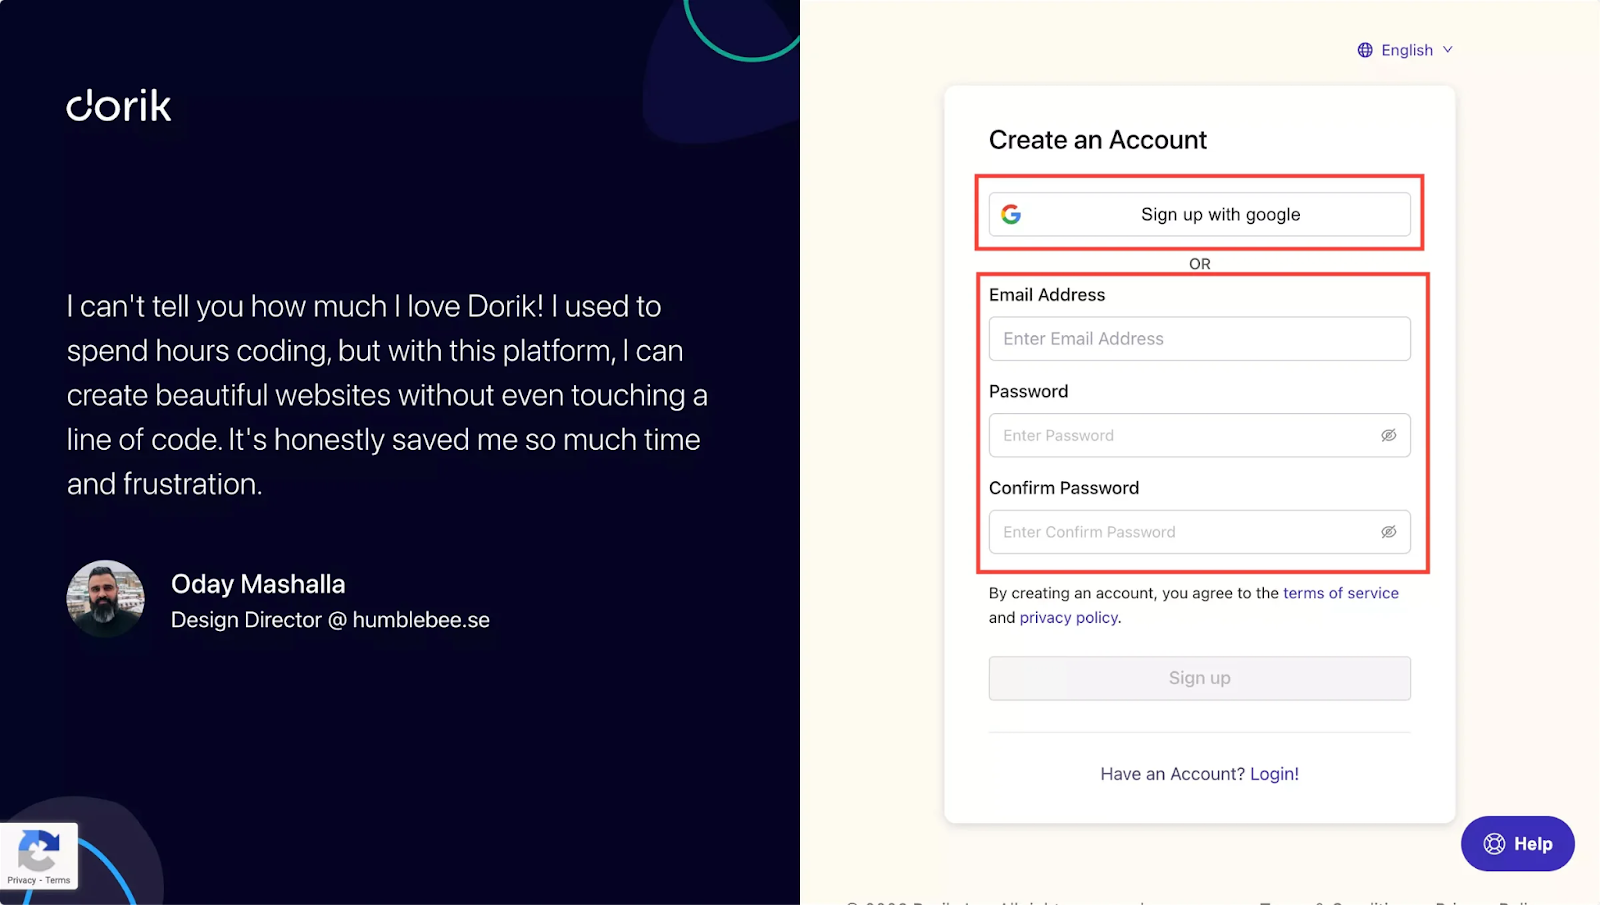
However, if you don’t have a Gmail ID, you can sign up with your email manually, as shown in the picture below.
It’s done. Your new Dorik account has been created. It’s that easy! Within a moment, it’ll take you to the Dorik Dashboard.
Shortcut: Go to Sign Up→ Sign In With Google→ Select an Email ID
Once your account is created, it’s time to create your website. Remember I said that Dorik offers three different approaches to creating your website? Here we go.
1. Create Your Portfolio Website with AI
Before you proceed, you need to decide if you want to create a CMS site or a Static Site. Although the initial building process is almost identical for both, a CMS site has some notable advantages over a Static site. Hence, I’ll be using the CMS option here. You can read our documentation on the CMS vs. Static website to learn more details about the differences.
Follow the steps below to build your portfolio website with AI:
1. Click on “Sites” from the dashboard.
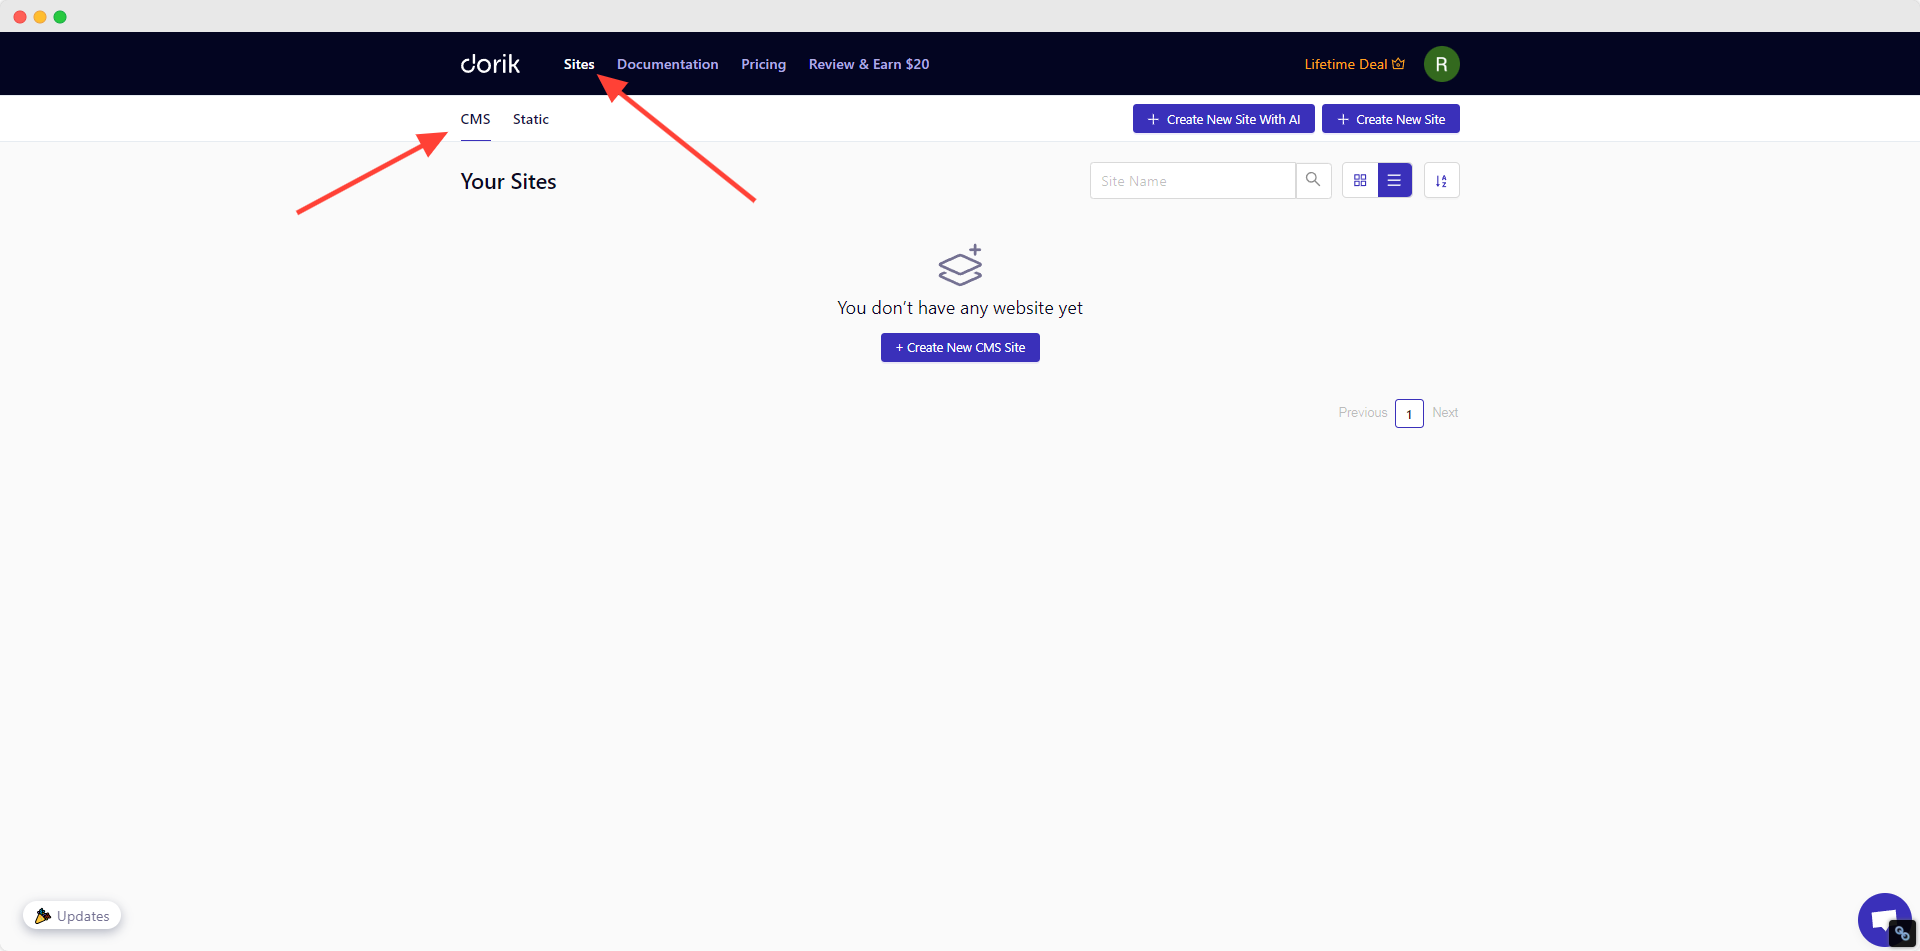
2. Choose “CMS”.
3. Click on “+ Create New Site With AI” button.
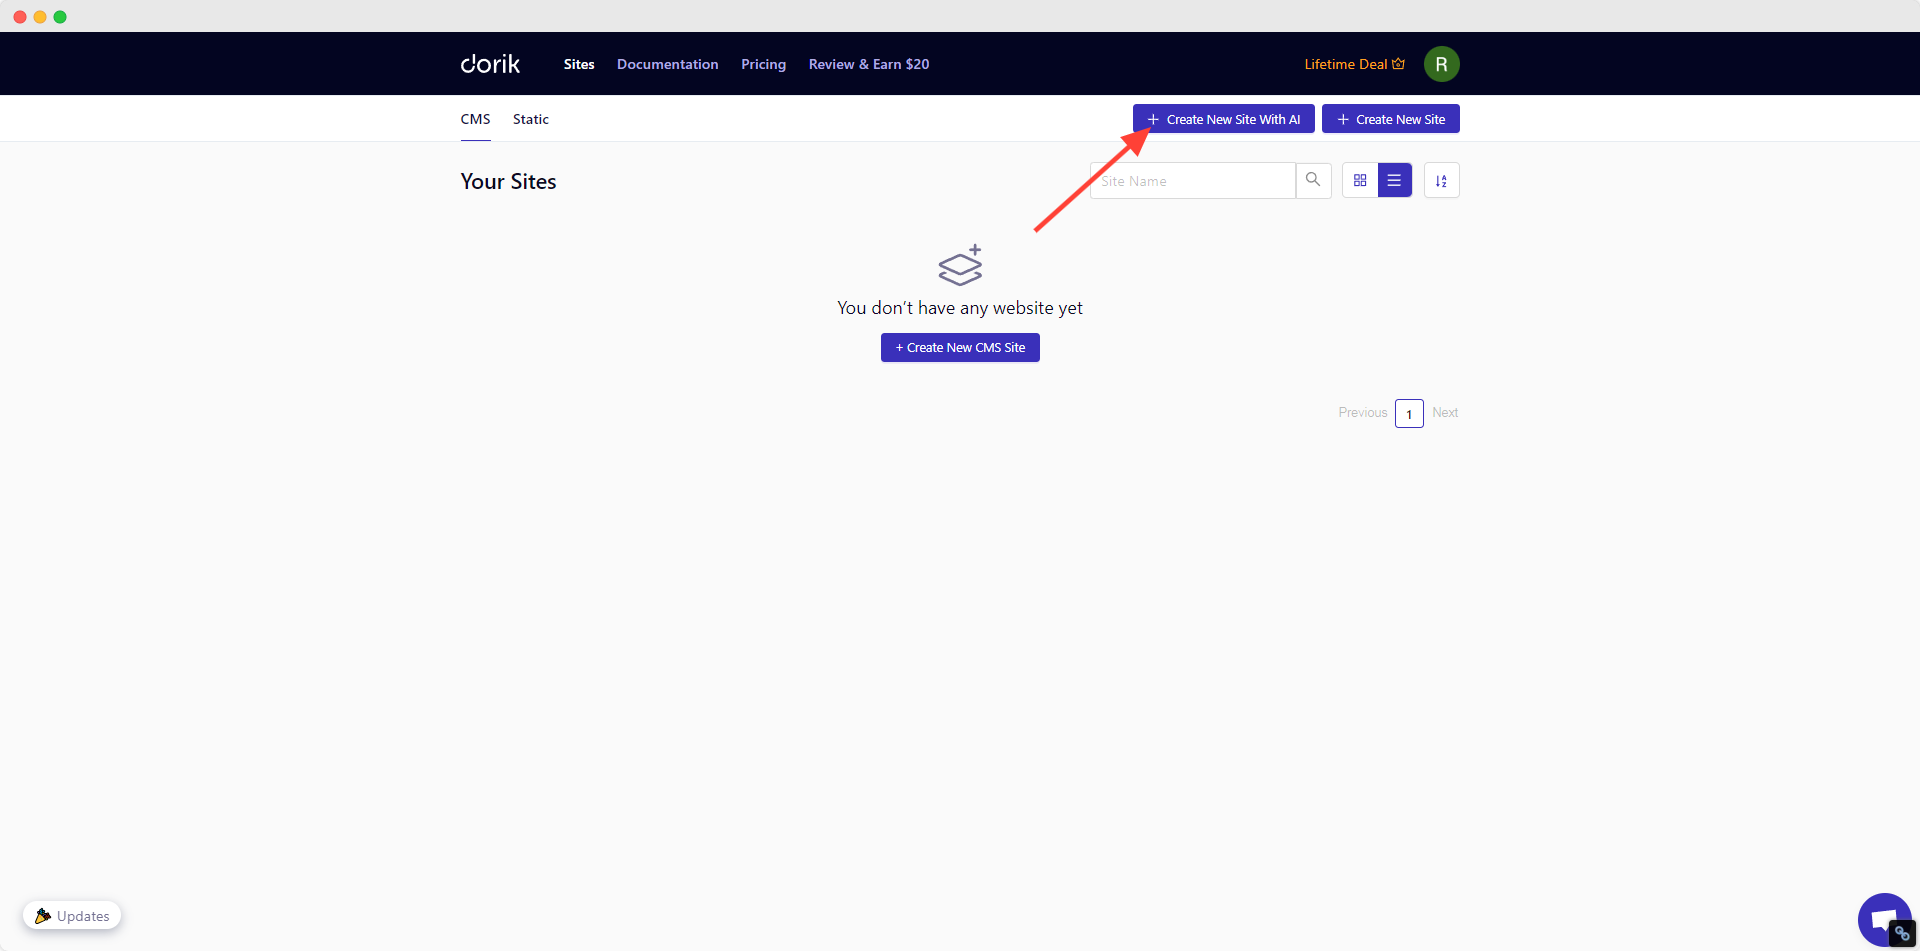
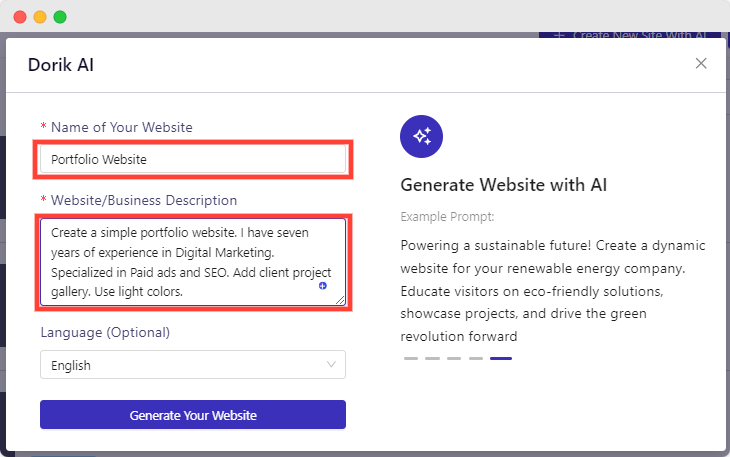
4. Write your website name and a detailed prompt in the popup.
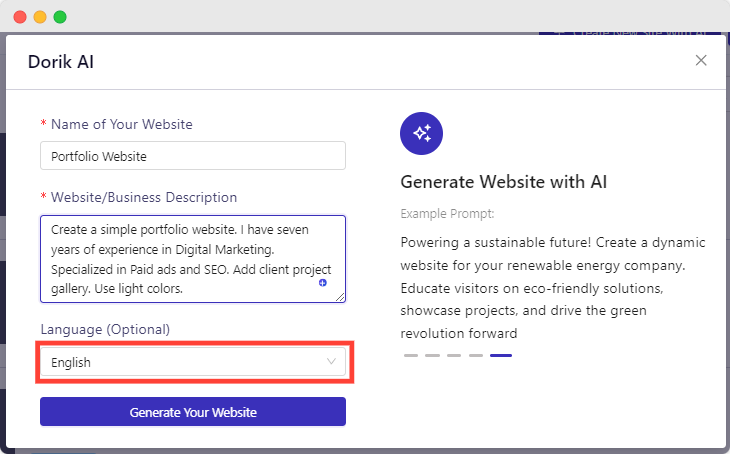
5. Select your preferred language.
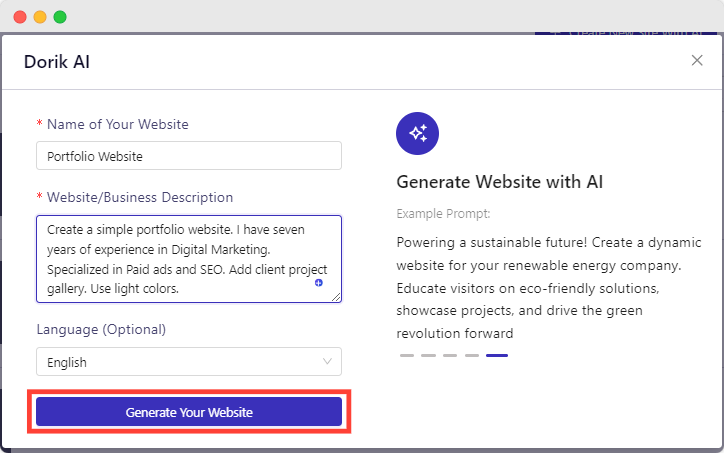
6. Click on the “Generate Your Website” button.
Wait for a moment while Dorik AI creates your portfolio website like magic before your eyes.
Shortcut: Go to Create New Site with AI → Write Prompt → Generate Your website
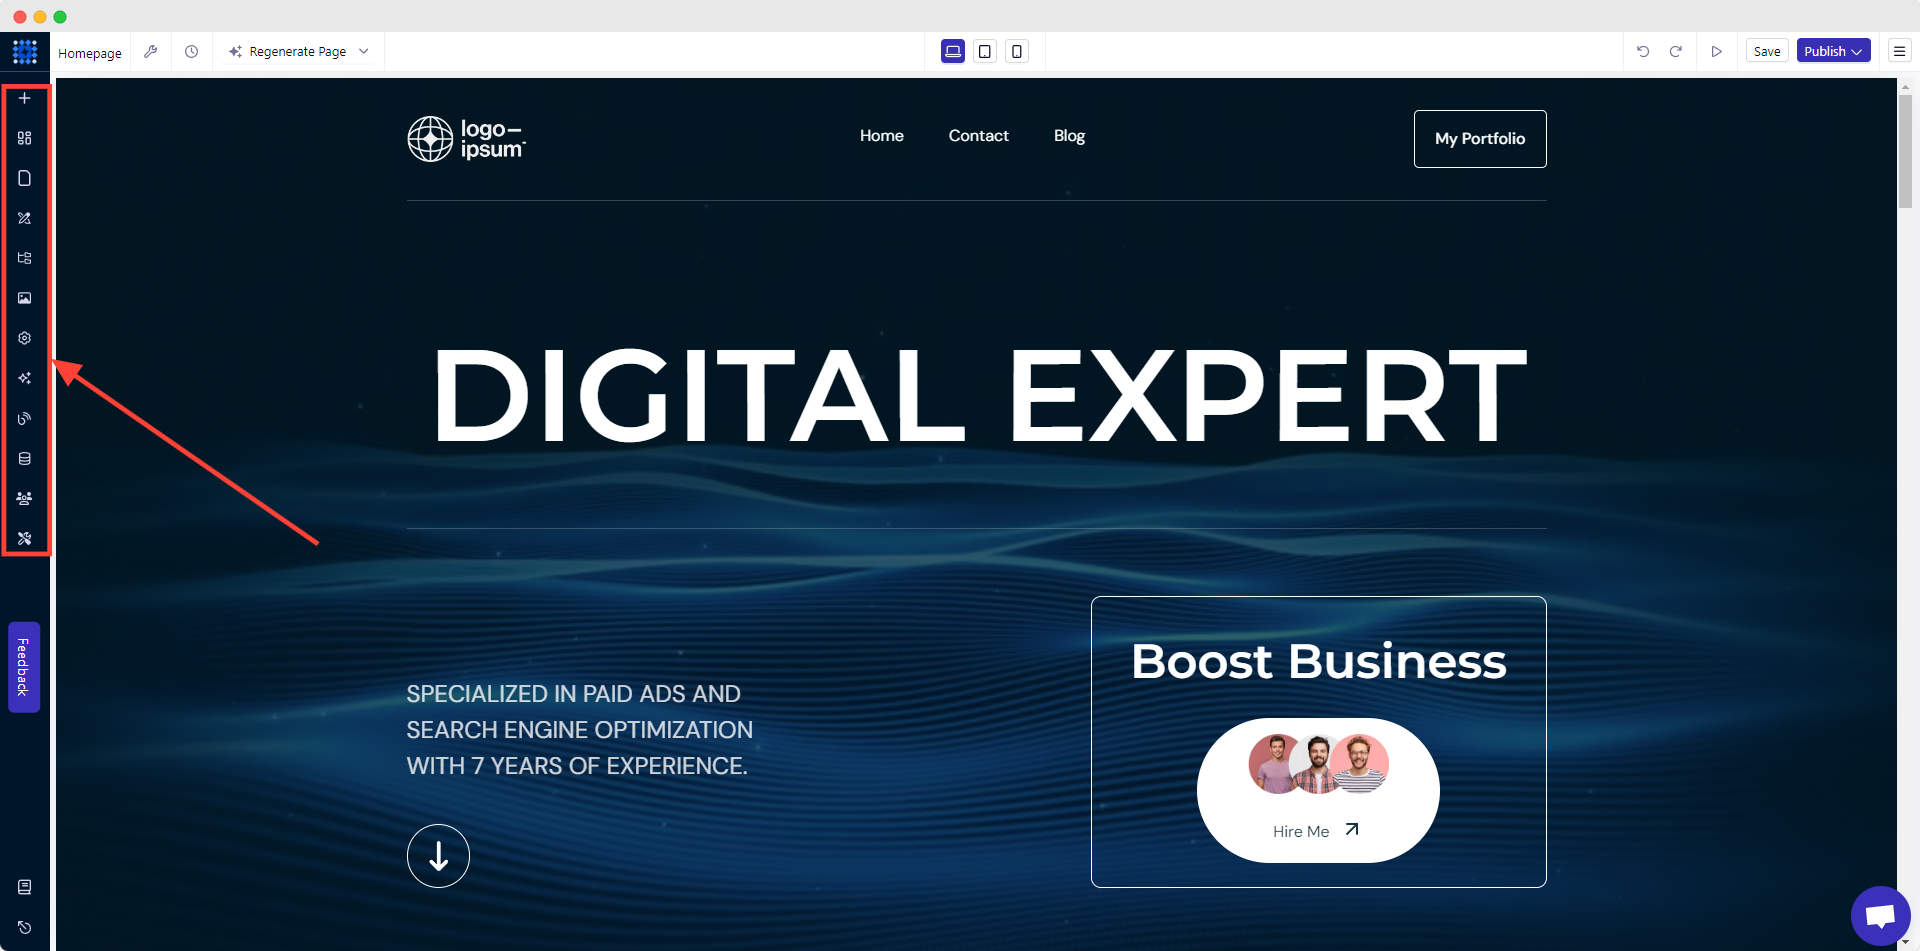
I’m sure you’re still curious about the design and functional capabilities of Dorik AI website builder. Hence, I’ve created a portfolio website using Dorik AI while writing this article. I’m attaching a raw (without any customization) image of the created website below for your reference.
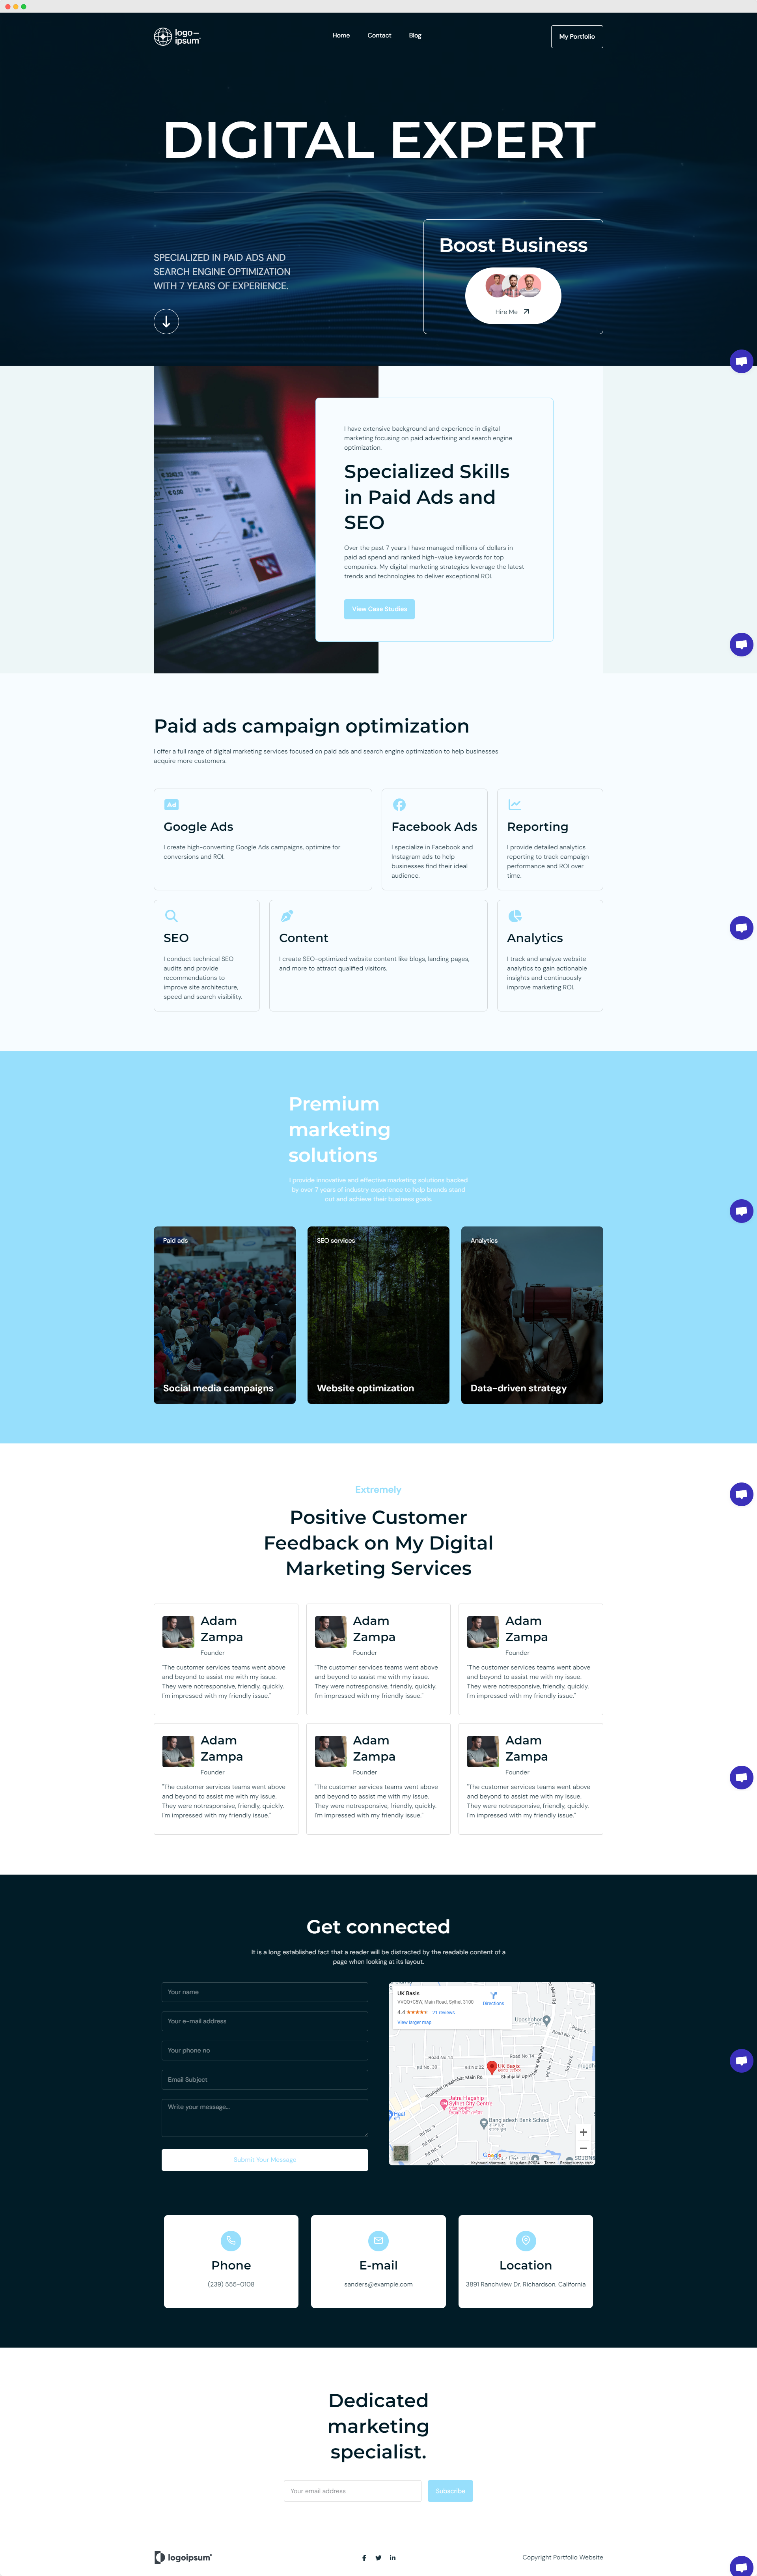
Prompt Used: Create a simple portfolio website. I have seven years of experience in Digital Marketing. Specialized in Paid ads and SEO. Add client project gallery. Use light colors.
(N.B: The same prompt may create a different output. Improving prompt, Using regeneration and editor will make your site design better.)
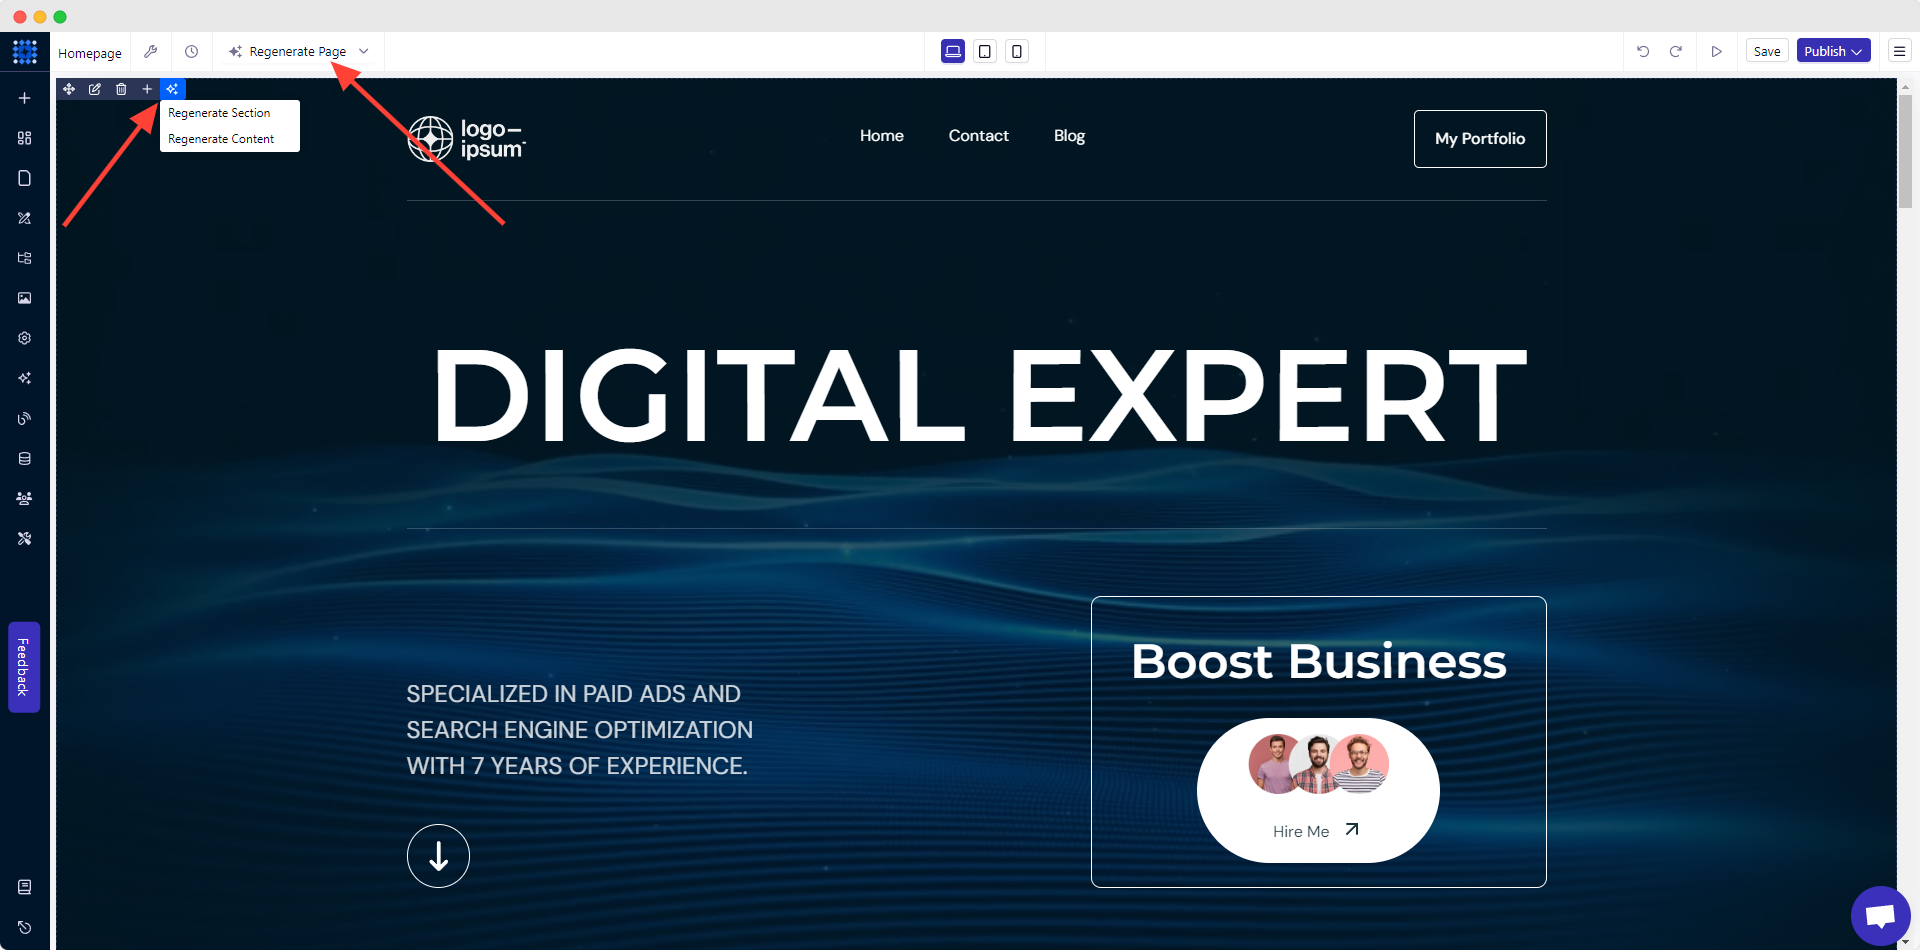
You can always use Dorik full page generation, section generation, text generation, image generation, and full site editing to make your site more engaging. You can also edit the prompt for the entire page and for any specific section.
You can publish your site for free using Dorik's subdomain.
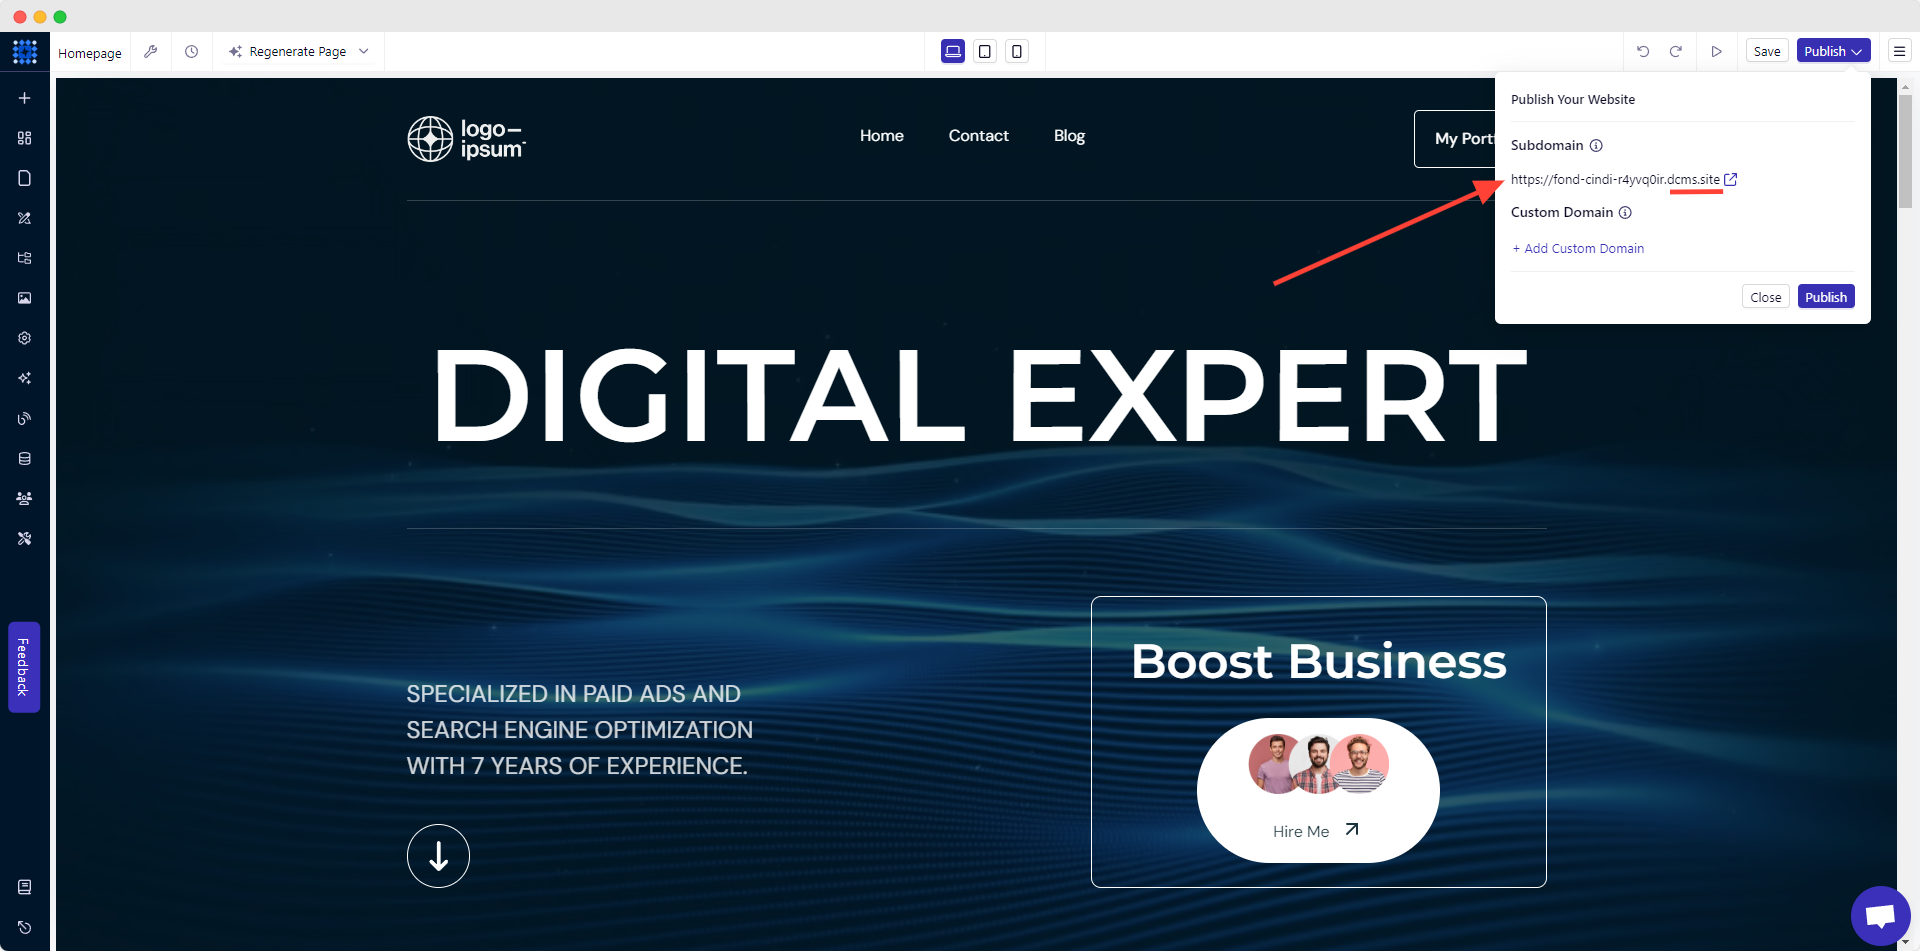
However, you can also add a custom domain on Dorik after upgrading to a premium plan.
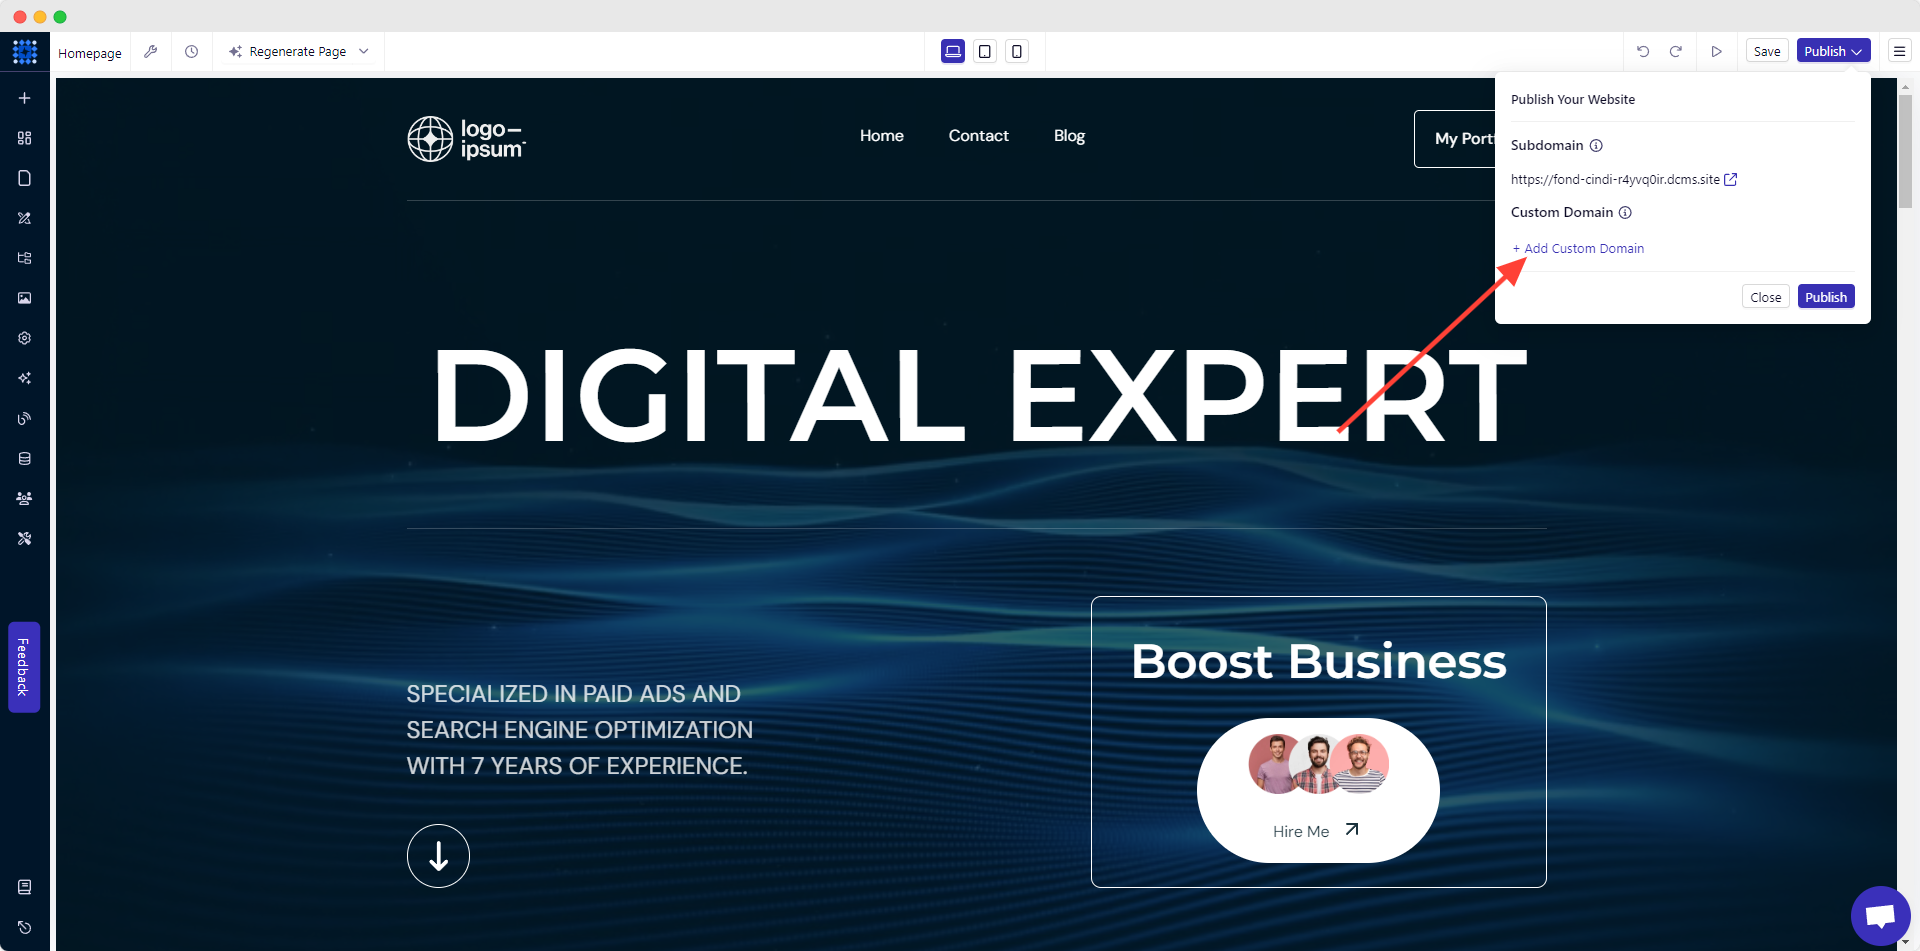
You’ll get the instructions to connect a custom domain to your site from some of the most popular domain registrars, like NameCheap, GoDaddy, OVH, Cloudflare, etc., in the domain connection popup for further instructions.

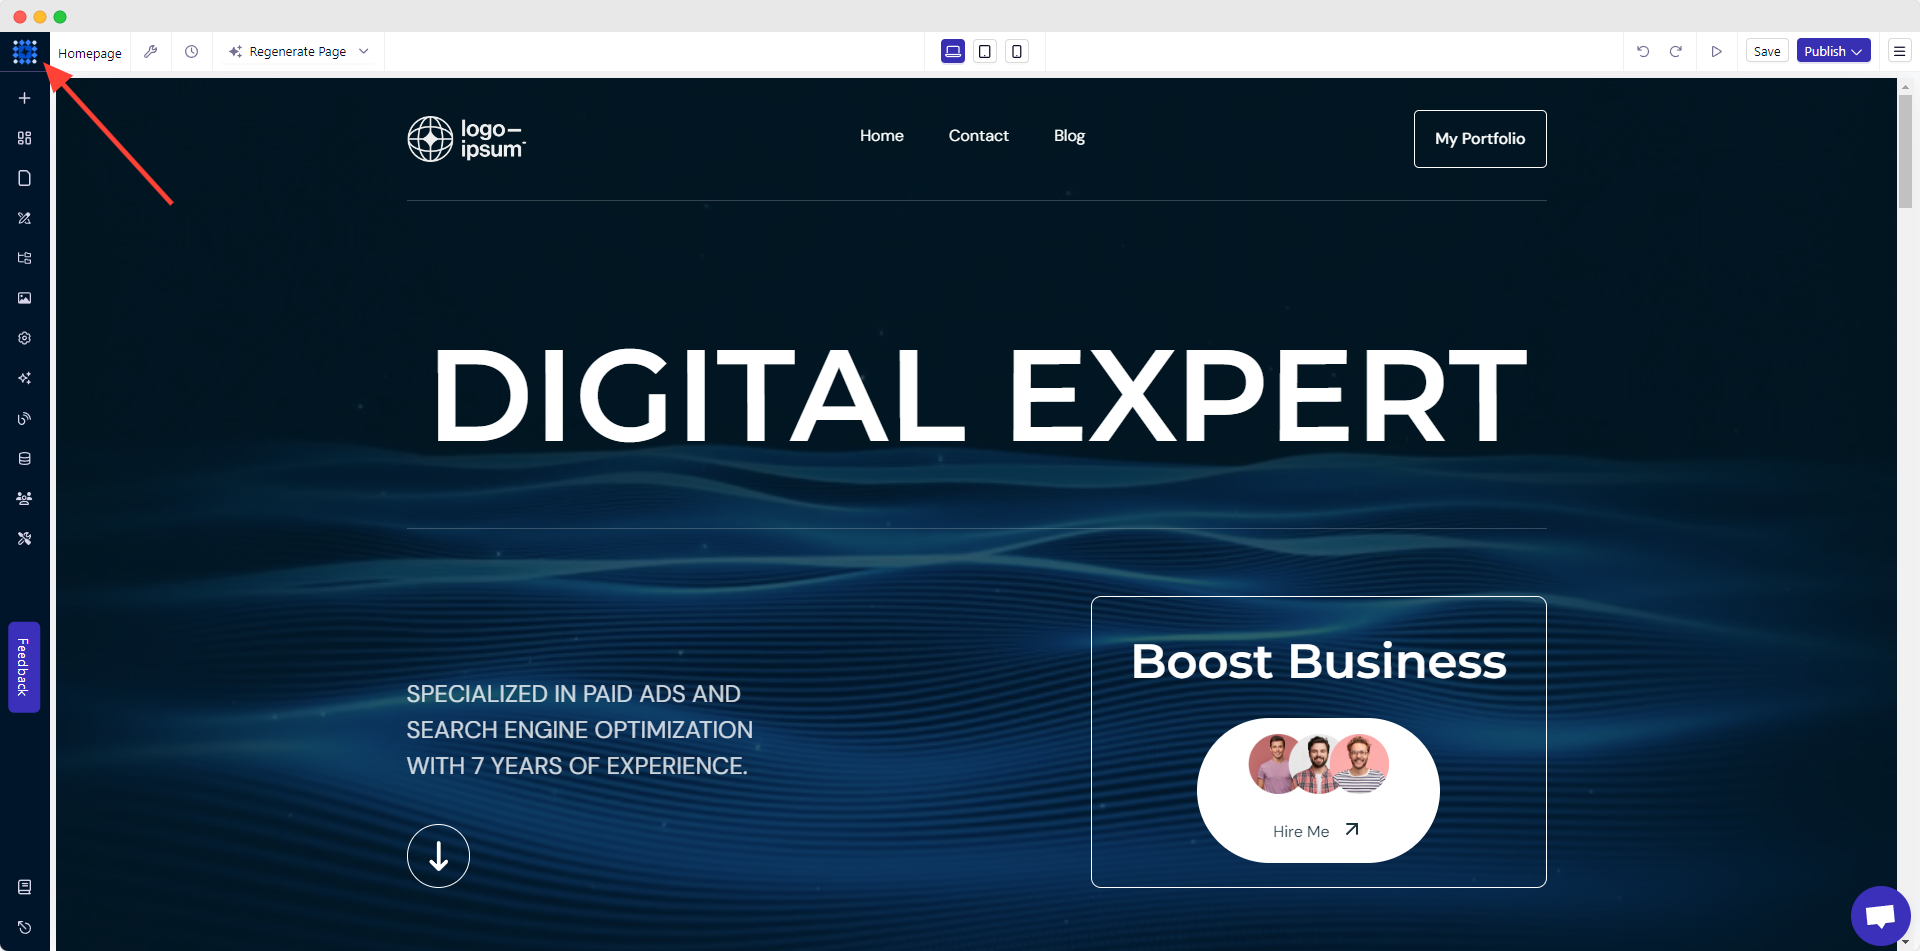
Congratulations!
Your website has been successfully published. Now, access the Dorik CMS Site Dashboard by clicking on the bluish square icon at the top left corner.
Take the time to examine each element and feature of the drag-and-drop interface to optimize your workflow.
The left sidebar panel is your “go-to” feature since it contains all the options required to customize your site.
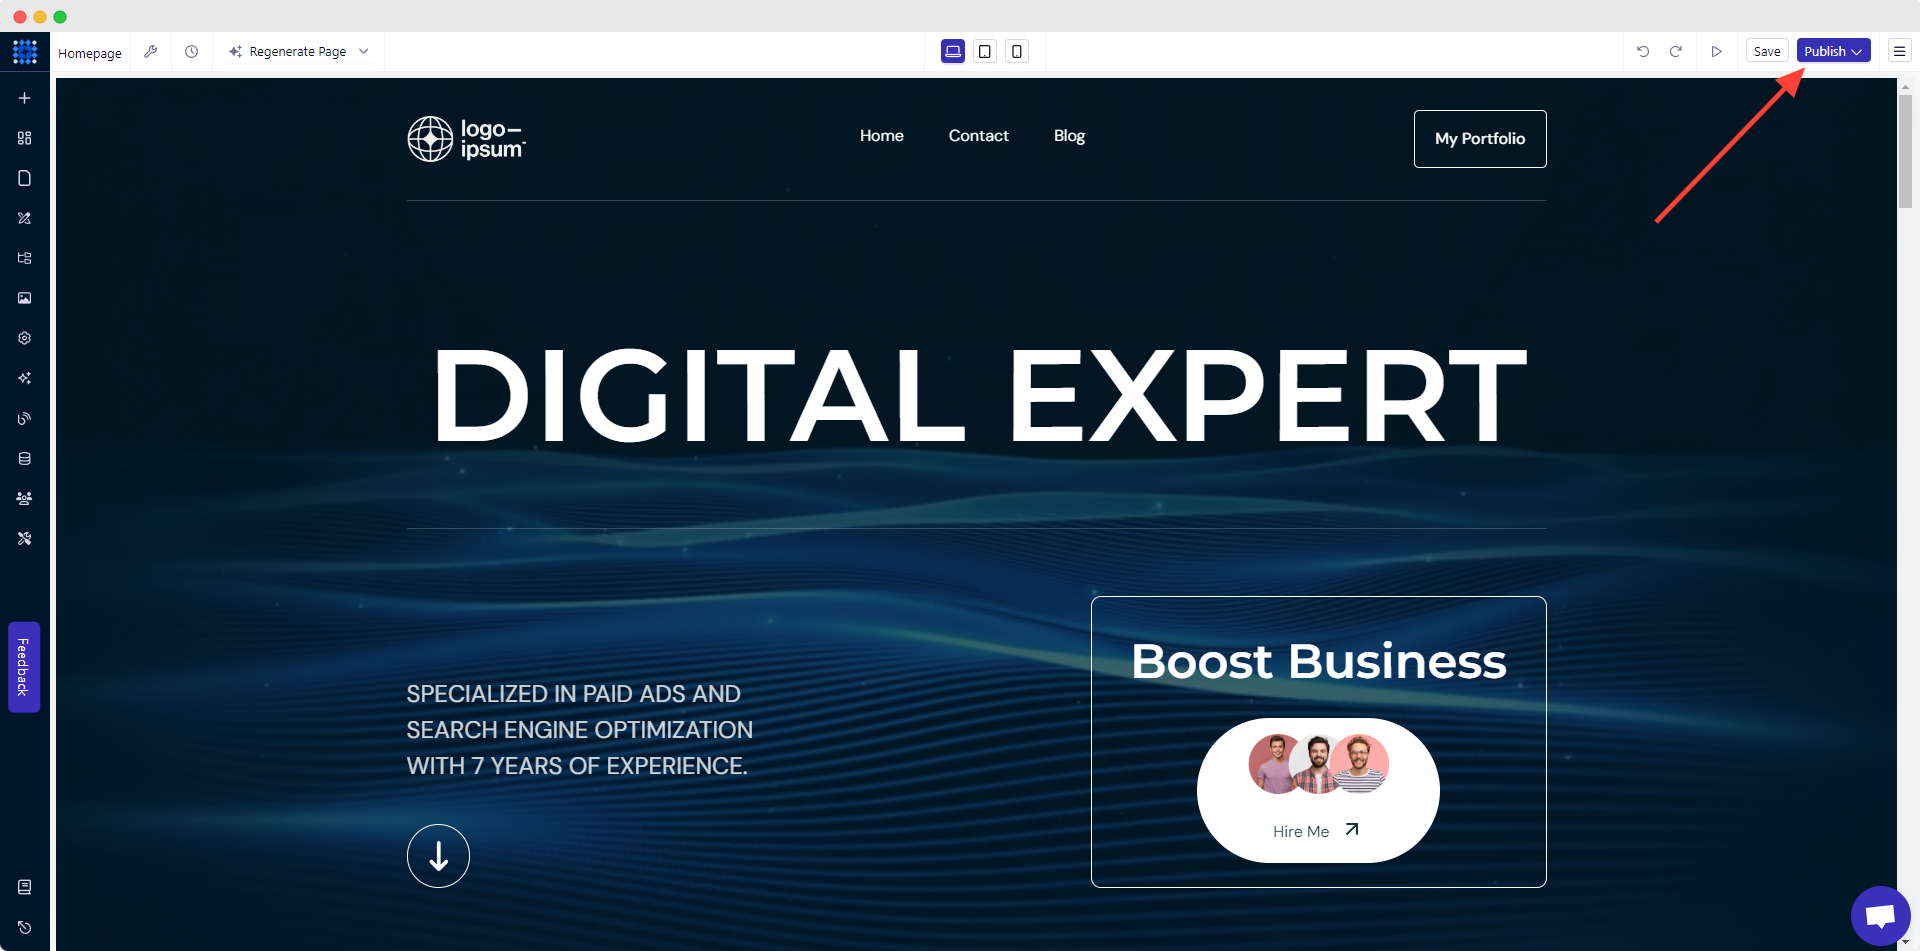
Once you are OK with all the features and options, click on "Publish" to start.
Are you worried about hosting your website? Relax! Because Dorik provides free hosting.
Related Reads:
2. Create Your Portfolio Website Using Template
Templates can be a great option for those who need a base. These templates are designed by experts following industry best practices.
Take a look at Best Portfolio Templates
Also, you’ll get the required pages pre-built with templates. And the best part? All of the pre-made pages have consistency, which you may find a bit cumbersome if you create your website with AI.
You’ll find many ready-made portfolio templates out there. Here are some of the best portfolio templates I’d suggest you to take a look at:
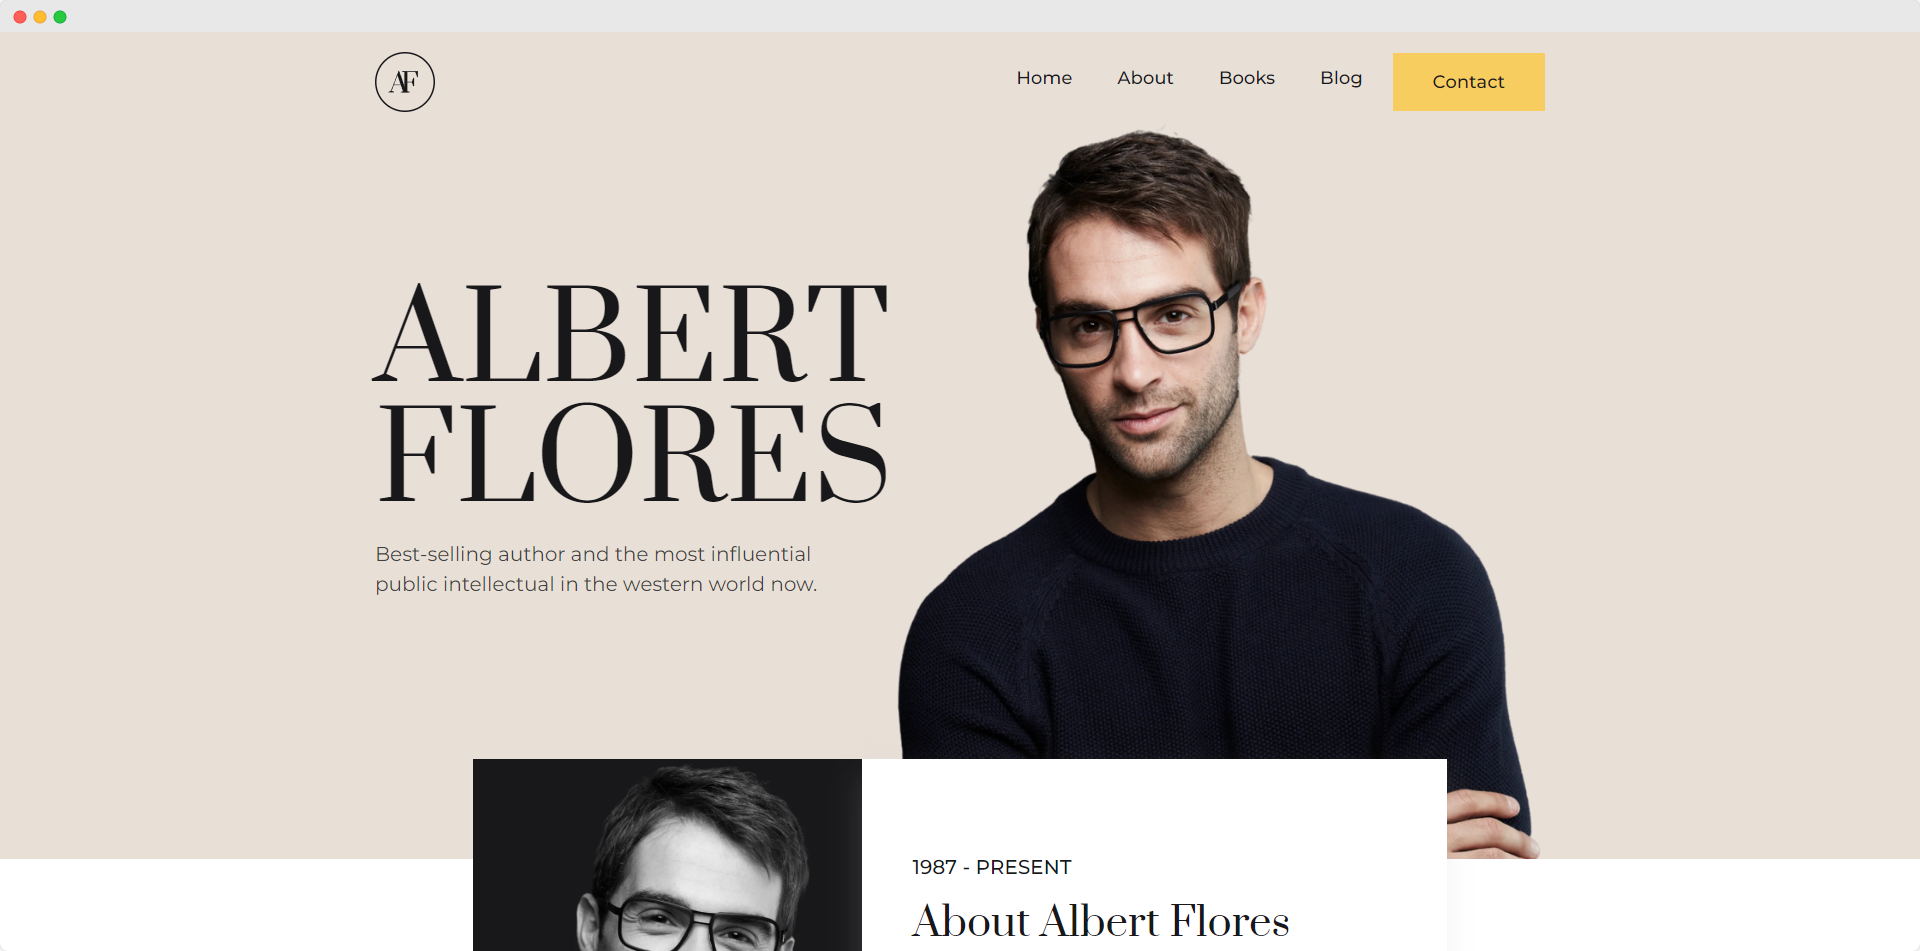
1. AF Writer Portfoili Template - Great for writers with nested pages for Book Library. This template features five pre-built pages, including books, contact, etc.
Related Read: How to Write a Bio
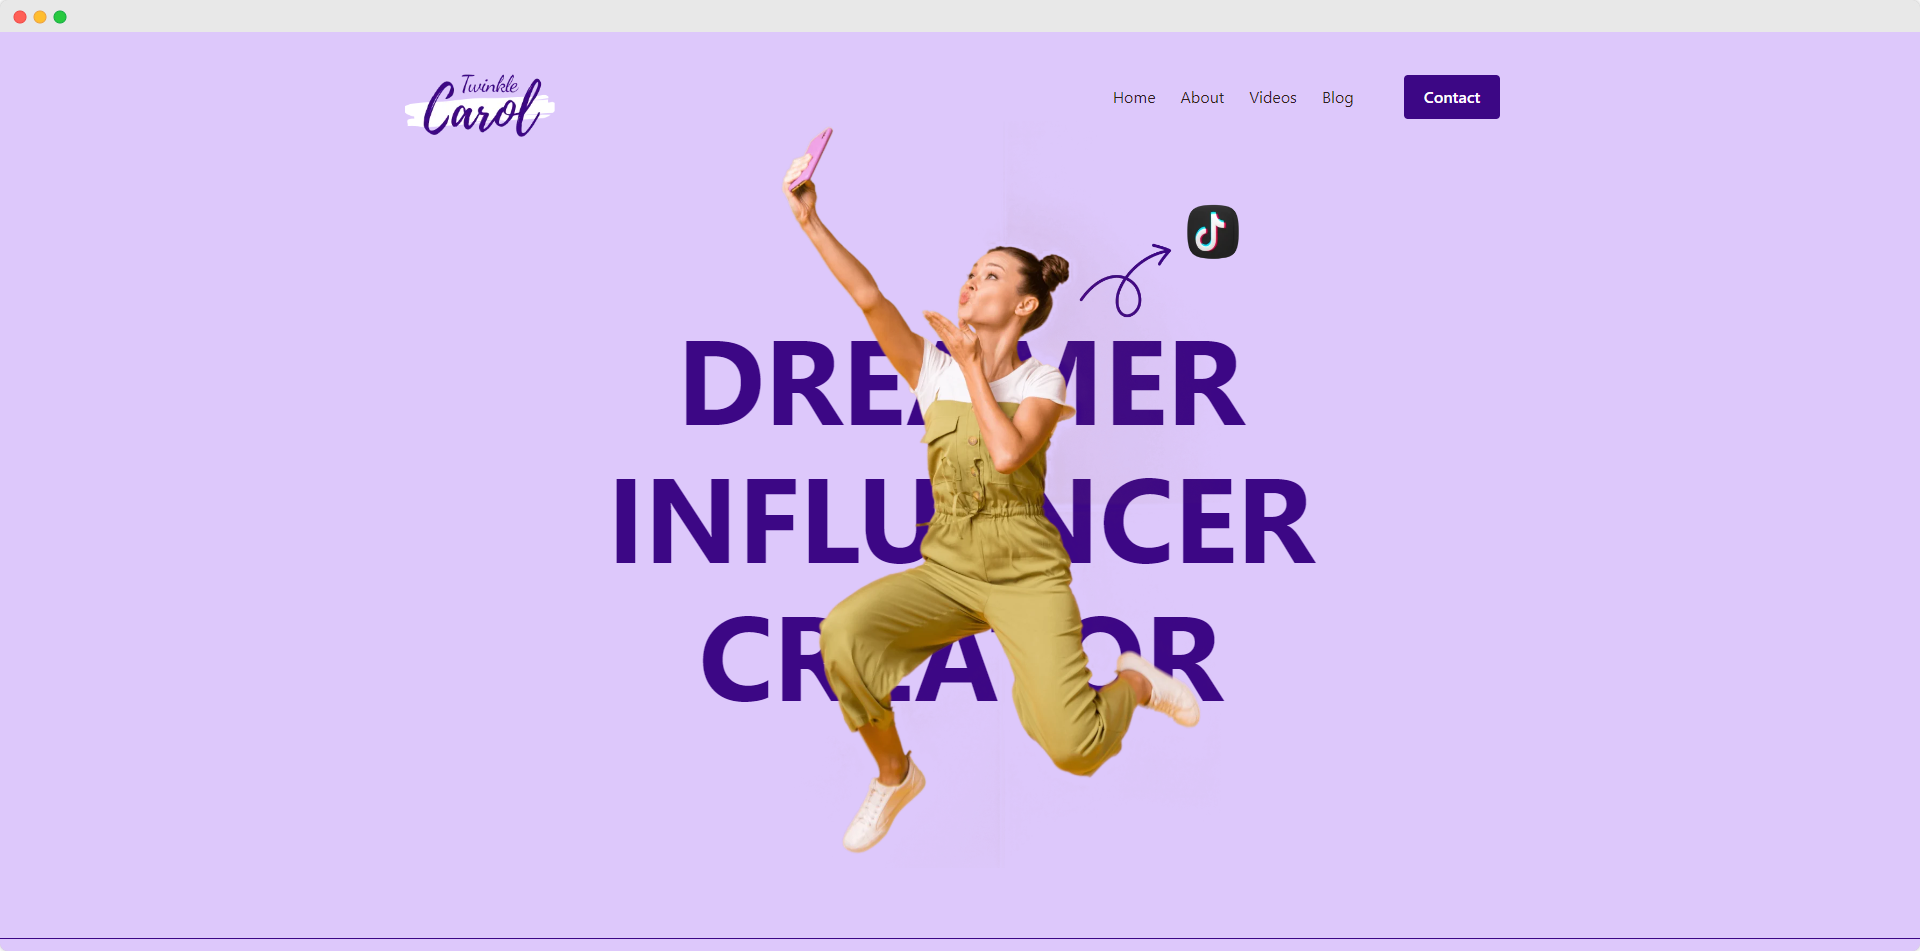
2. Carol Influencer Portfolio Template - If you’re an influencer and looking to build a colorful and trendy portfolio, this template will be a perfect option to start with.
3. JR Digital Marketing Portfolio Template - JR is a template designed for digital marketing experts. This template features a service section on the homepage along with a dedicated service page.

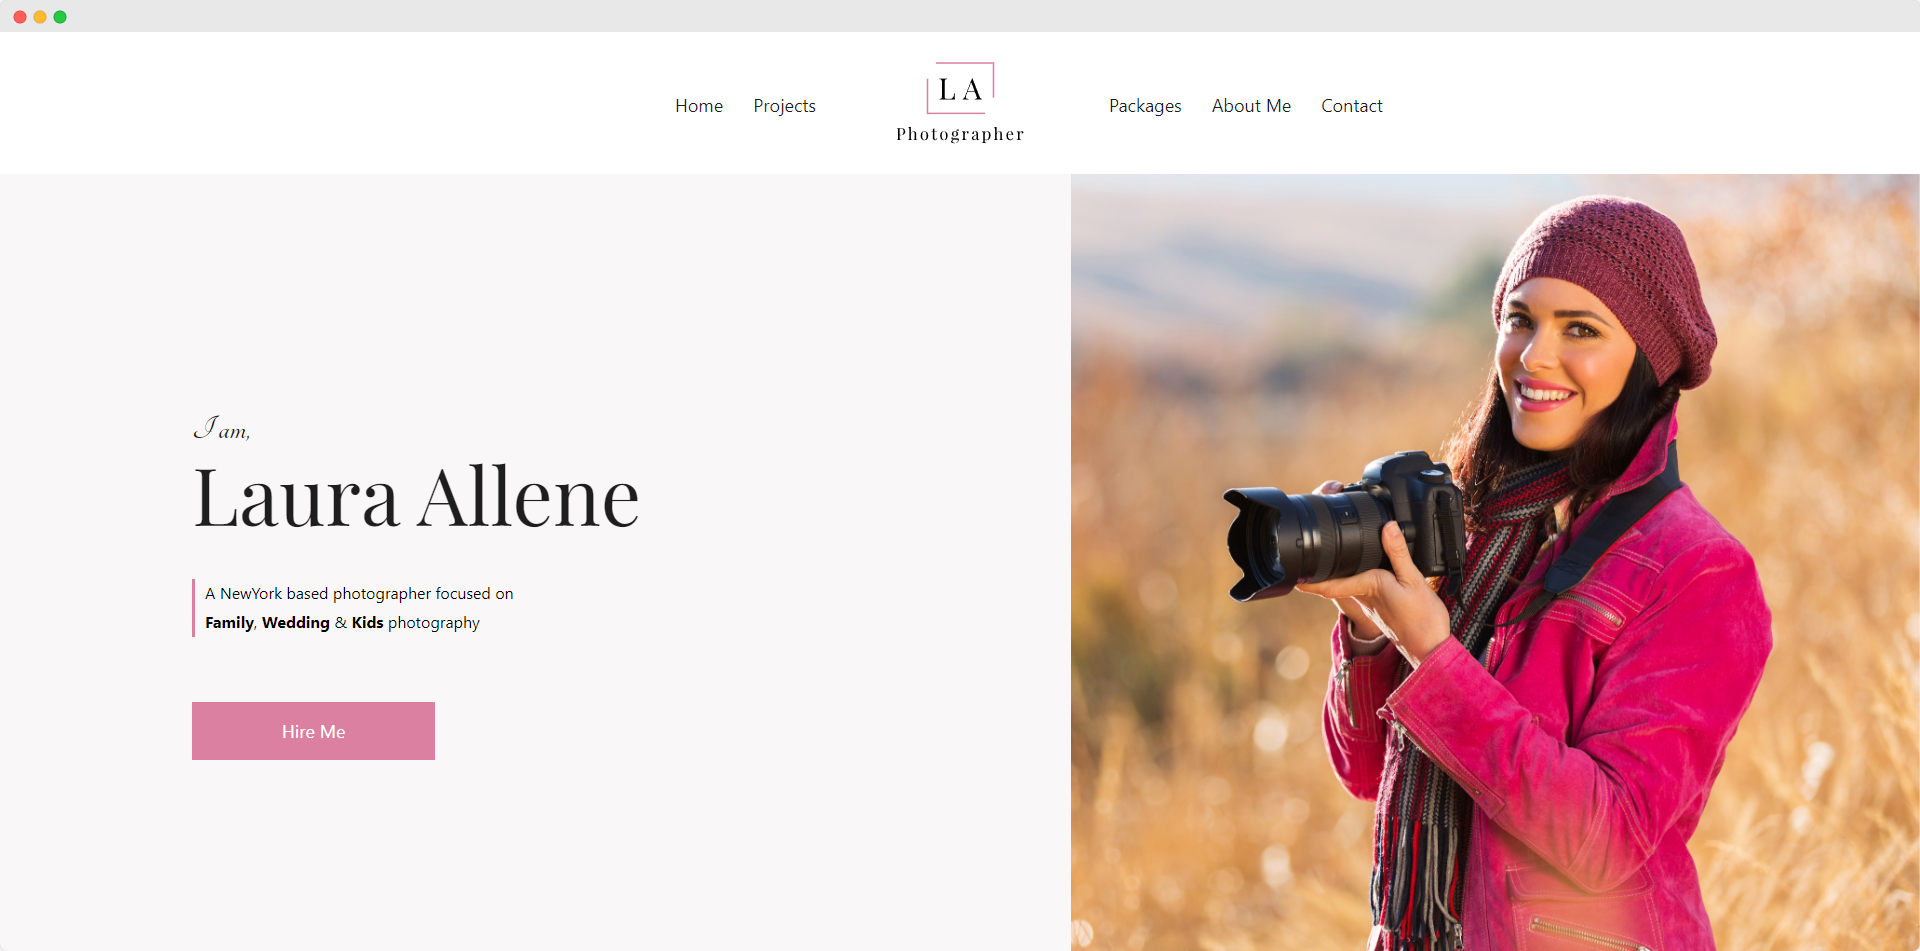
4. Lallene Photography Portfolio Template - If you want to create a photography portfolio website, give this vibrant template a try. It includes a project page to showcase your photos and a packages page where you can offer your packages with pricing.
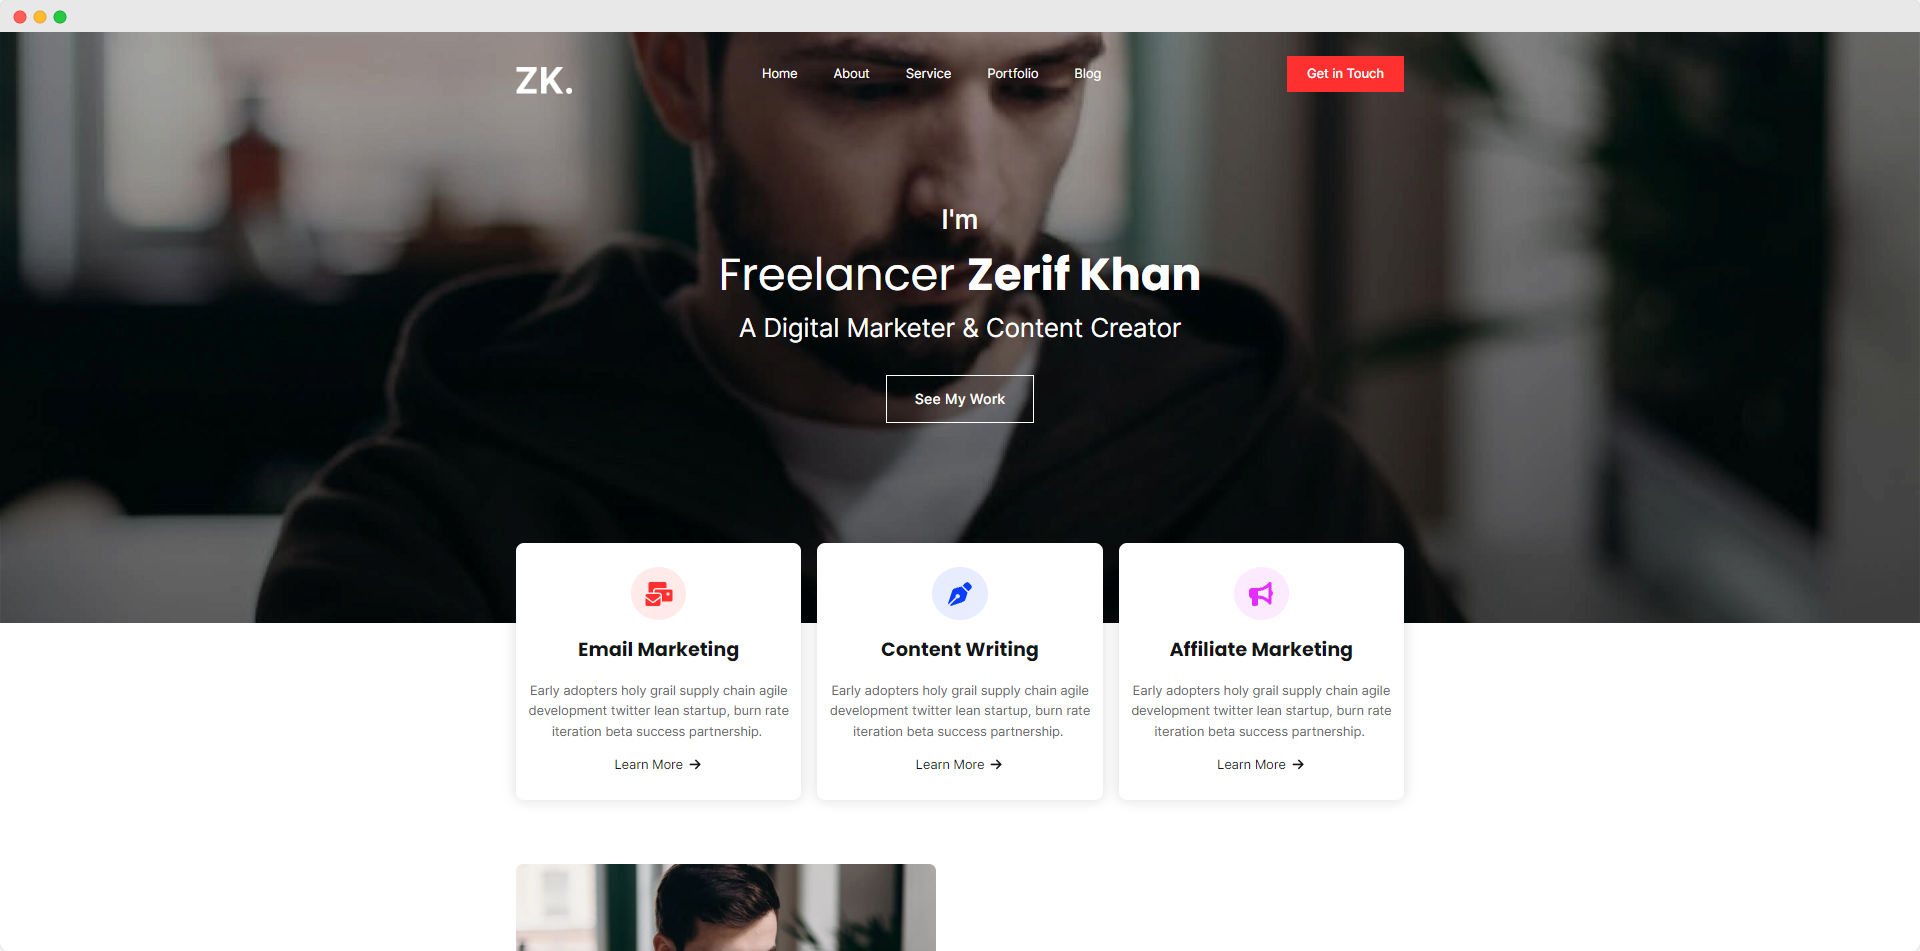
5. ZK Freelancer Portfolio Template - ZK template is popular among freelancers. It focuses on services and testimonials along with other useful pages and sections required for a freelancer.
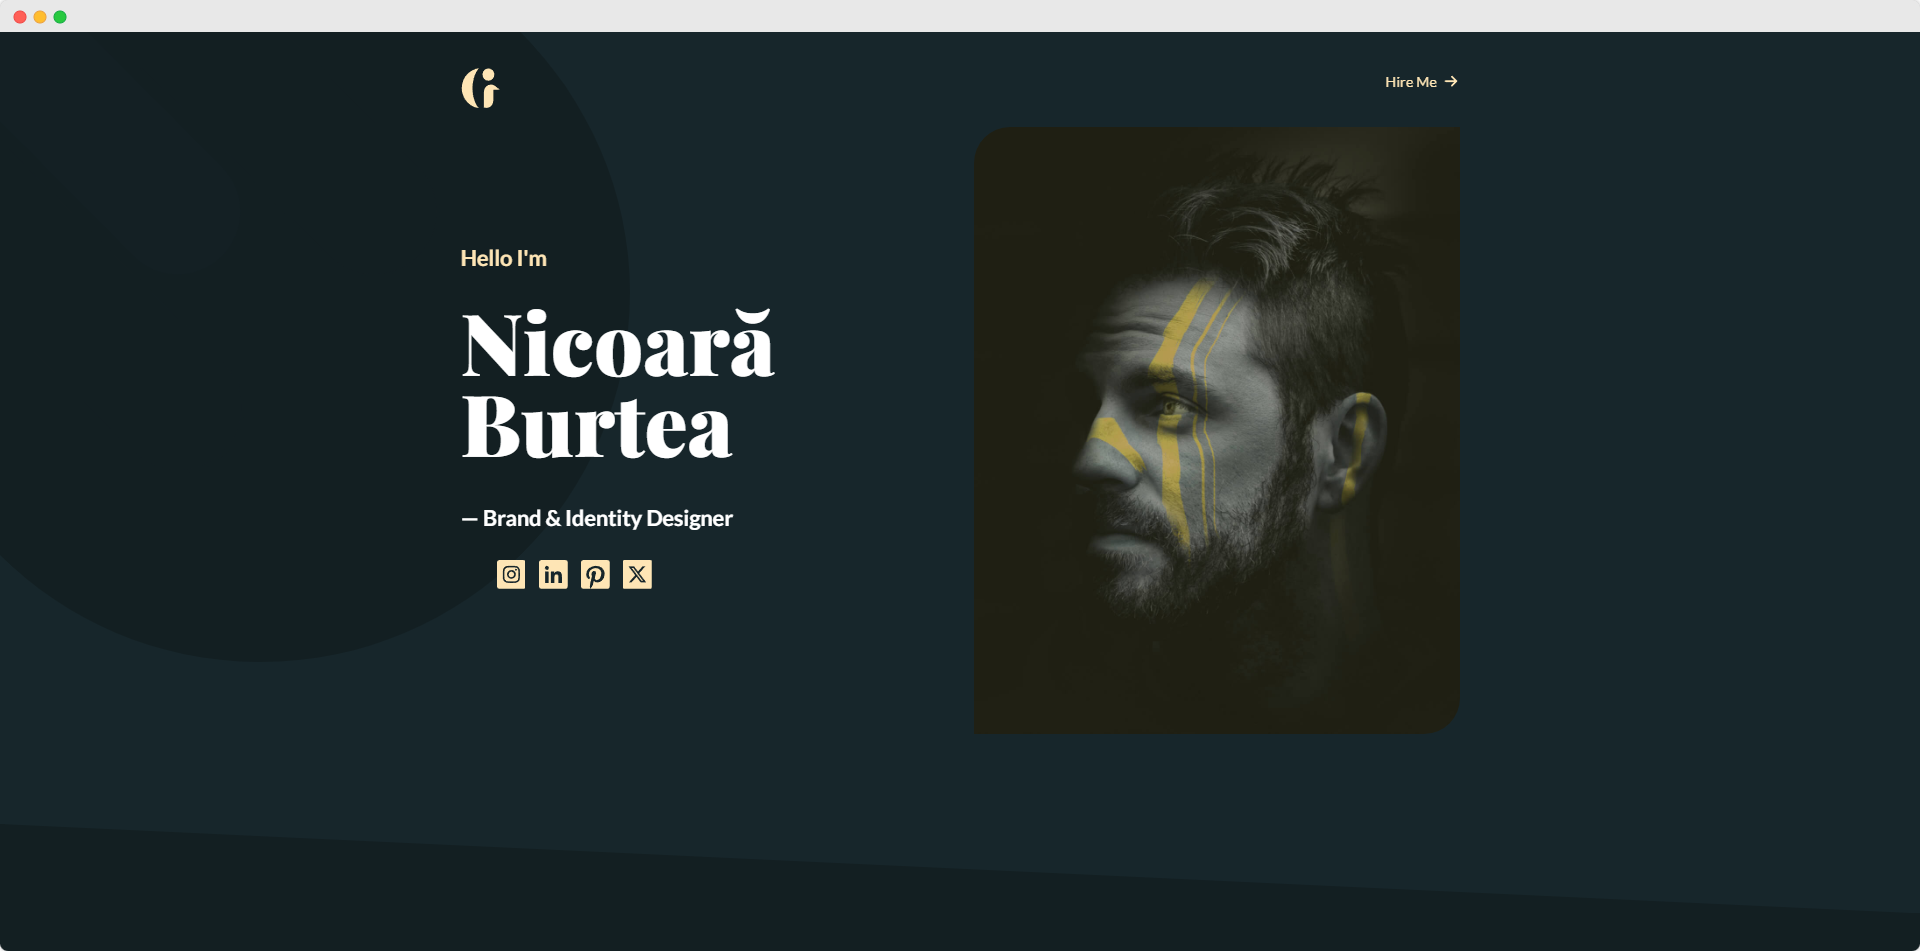
6. G Designer Portfolio Template - This template is all about aesthetics. If you love a dark template with a professional design aesthetic, I recommend you give it a try.
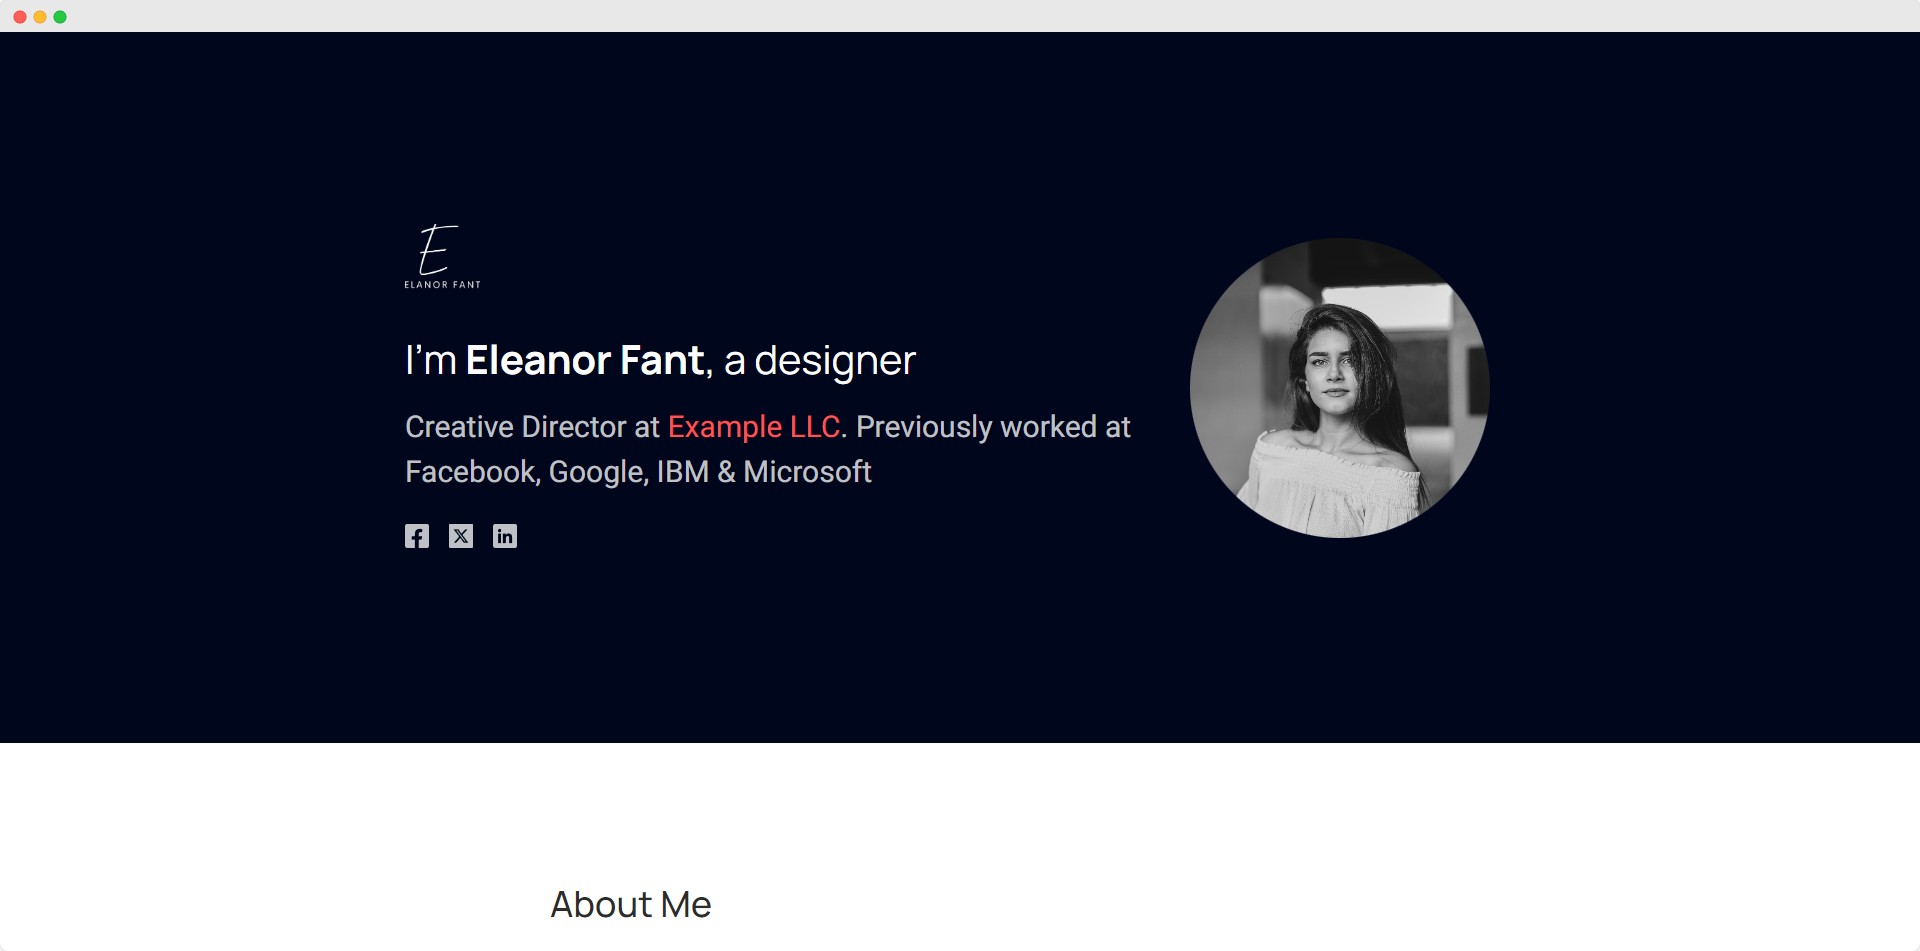
7. Eleanor One-page Resume Template - Last but not least, Eleanor is a great template for a resume portfolio. It features a sleek One-page design to showcase your experiences, projects, and skills.
I hope you’ve already chosen a template.
Now, it’s time to create your portfolio website using the template. To do that:
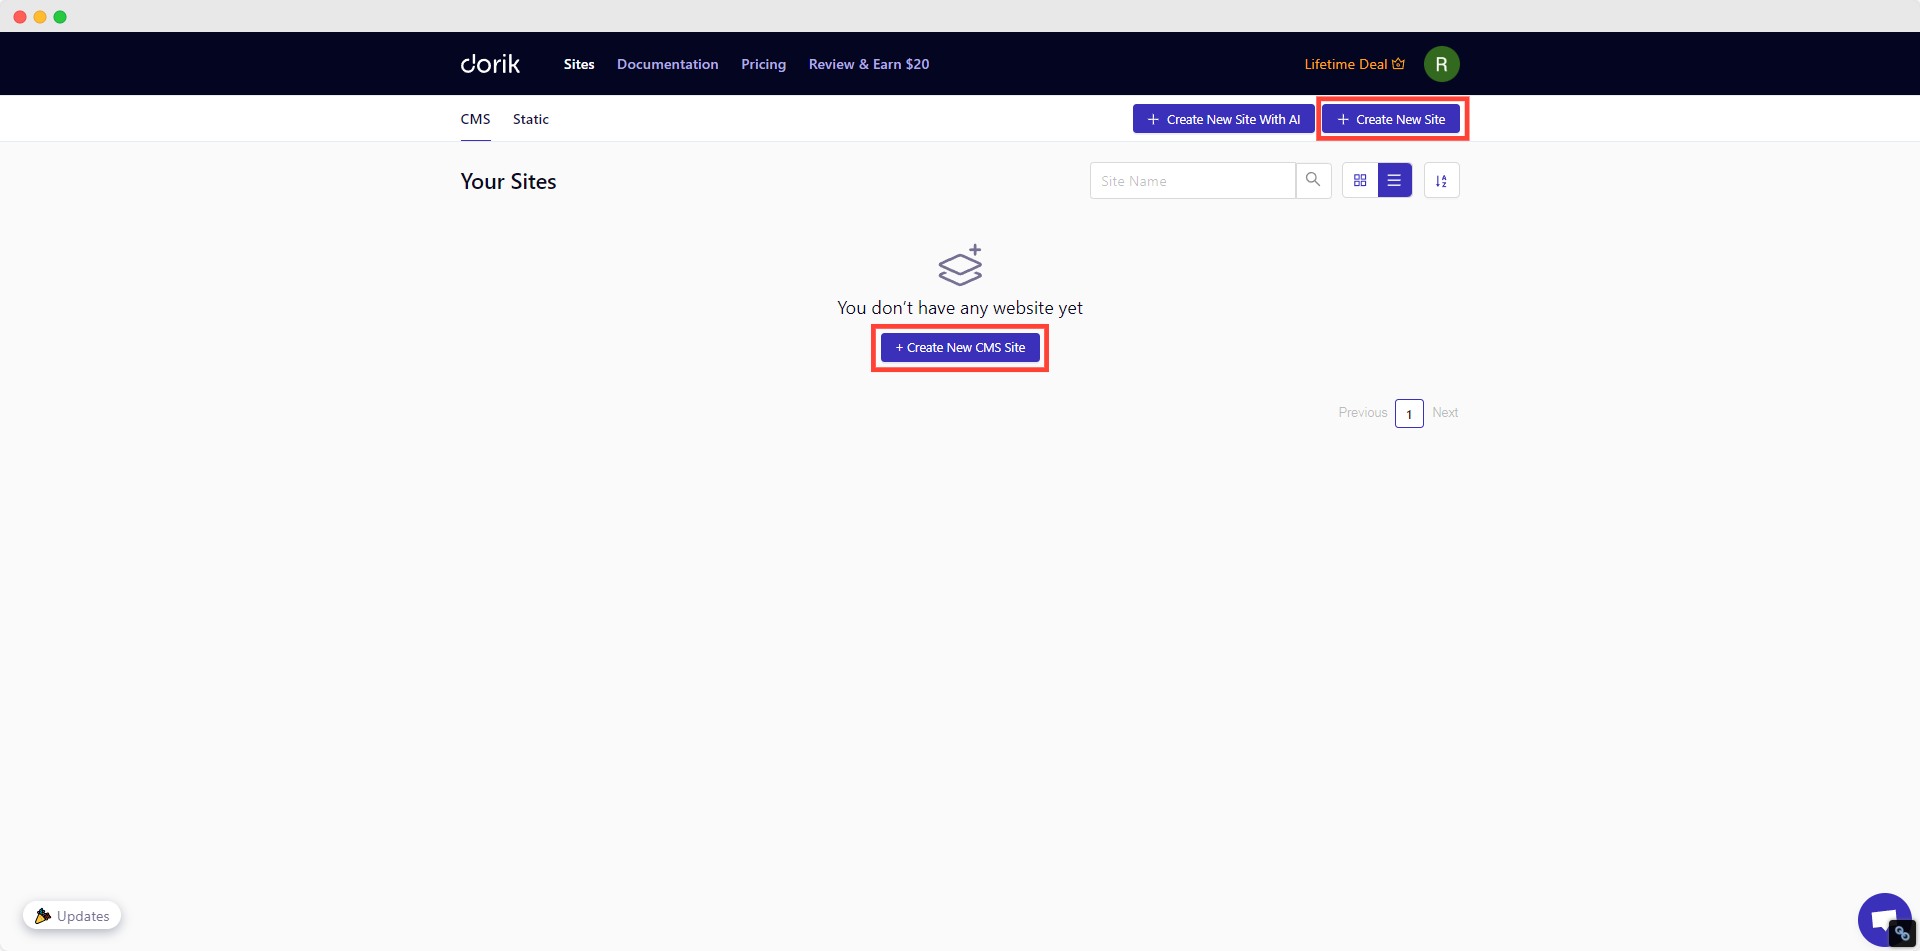
1. Click on the “+ Create New CMS Site” or the “+ Create New Site” button as marked on the image below.
2. Type in “Portfolio” or check the “Portfolio” category to get portfolio-focused templates.
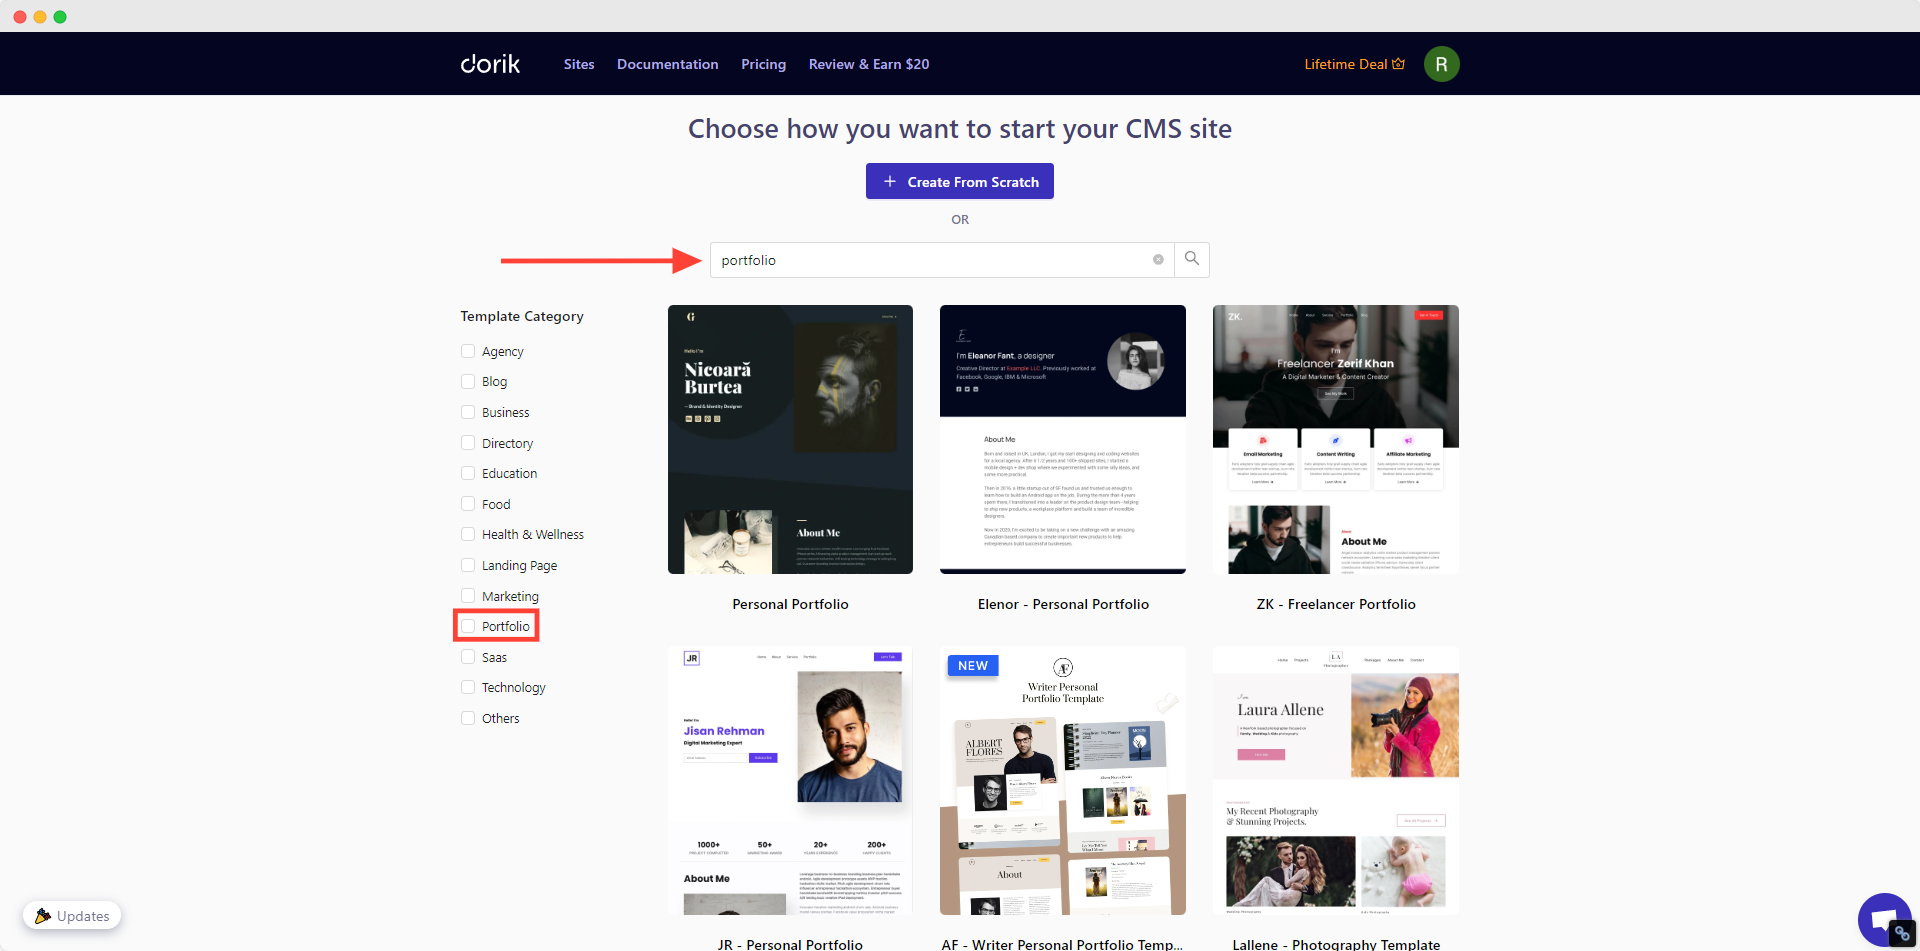
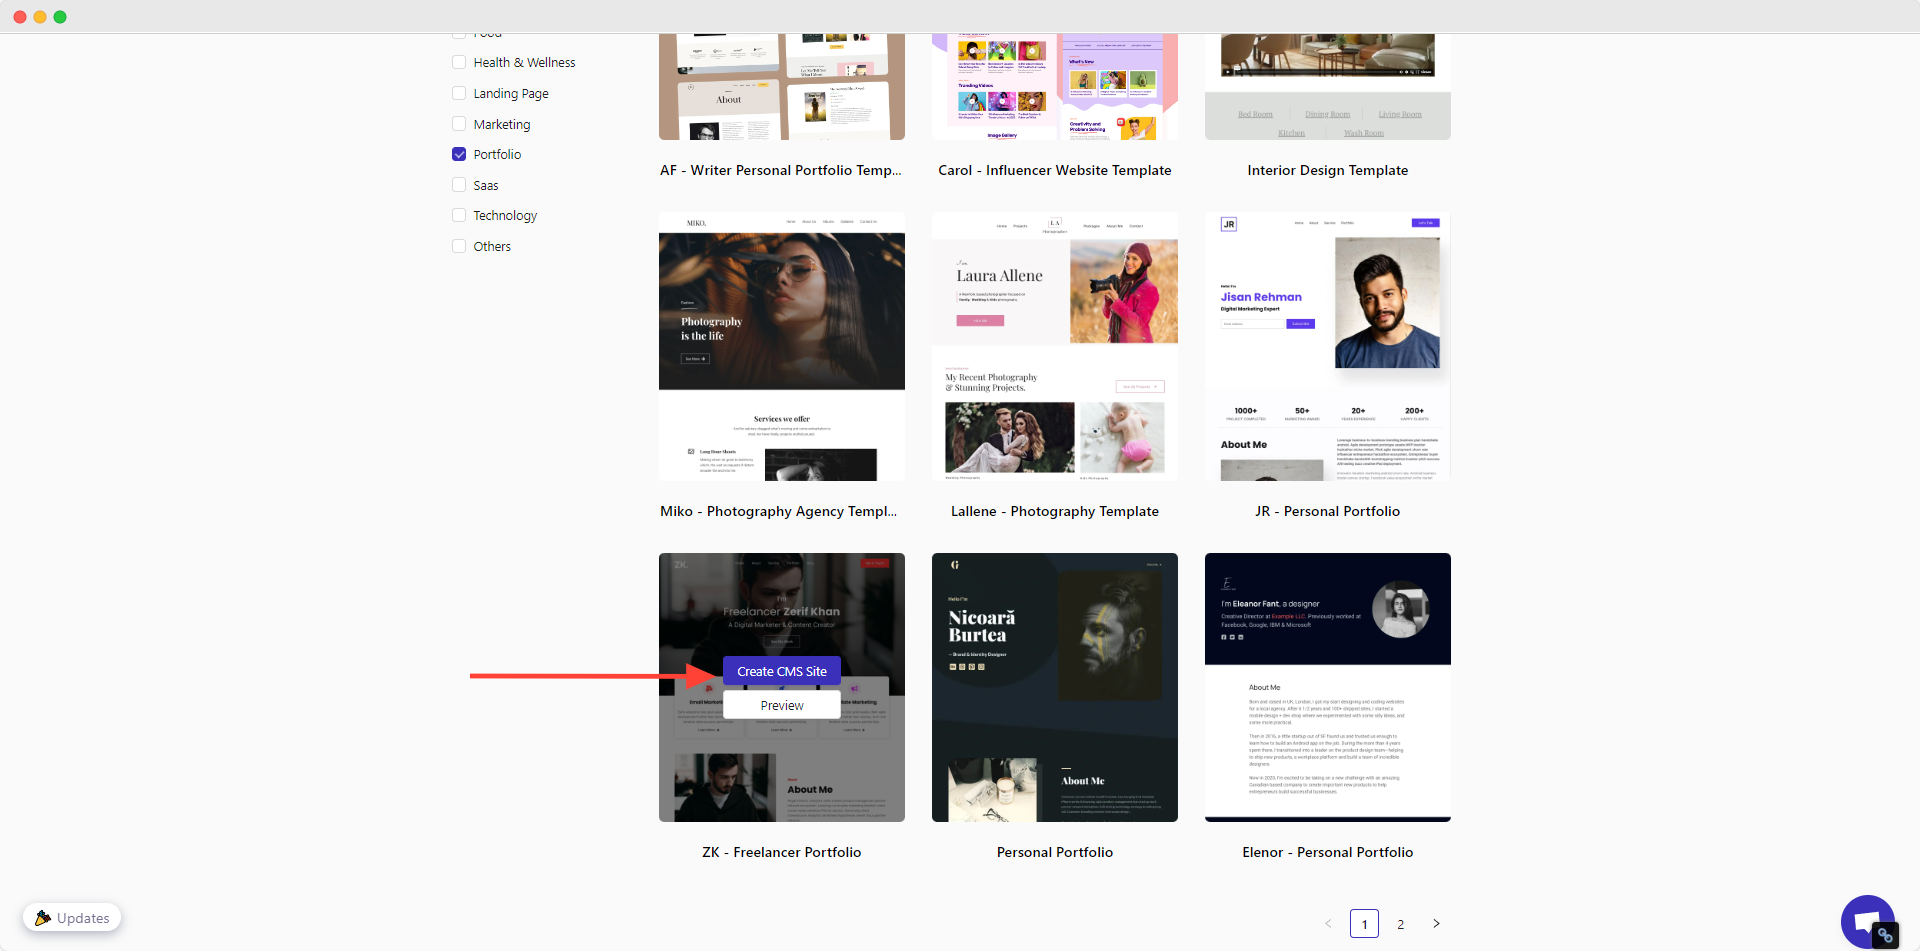
3. Preview the templates to choose the best one that fits your requirements.
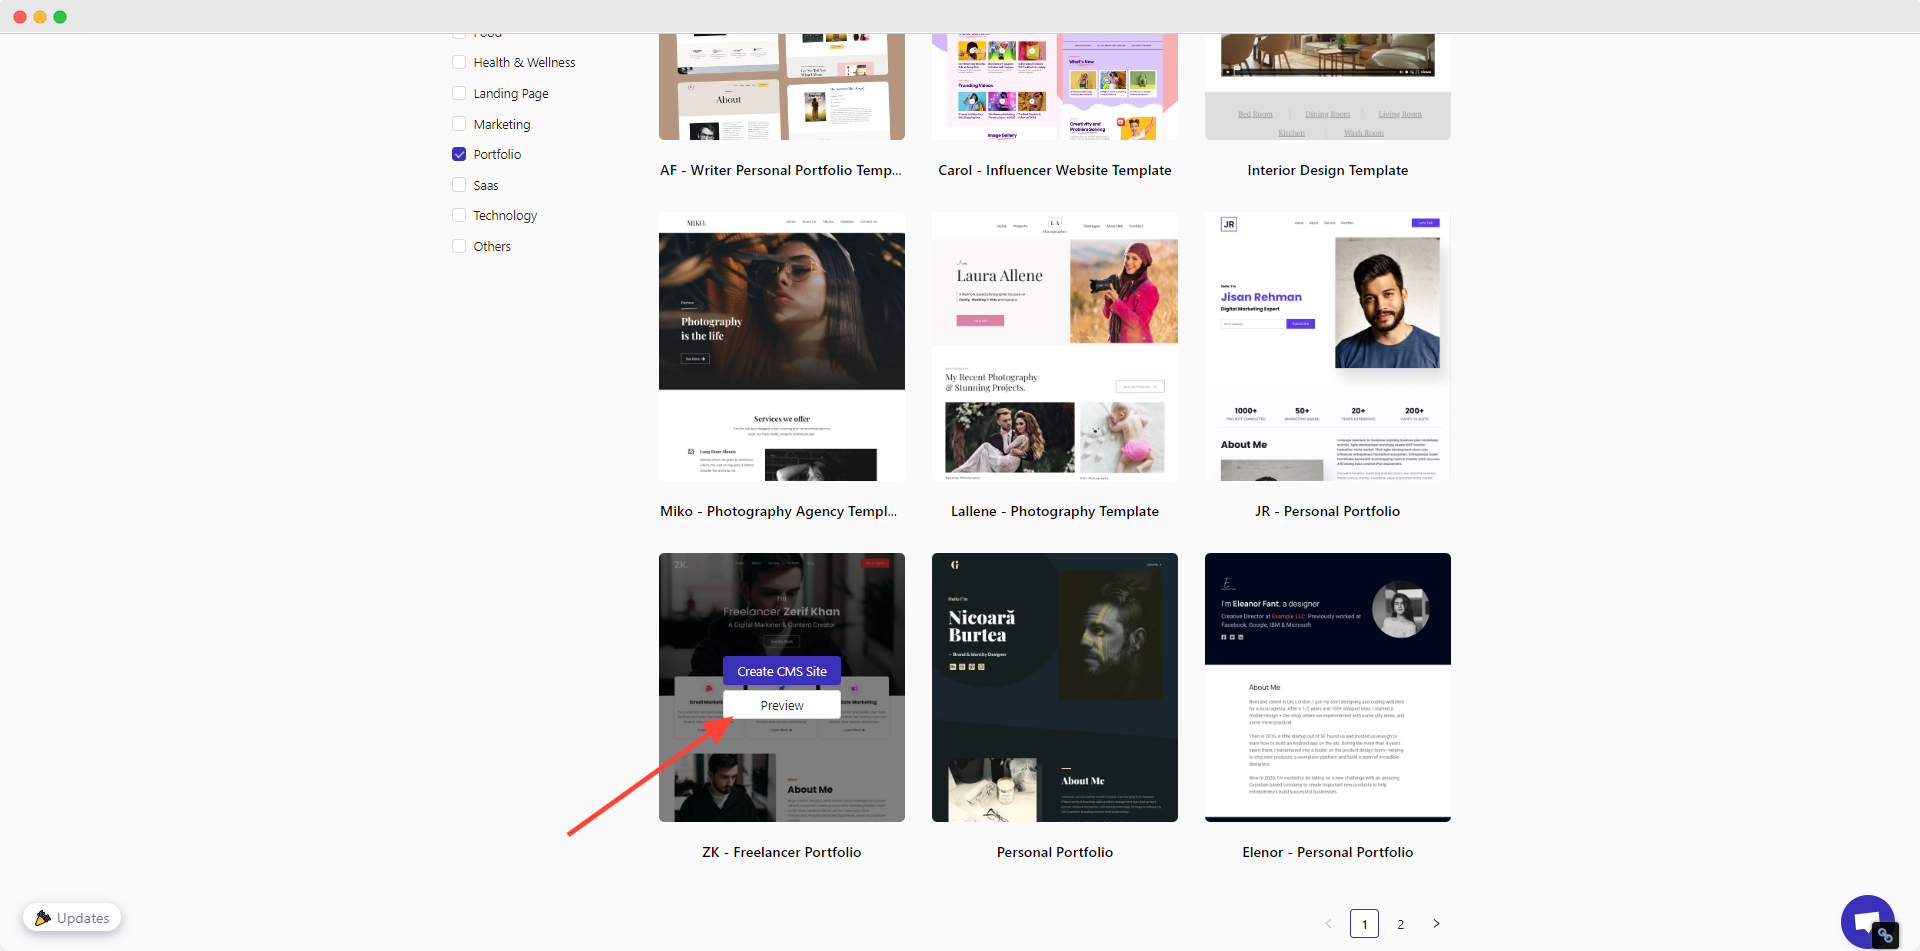
4. Once the template is finalized, click on “Create CMS Site” to start customizing the template.
3. Create Your Portfolio Website from Scratch
If you want to start completely fresh, you may create your website from scratch. Here’s how to do that:
1. Click on the “+ Create New CMS Site” or the “+ Create New Site” button.
2. Click on the “+ Create From Scratch” button.
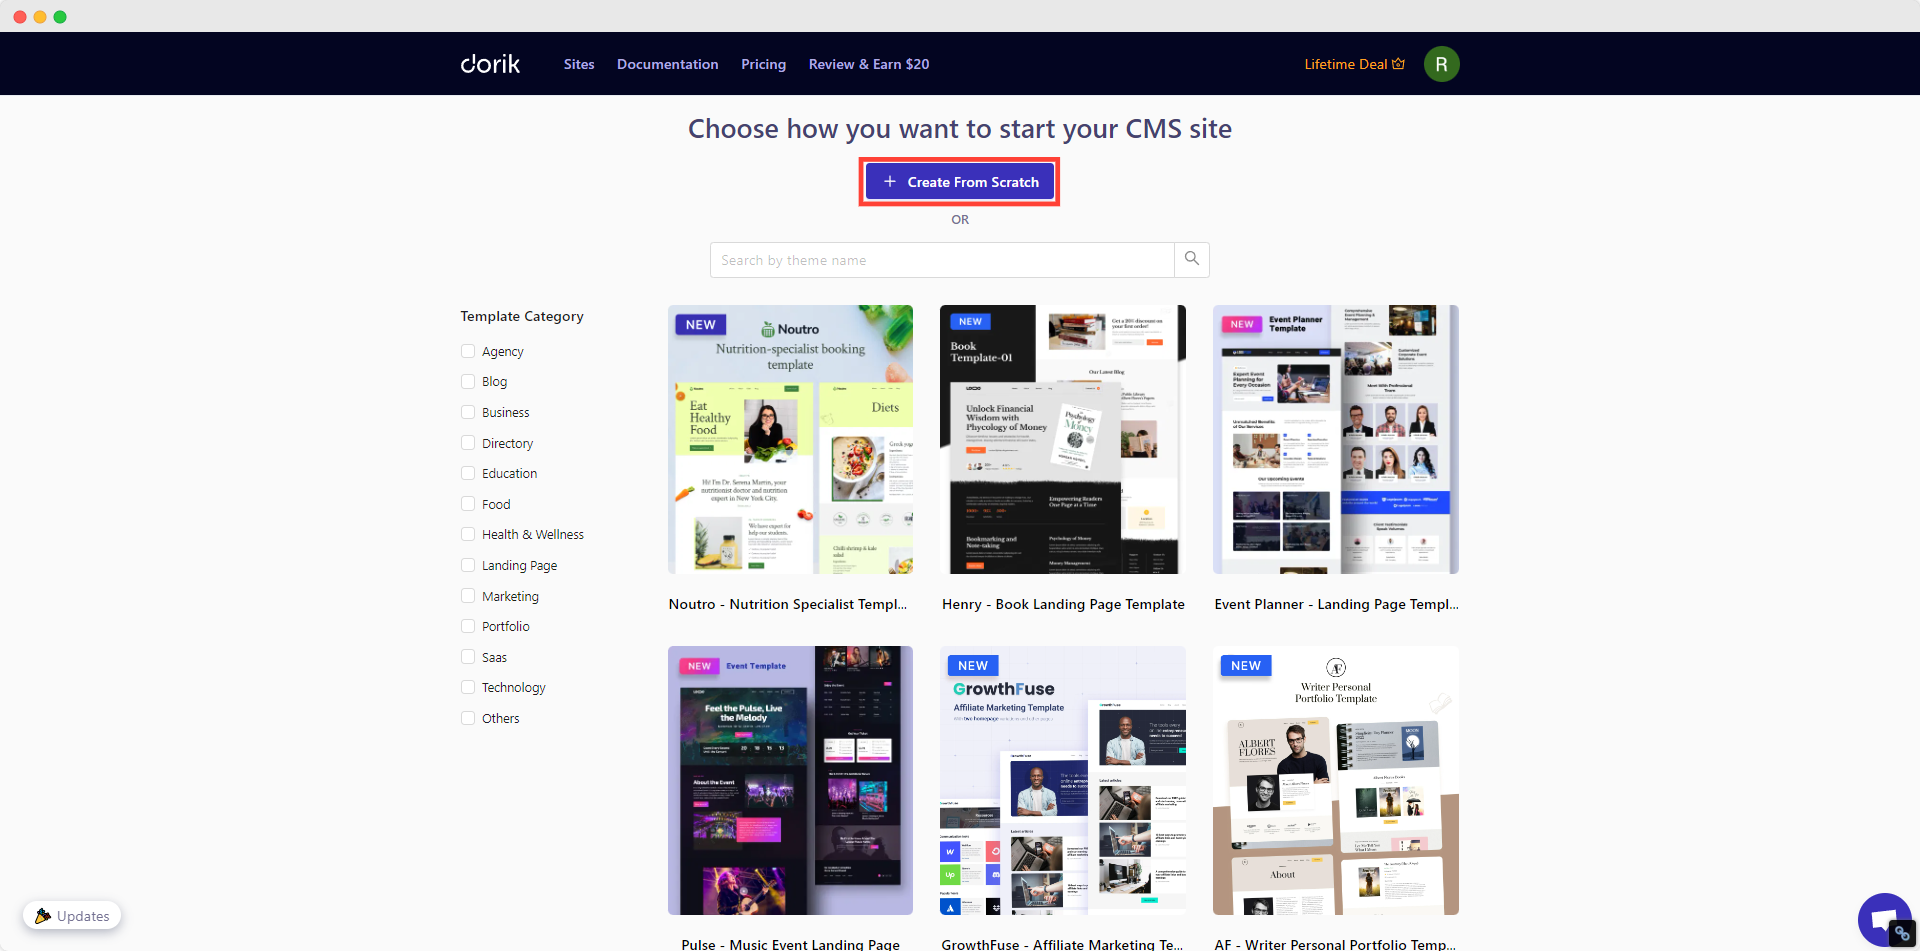
3. Learn the Builder Basics from the resources.

4. Click on "+ Add New Section" to start customizing your portfolio website.
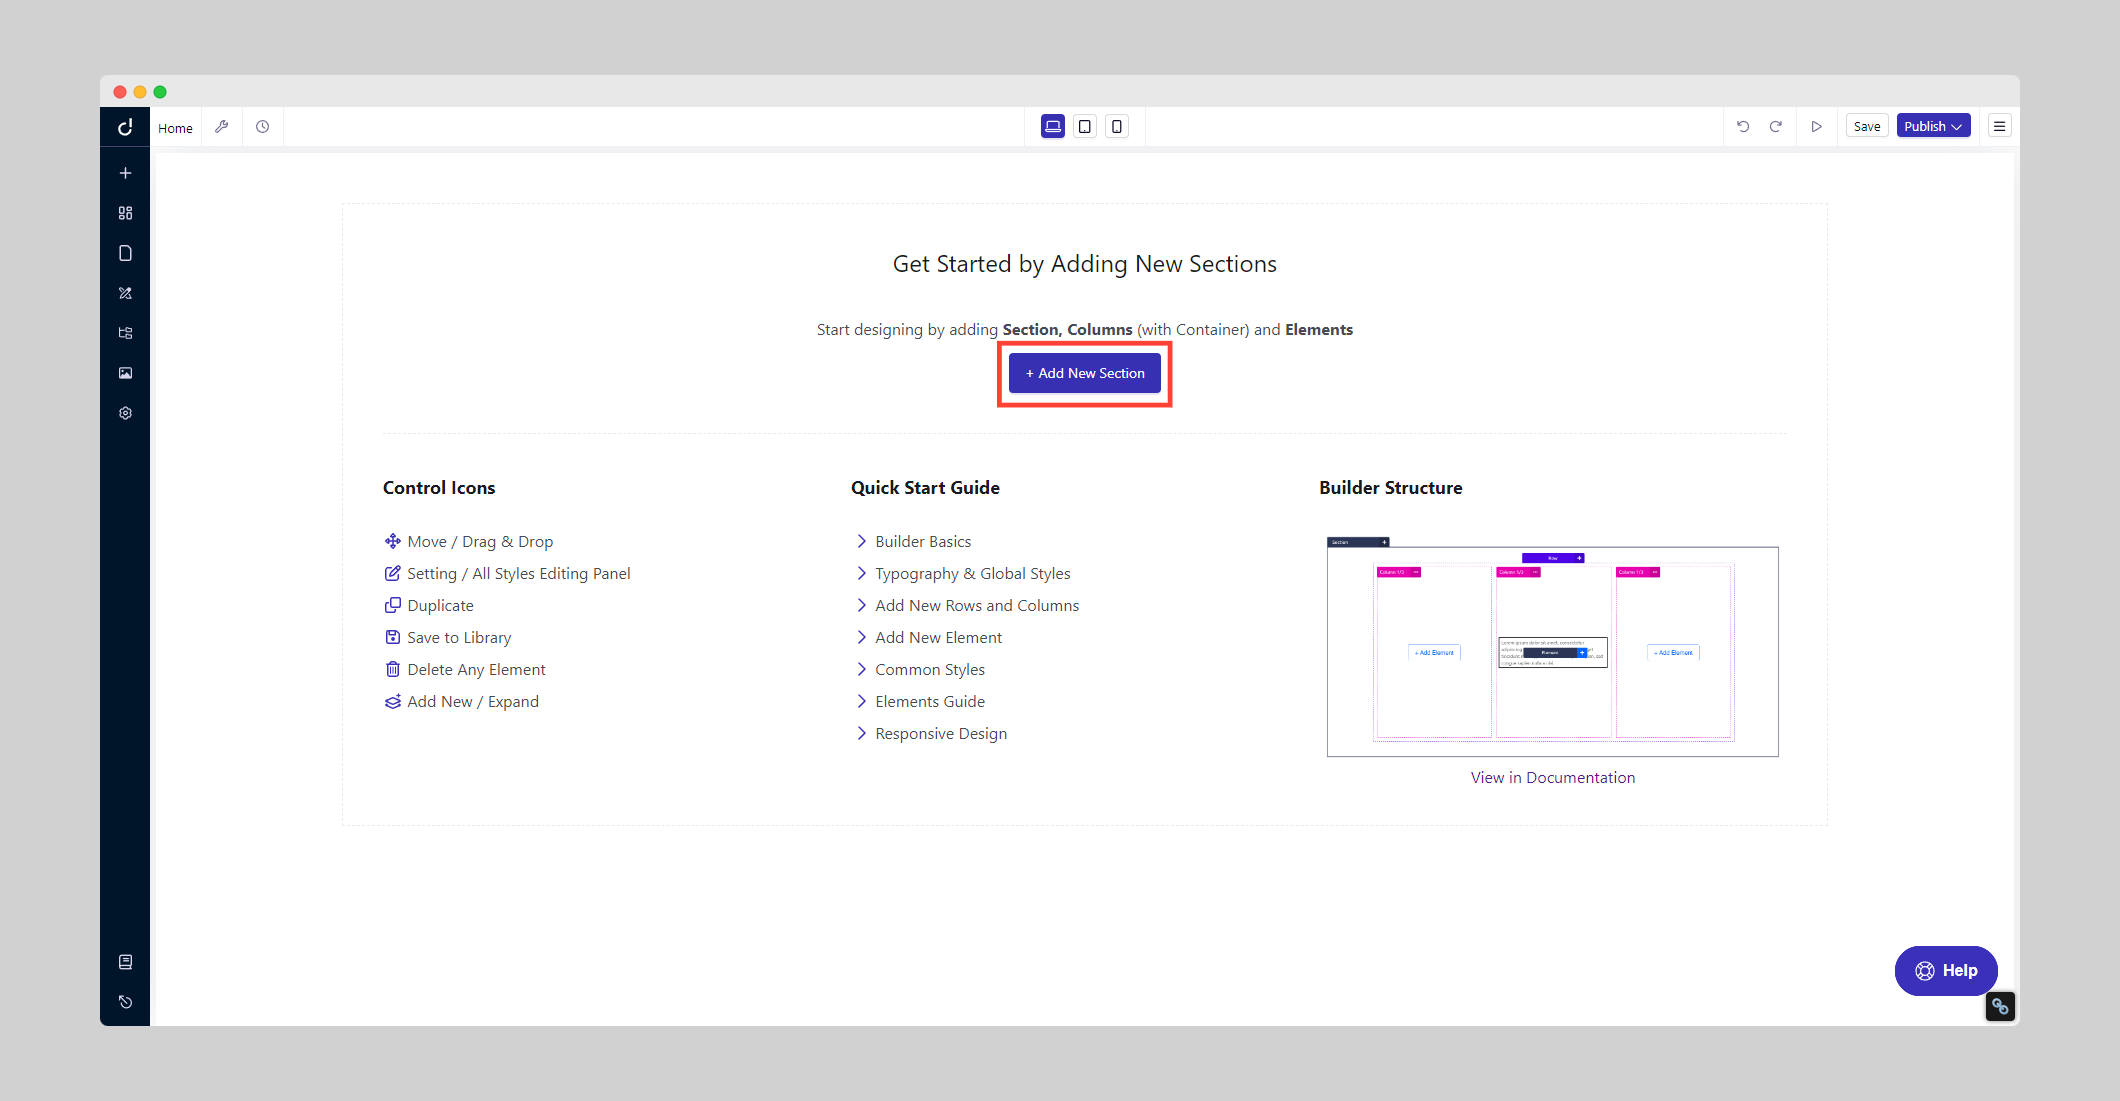
Step 4: Customize Your Portfolio Website
The main task of how to build a portfolio website starts now. After launching the builder, you will find yourself in the editing panel of your website’s homepage.
You have the freedom to make any changes to your design. So, let’s customize it!
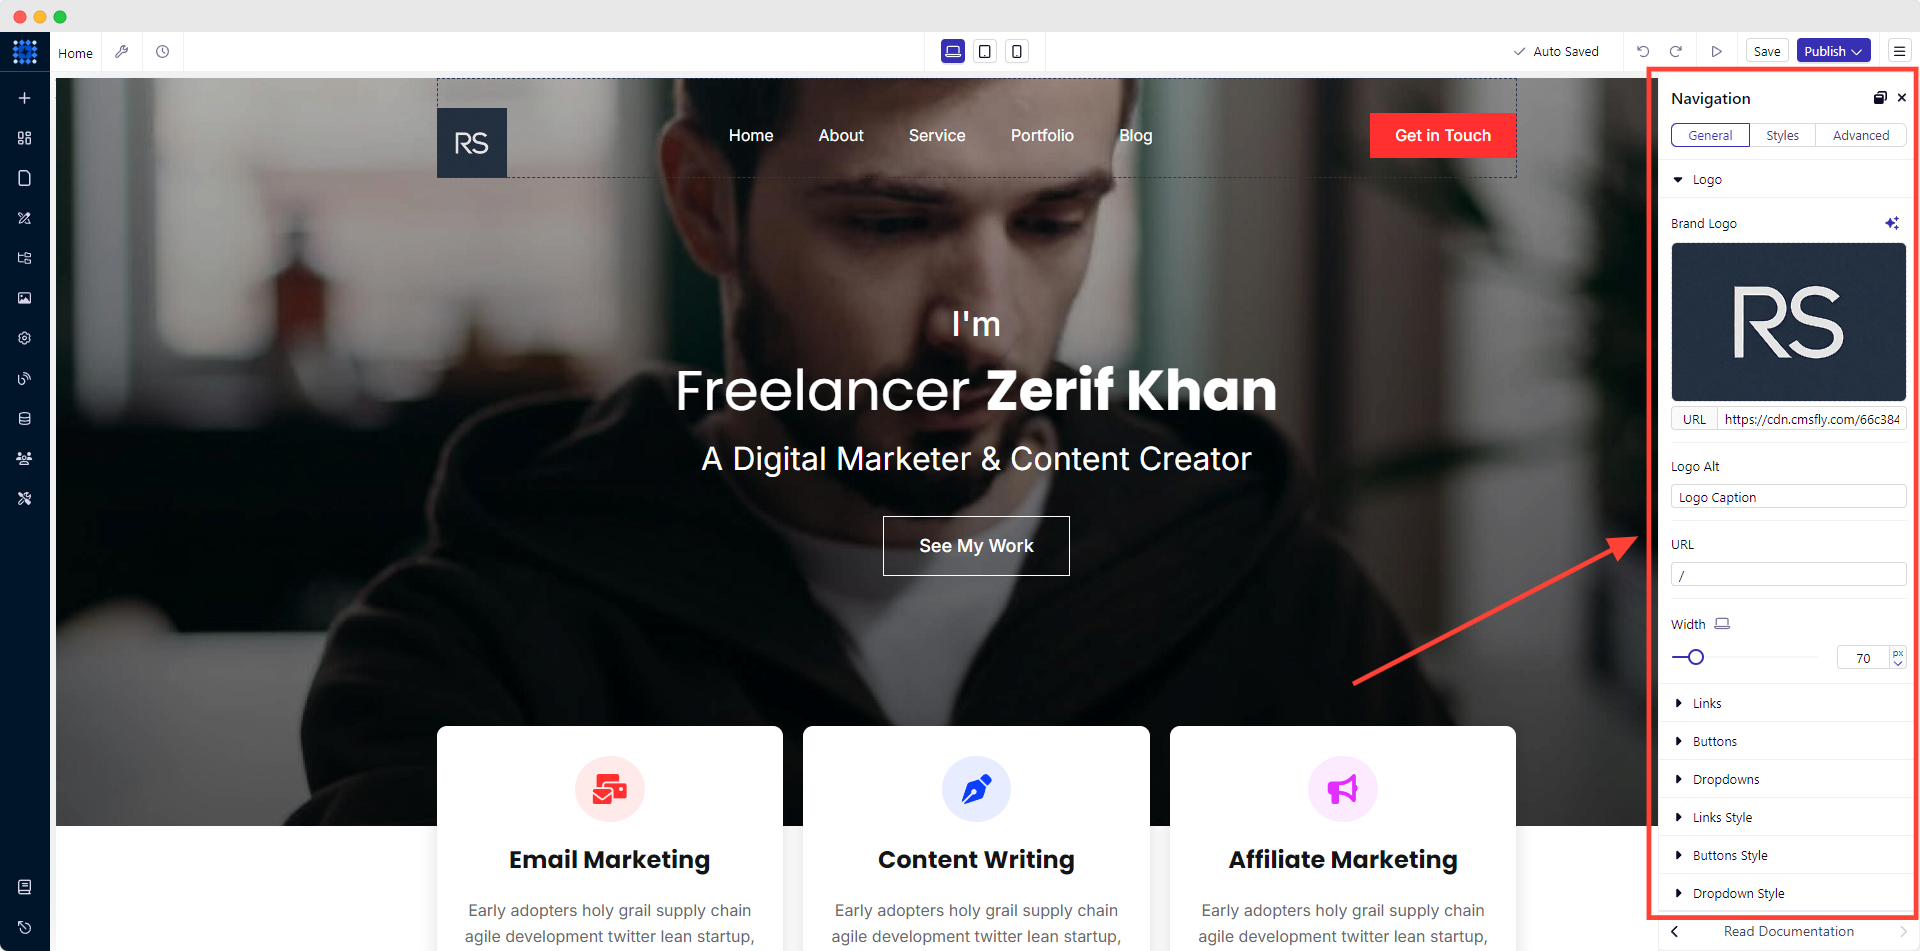
1) Add A Logo To Your Website
To add a logo:
1. Hover your cursor over the header area. It will show you an editing option. Click on the Edit Element icon.
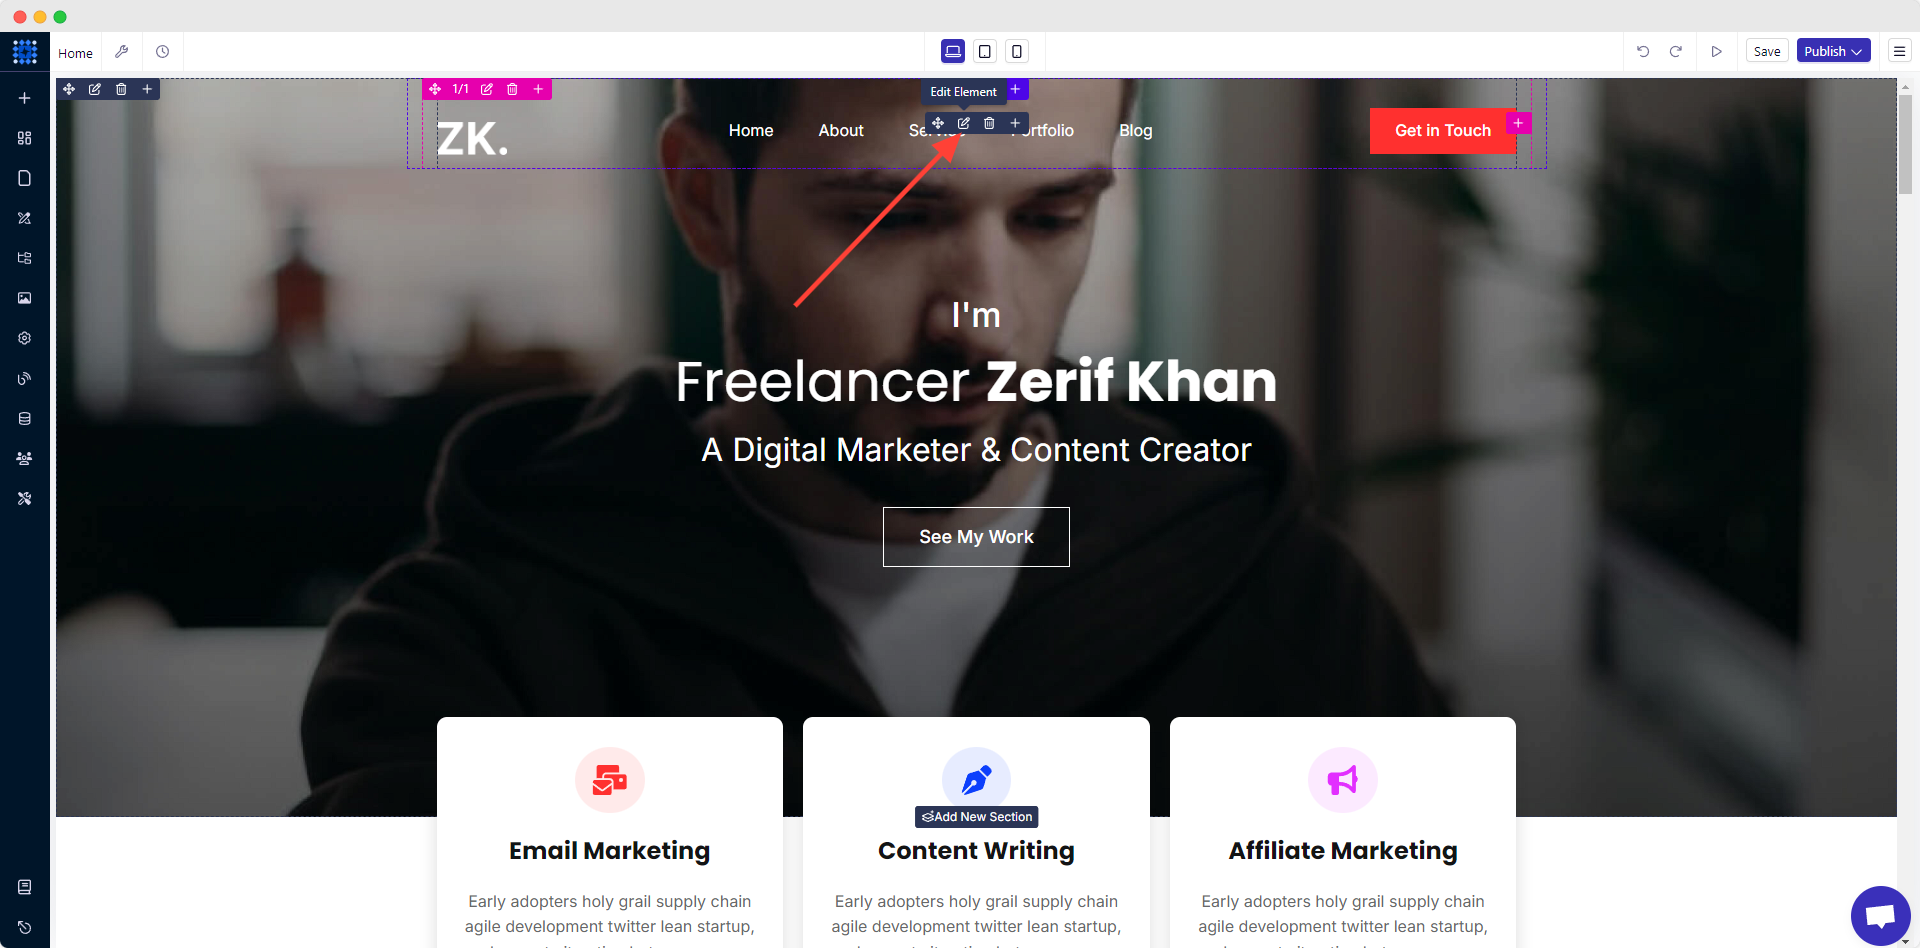
It will open a navigation bar showing you all the available options. You can move it anywhere for convenience of work.
2. Now, click on the image to replace it. The default logo will be removed, giving you the option to upload your logo.
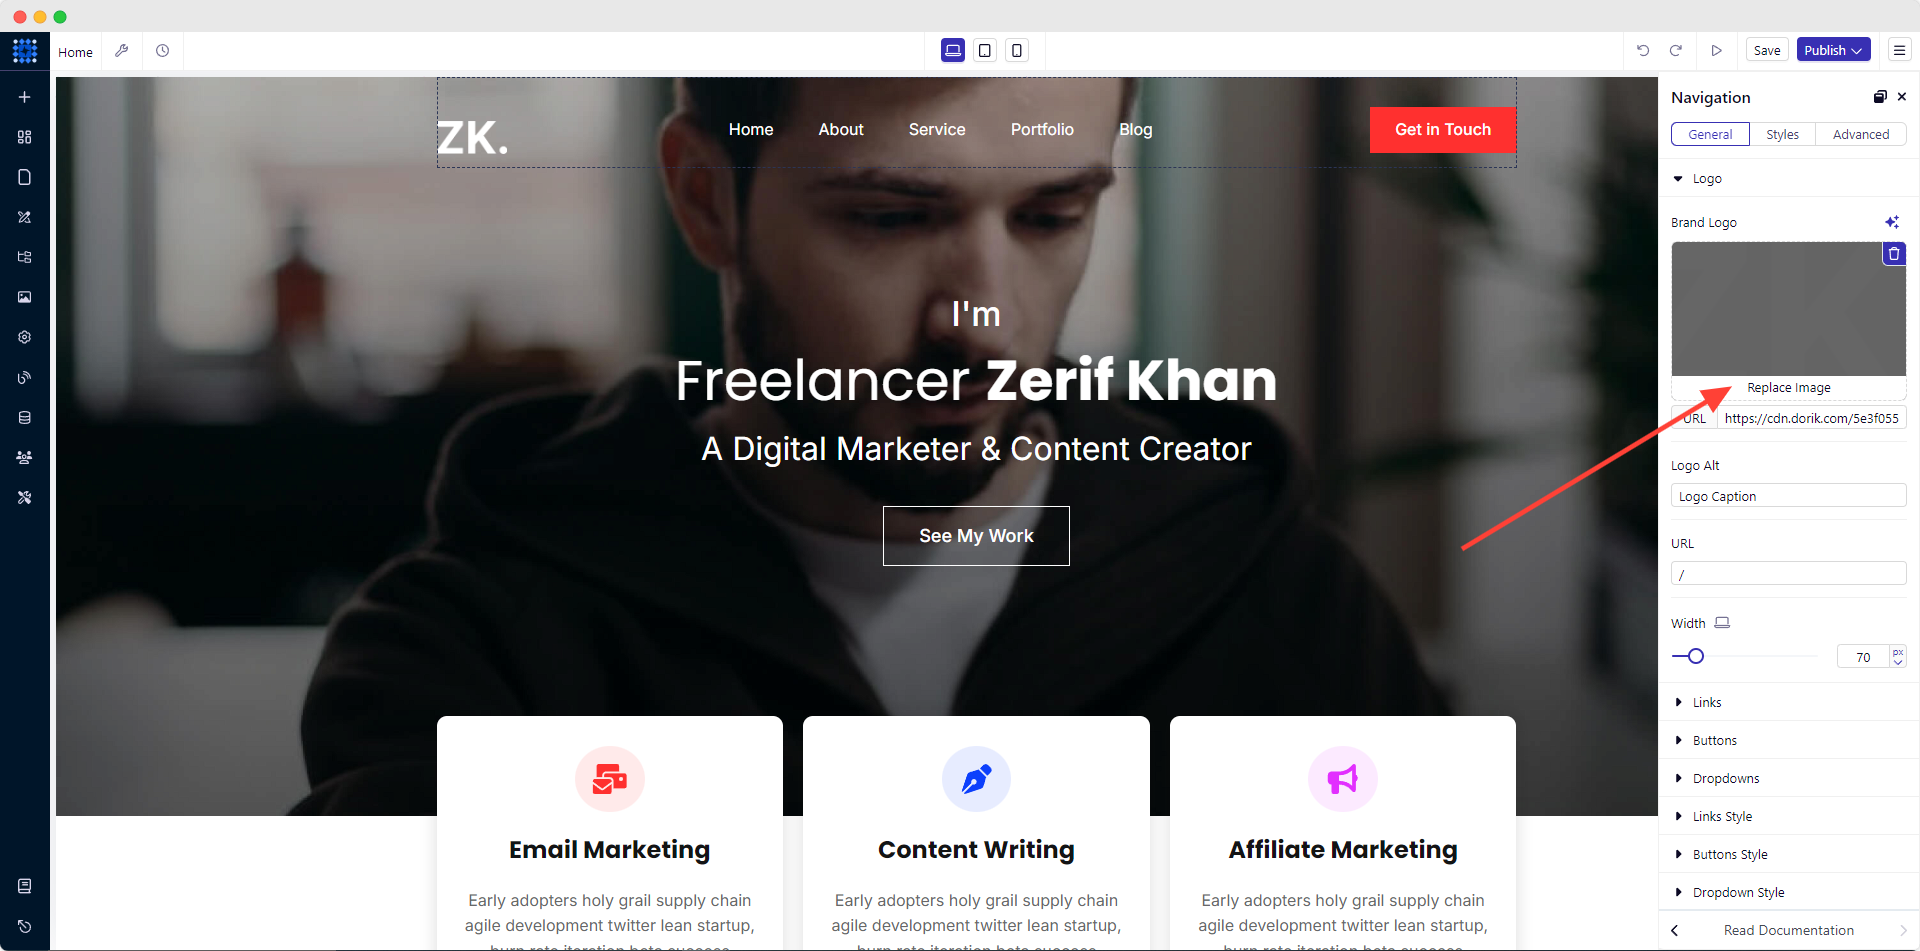
3. Click the Upload Image button and select your pre-designed logo from your computer.
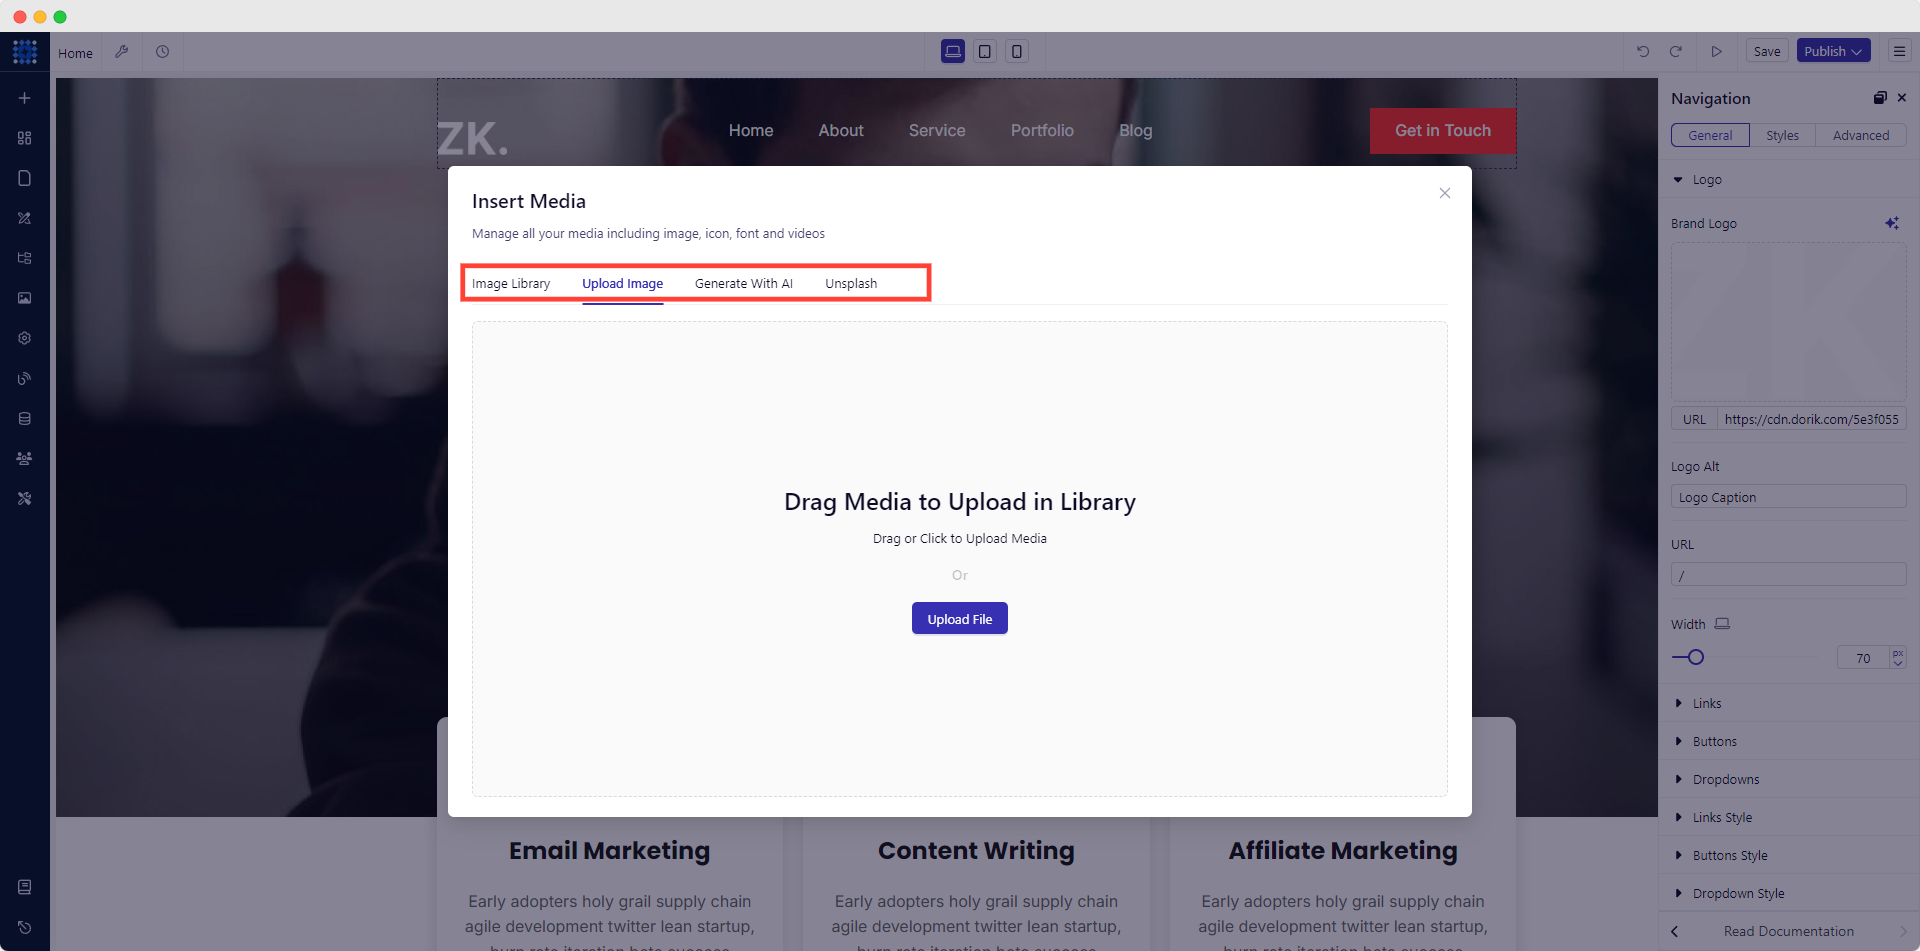
If you don't have one yet, it would be better to make a logo.
4. After uploading the logo, add relevant Logo Alt texts. You can also insert a specific URL with the logo, adjust its Width, and so on to further customize the logo.
2) Customize the Header & Navigation Menus
You should maintain the best practices for designing your website header. It will make your site professional.
Let's edit the default navigation design:
1. Hover your cursor over the header area and click on the Edit Element icon.
2. From the navigation editor, click on the Links dropdown. Here, you will find all the default menus. You will be able to copy, edit, and delete them. Modify them as per your demand.
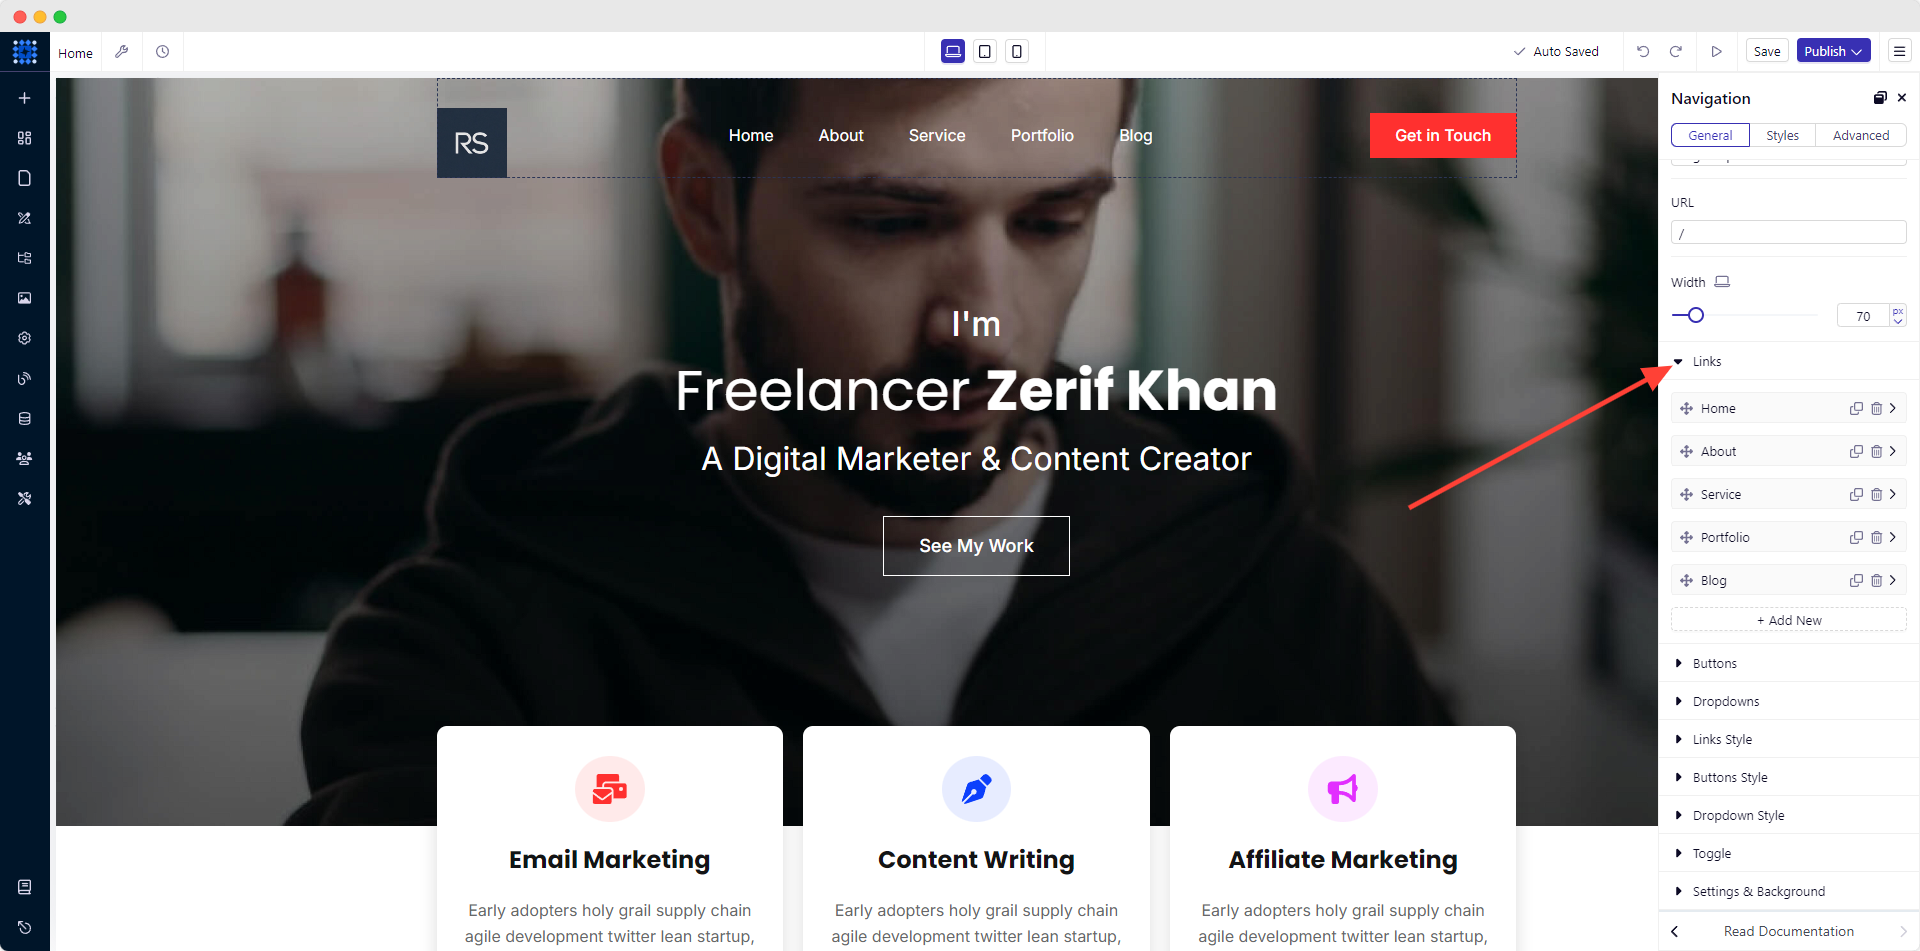
3. If you want to add additional menu, click on the "+ Add New" button. A blank menu will be created.

4. Then, hit its dropdown arrow icon. Name your new menu from the Link Text box. Select your preferred Link Type and customize the menu to your preference.

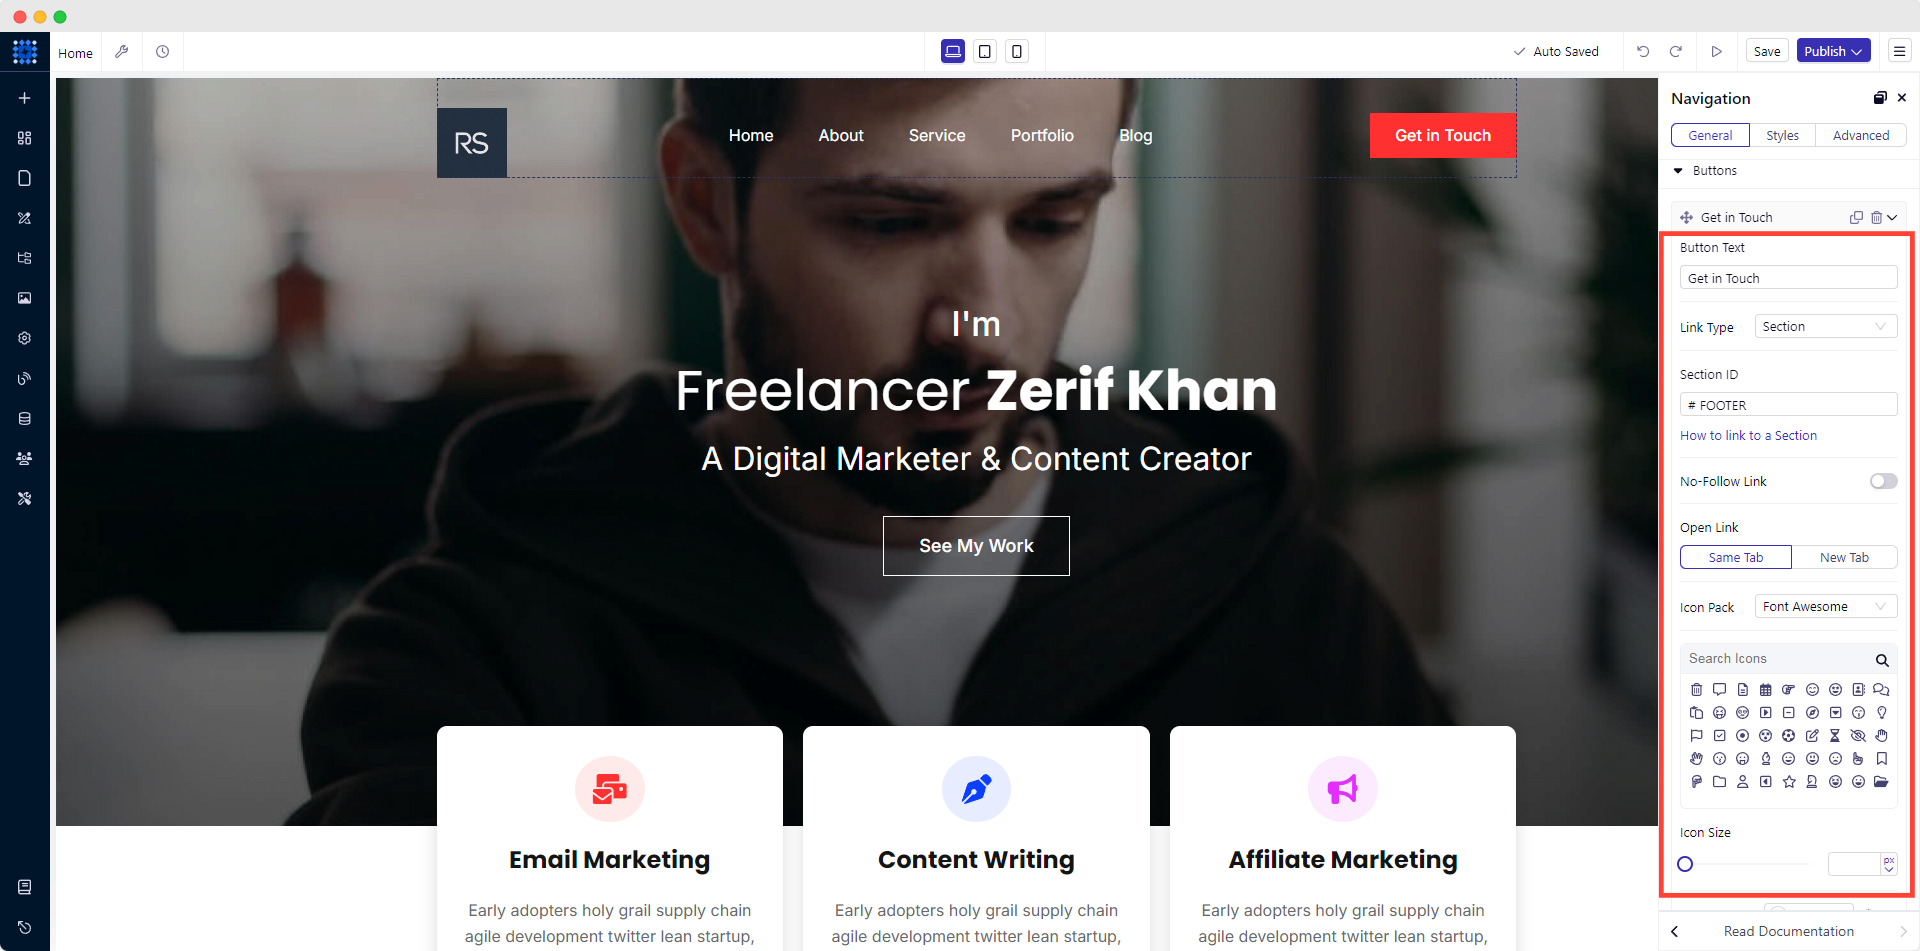
3) Add & Customize The Call to Action (CTA) Button
1. Click on the Buttons dropdown from the editing panel.
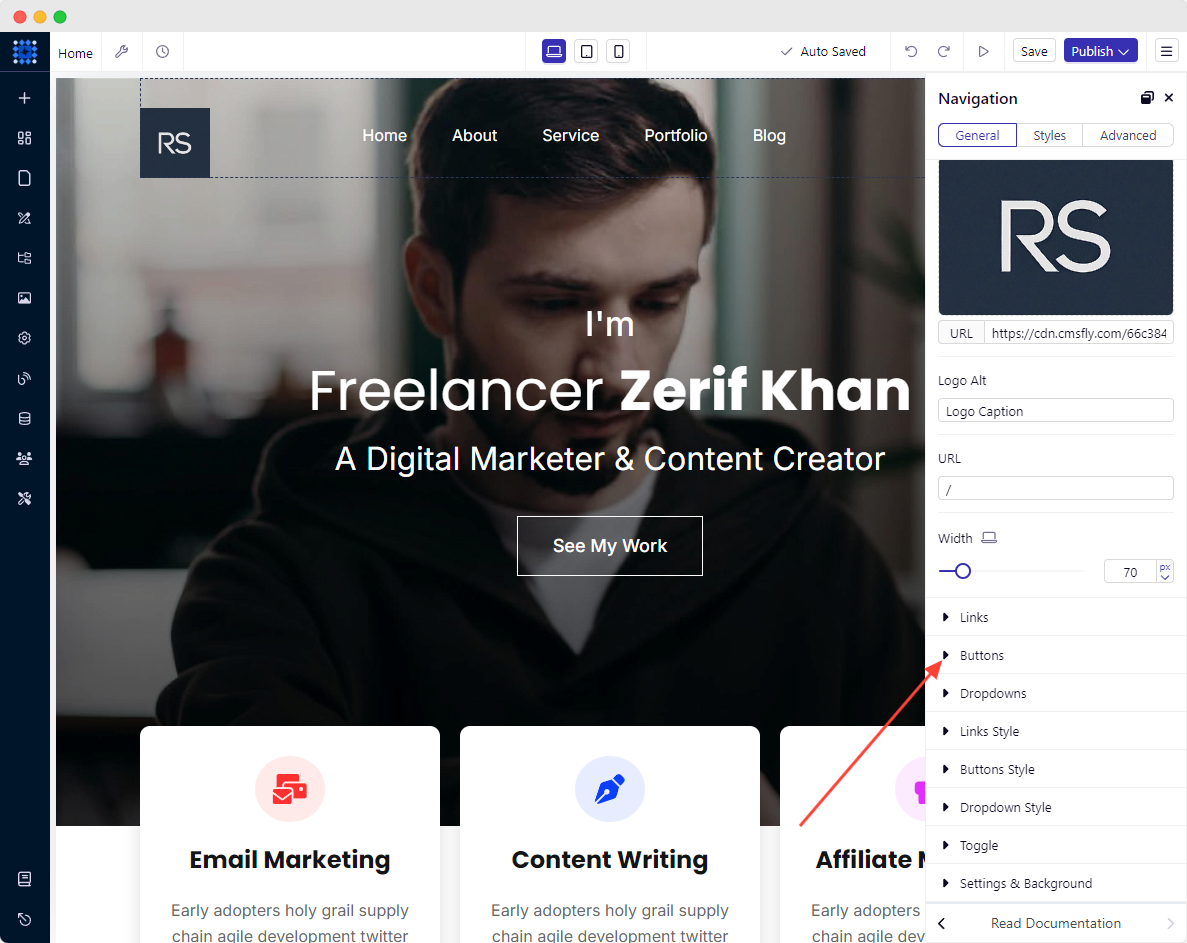
2. Open up the existing button to customize it.

3. Now, write down your preferred text in the Button Text box.
4. Click on the dropdown arrow of Link Type and select a specific type. For example: If you want to add an external link to your button, choose the External Link option.
5. Then, insert the targeted link in the URL box. To open it in another tab, select the New Tab option.
You can also customize the button color.
4) Add Your Name And A Catchy Title
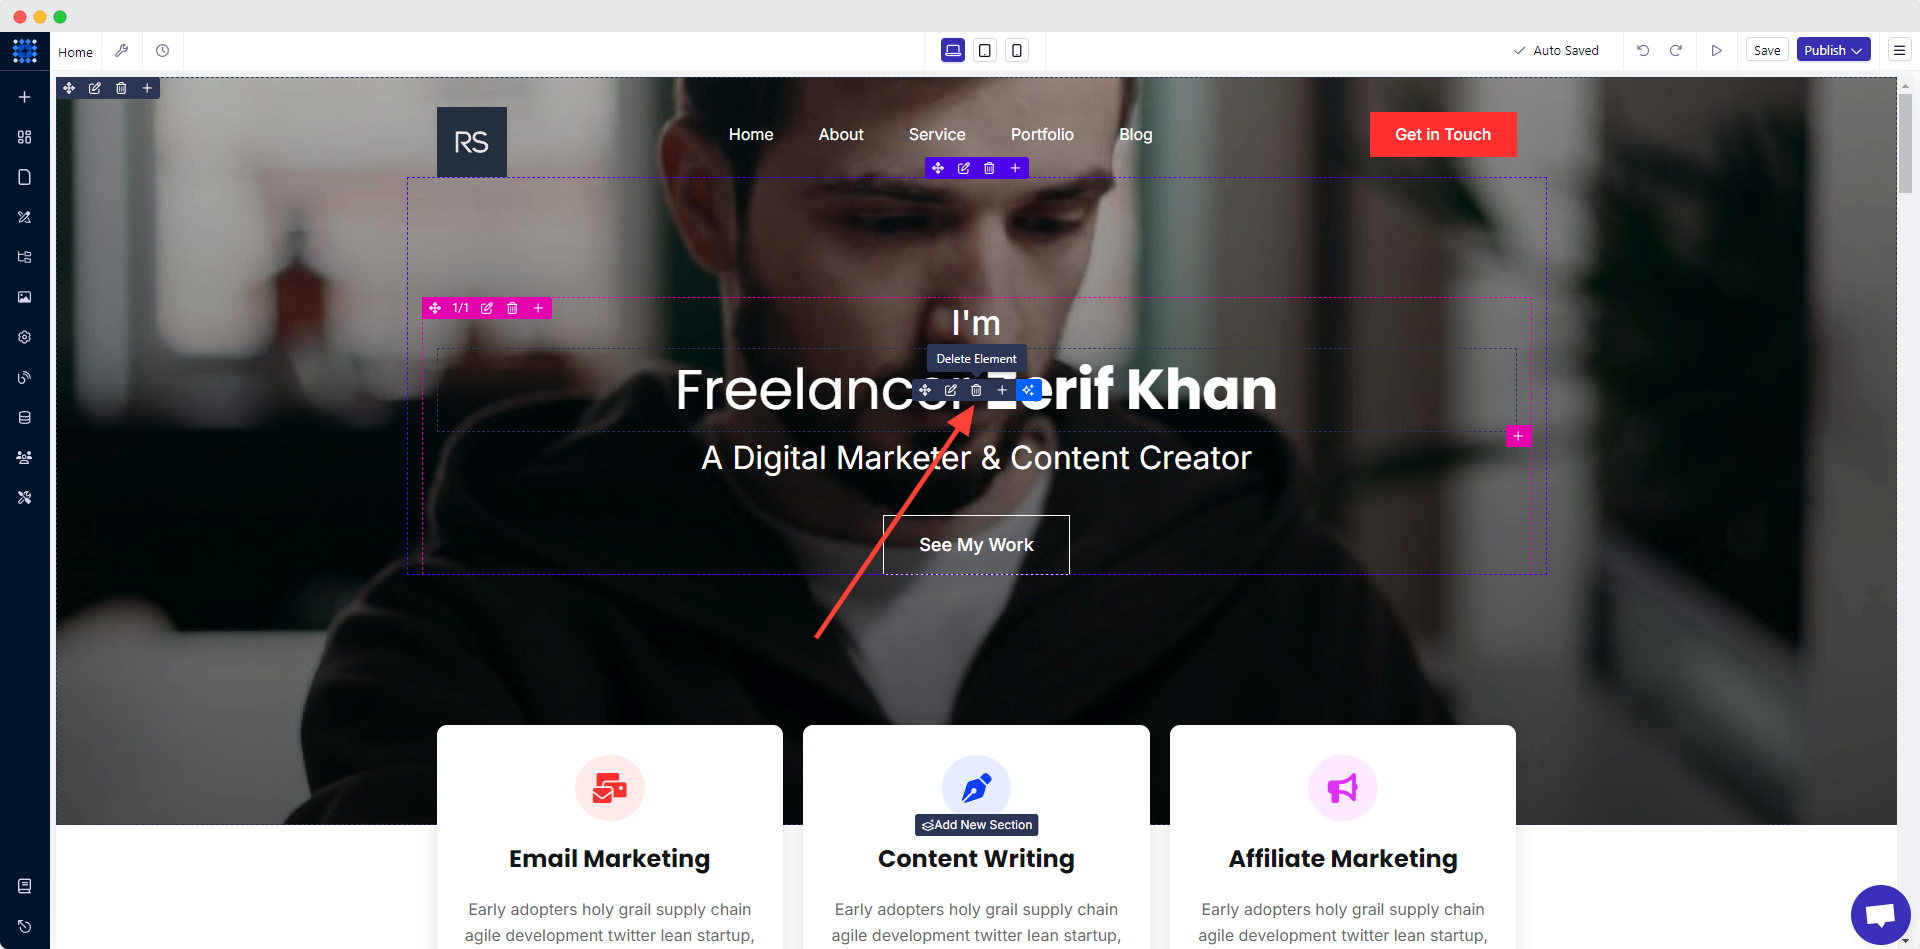
1. To do it, hover your mouse over the pre-written name and click the Edit Element icon as before.
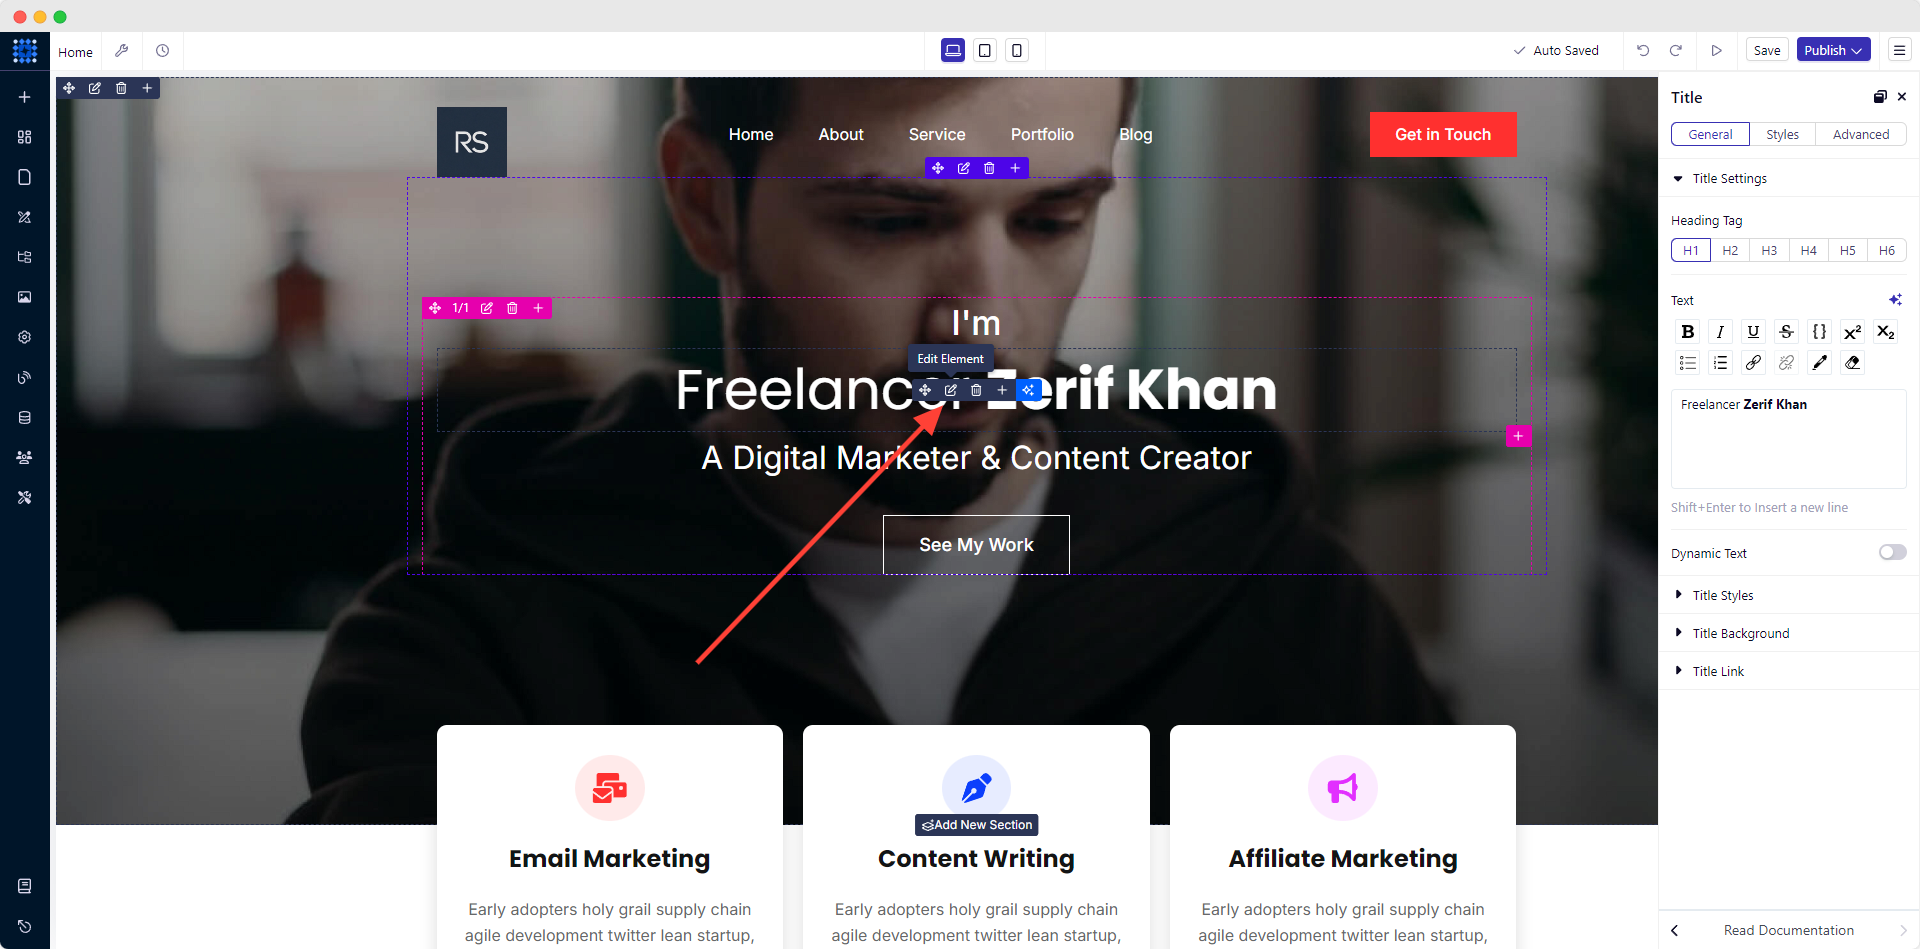
2. Now, replace the default name with your own name. Change the font and style if you want.
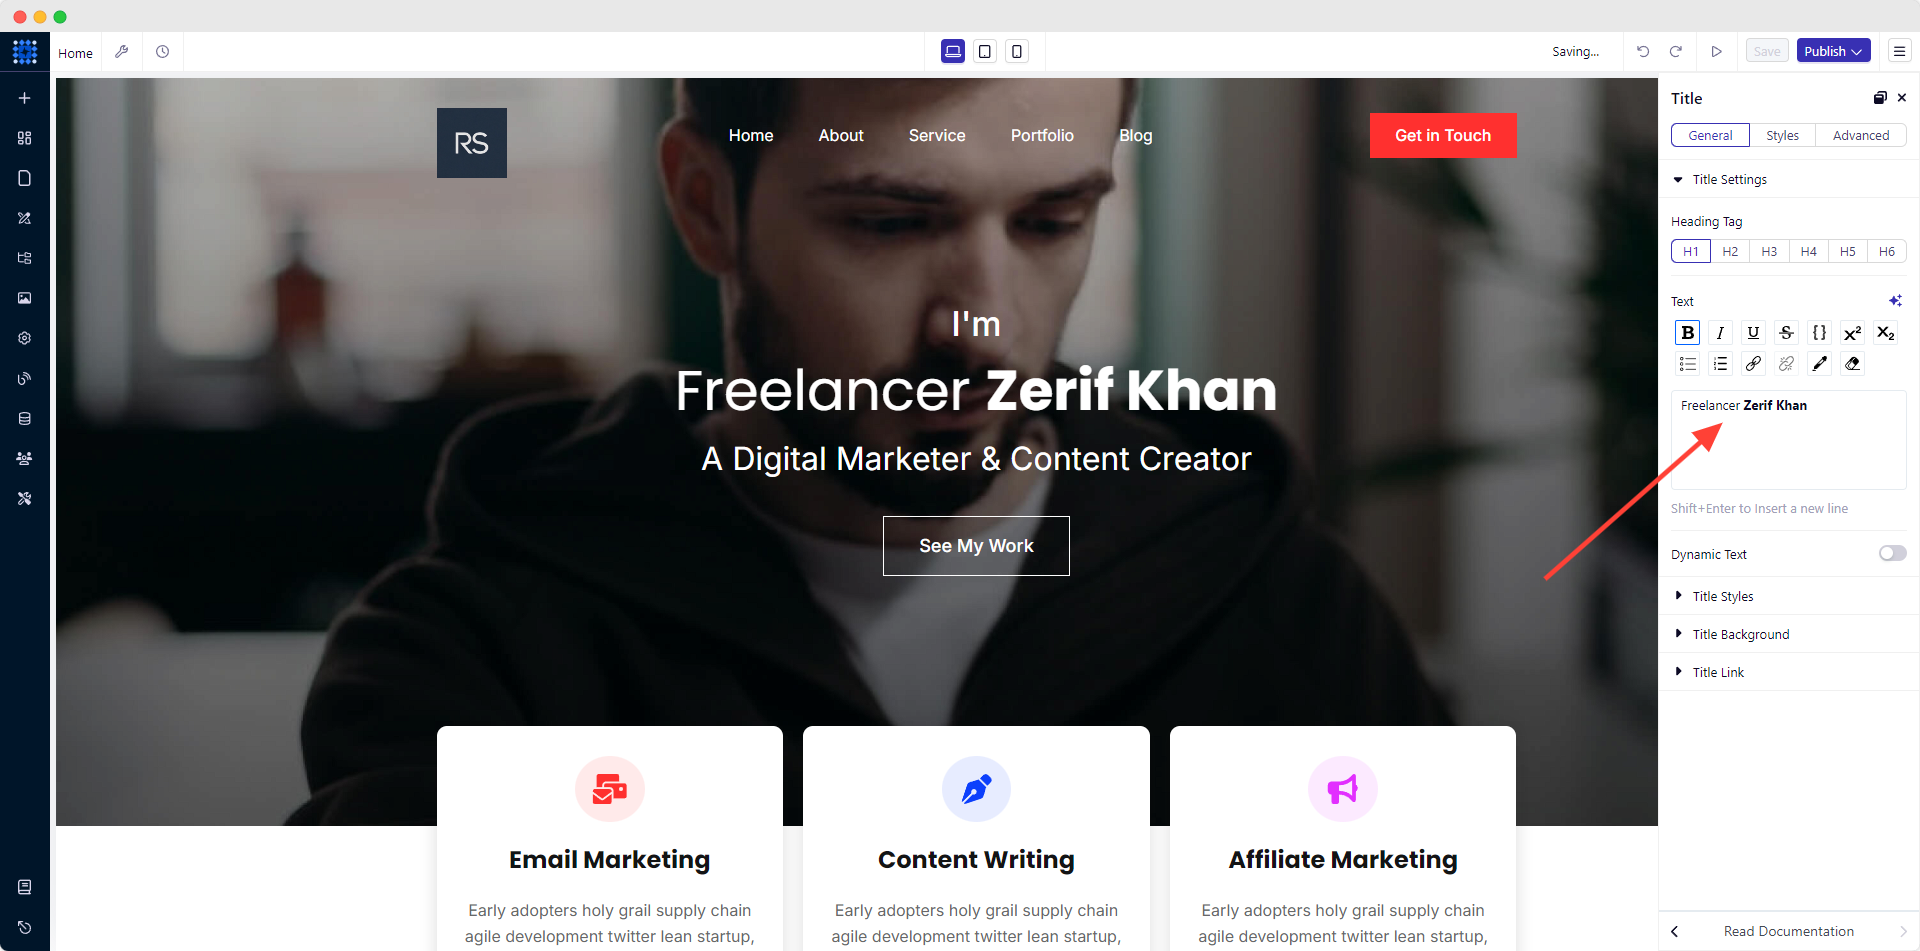
In the same way, edit the default description under the name and add your preferred texts.
Note: Try the AI copywriting tool as your writing assistant.

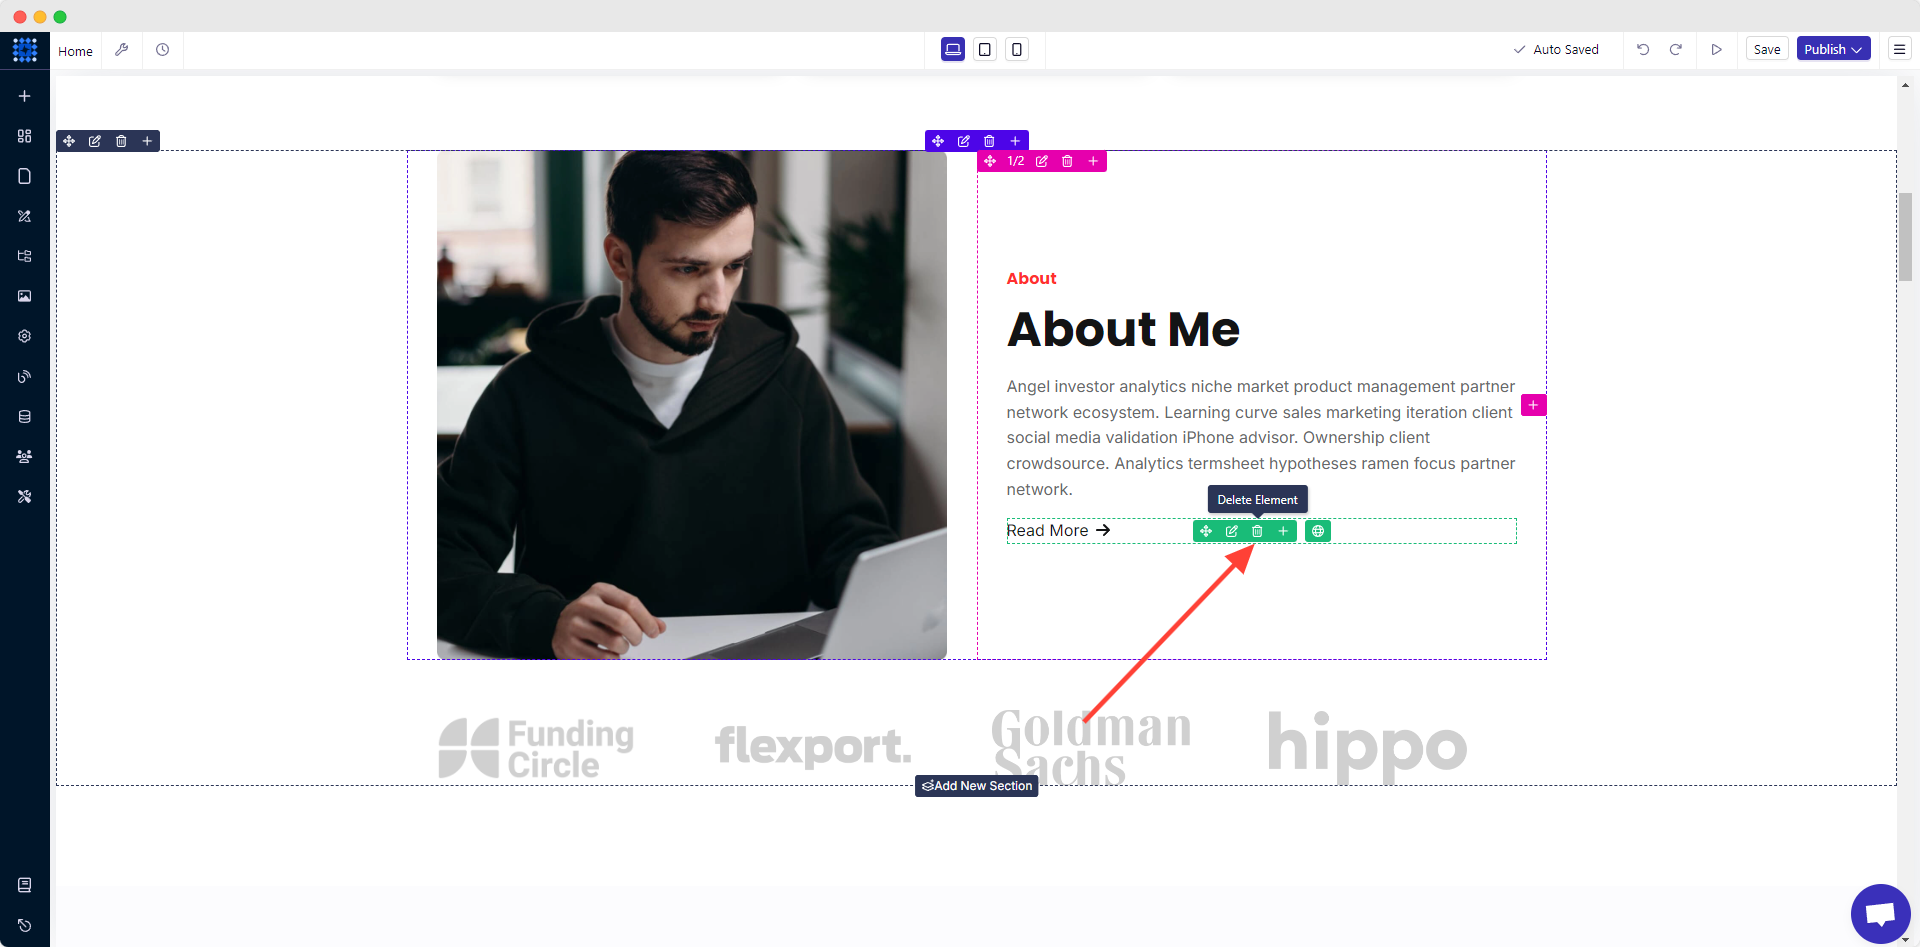
However, if you want to delete any element, hit the Delete Element icon. It will be removed instantly.
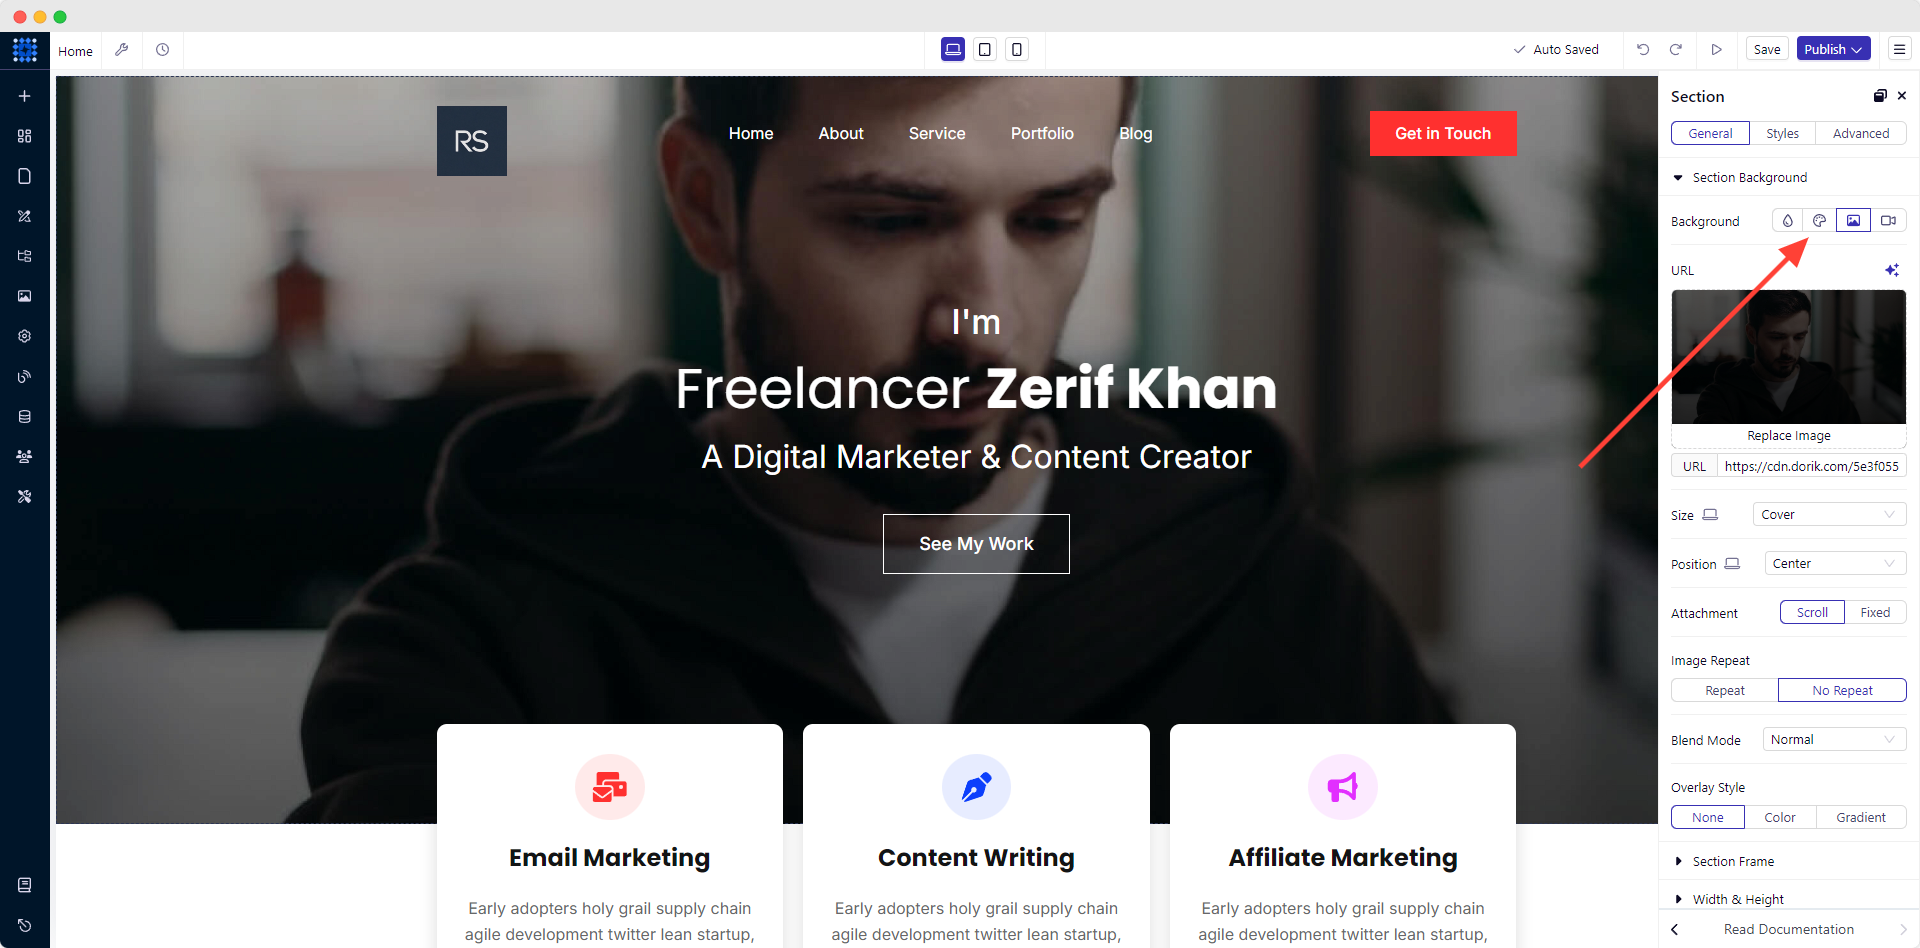
5) Change The Section Background Image
It is the same as the logo-changing process.
1. Click the Edit Section Style from the top left corner of the screen. It will open the section background editing option.

2. From the editing panel, click on the image to replace it with yours.
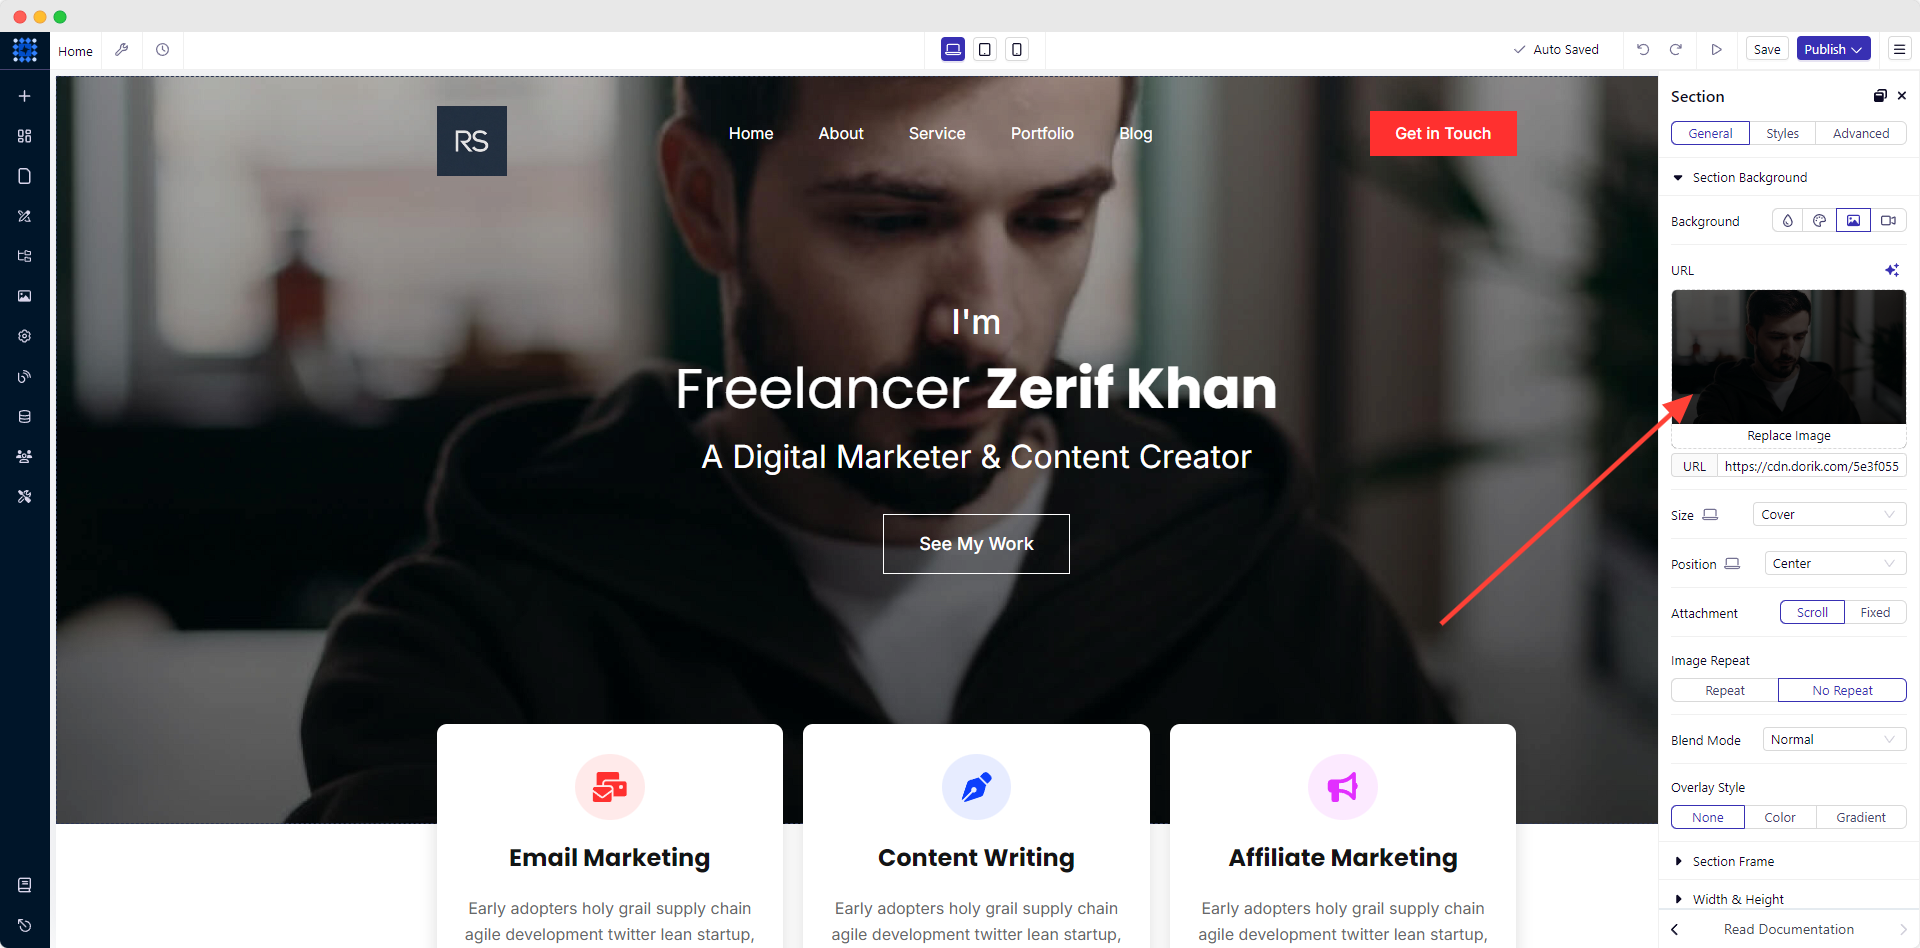
3. Now, pick a suitable image from your computer.

Instead of an image, you can even add solid background color, Gradient color, and videos. So, decide which one you prefer.
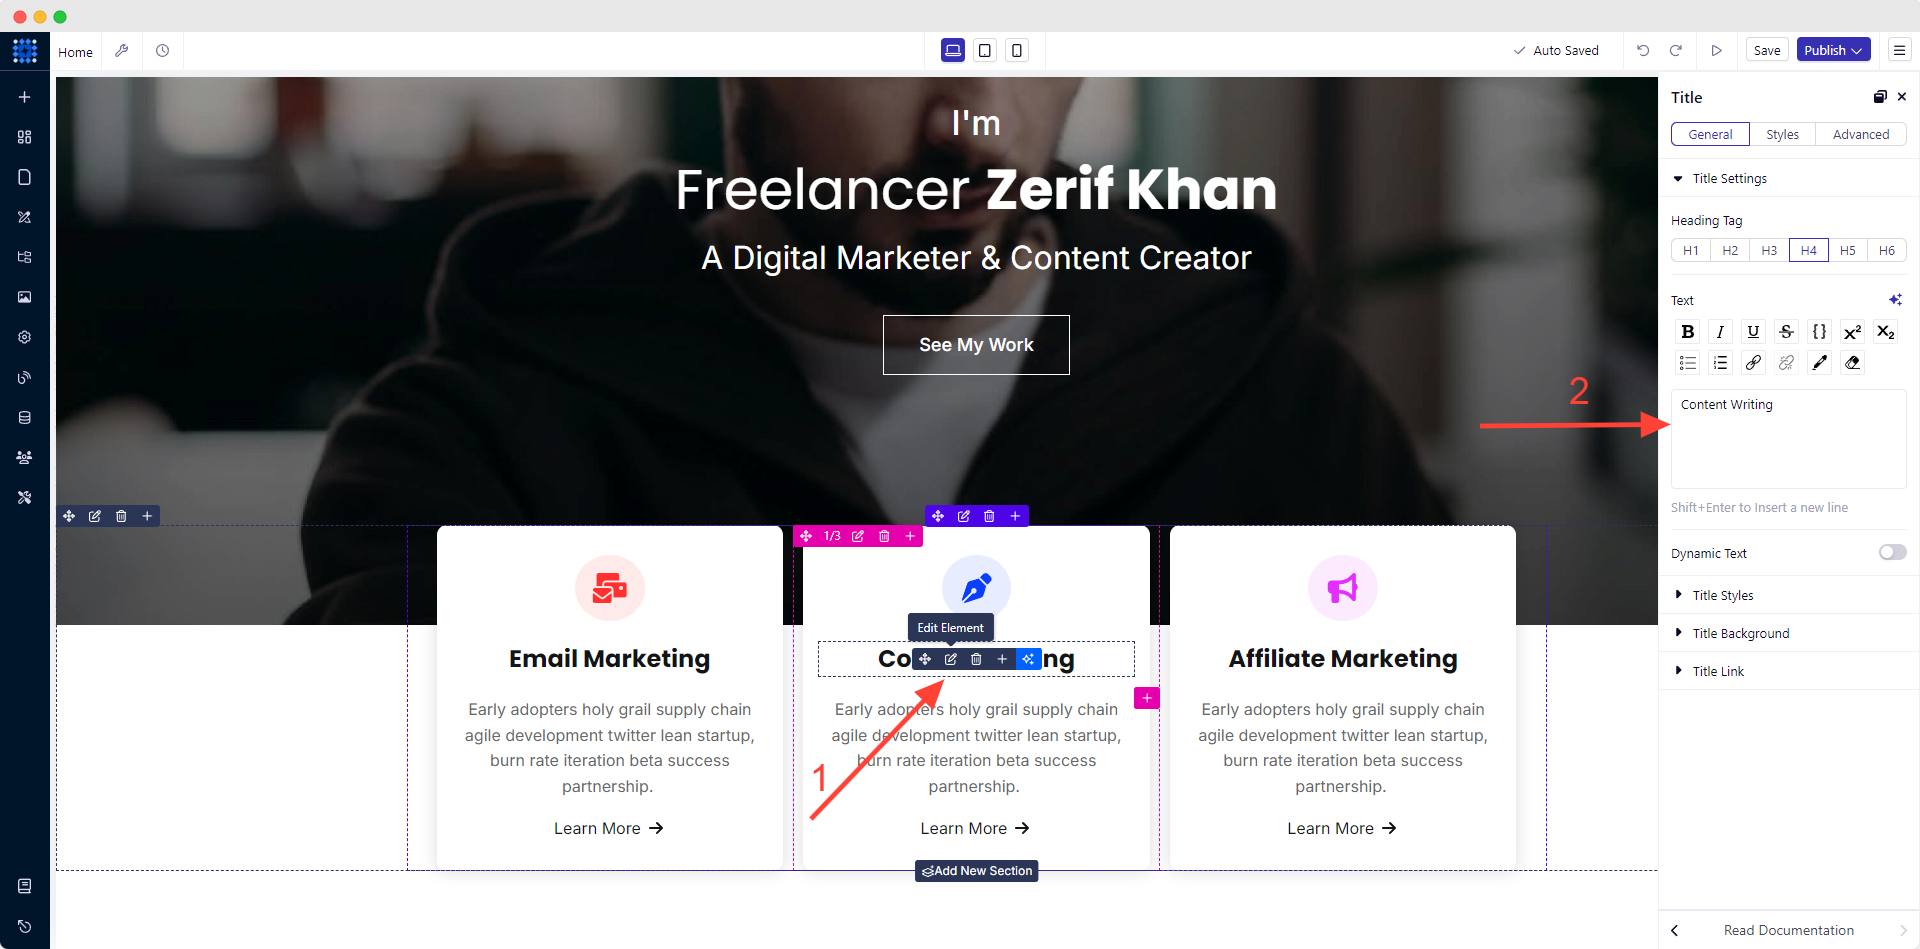
6) Edit Your Service Section
Editing all sections in Dorik is the same. It's pretty easy to make any changes where necessary.
Now, navigate to the Service section. The template we have chosen allows us to show 3 service areas. But it lets you add more if you need to. So, do not get worried.
To modify the title and icon of a specific service:
1. Click on its Edit Element option.
2. Provide a suitable title for your service.
3. After that, add a short description just below the title.
You can also add a link to it for more engagement.
4. Click on the icon symbol if you wish to change it. Choose the exact match from the icon library. Then, adjust its alignment, color, size, background, etc.
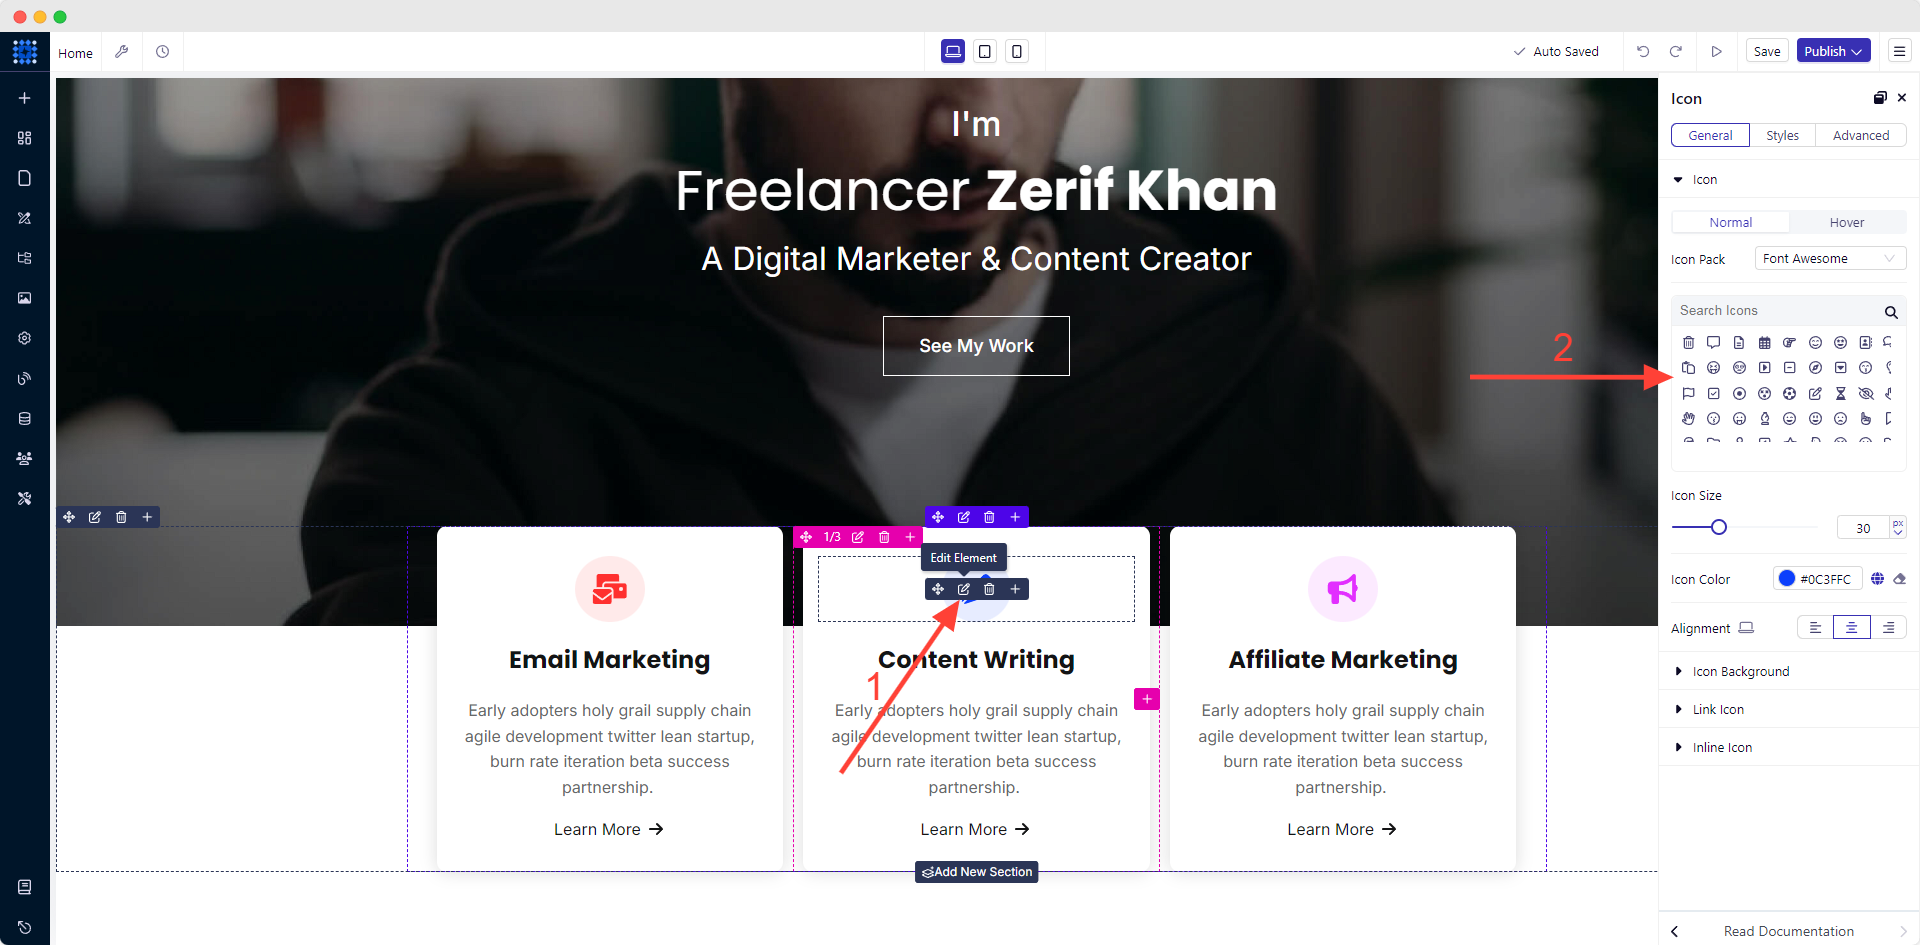
Add all of your offered service areas following the same editing process.
However, you can see some examples of service websites to better understand the design patterns.
7) Edit Your About Section
1. Go to the About section.
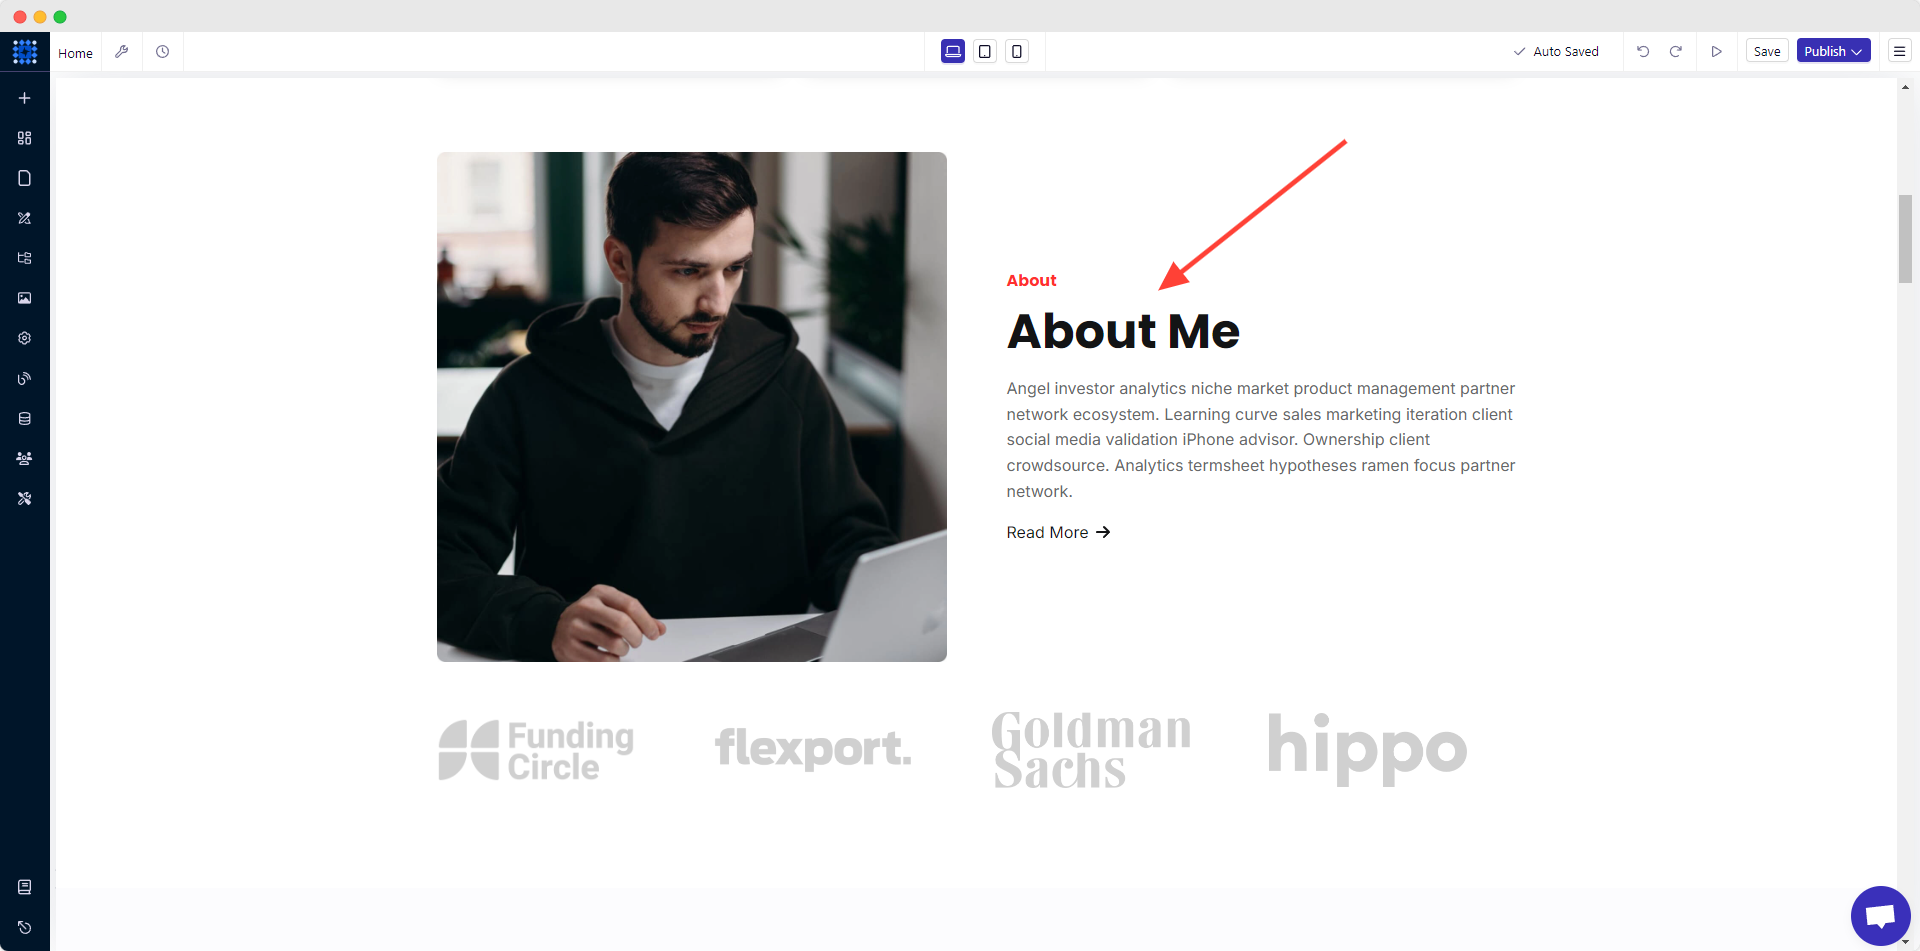
2. Click on the description box. A text editor panel will appear. Write down a short bio of yourself there.
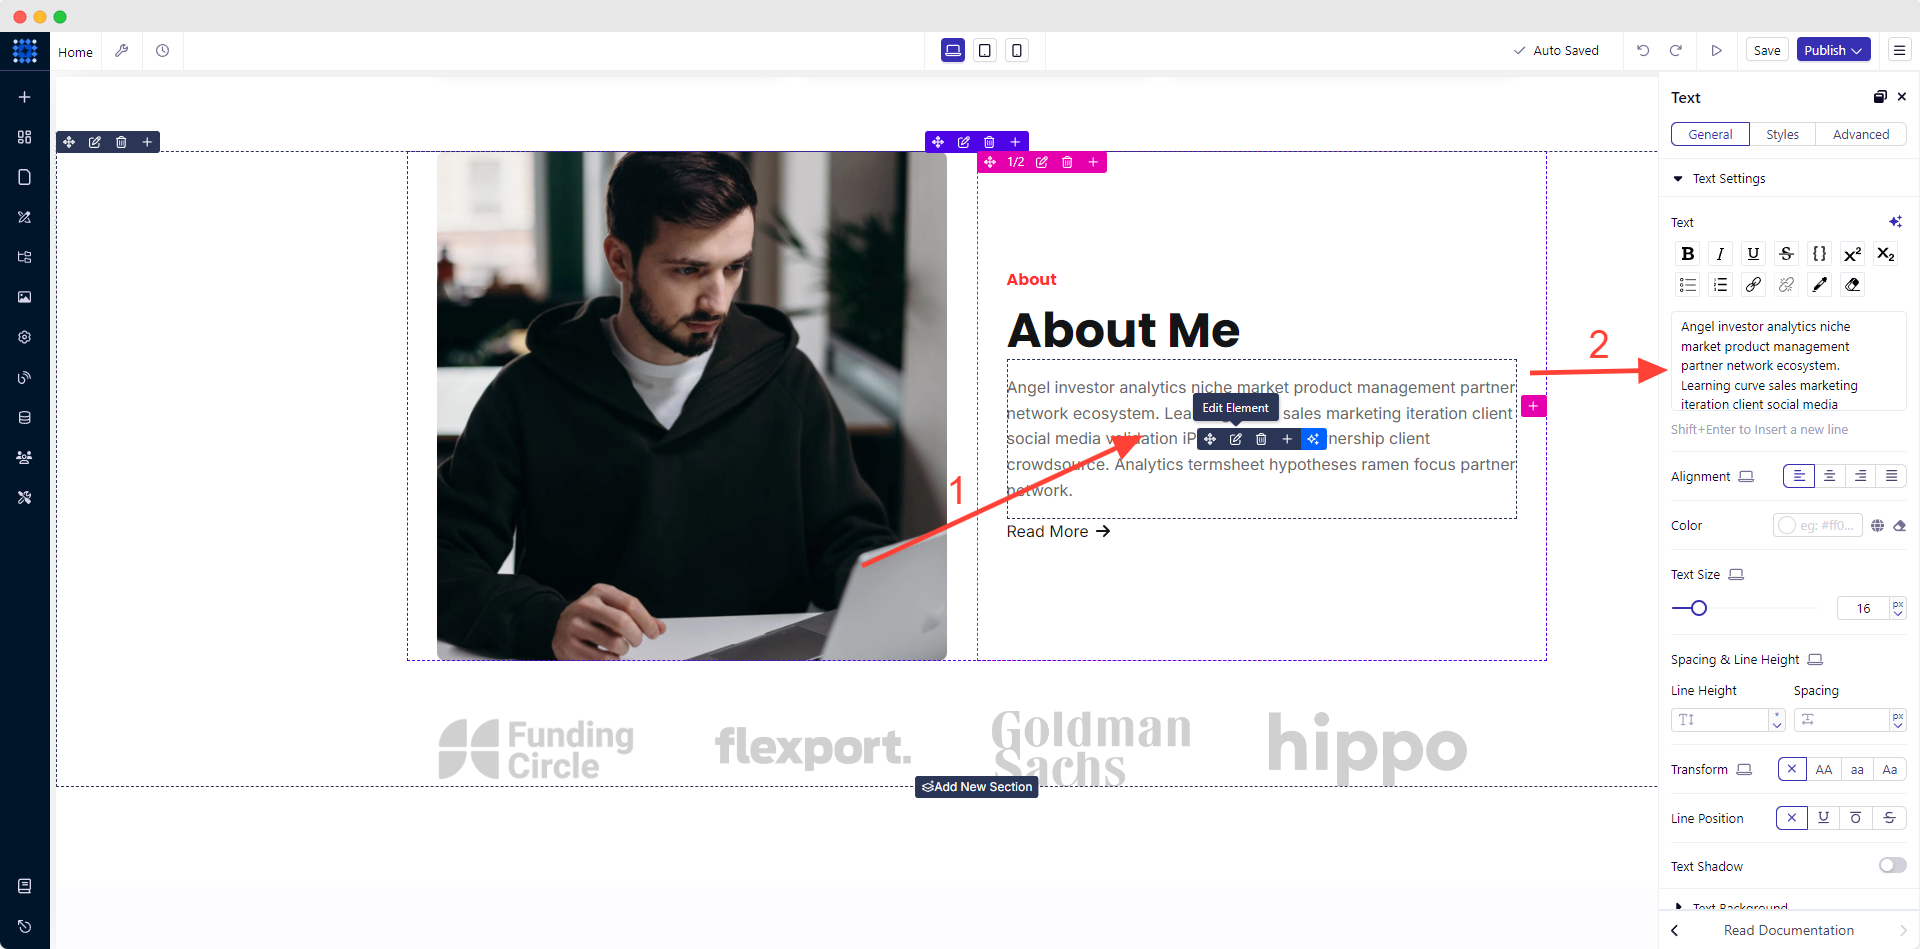
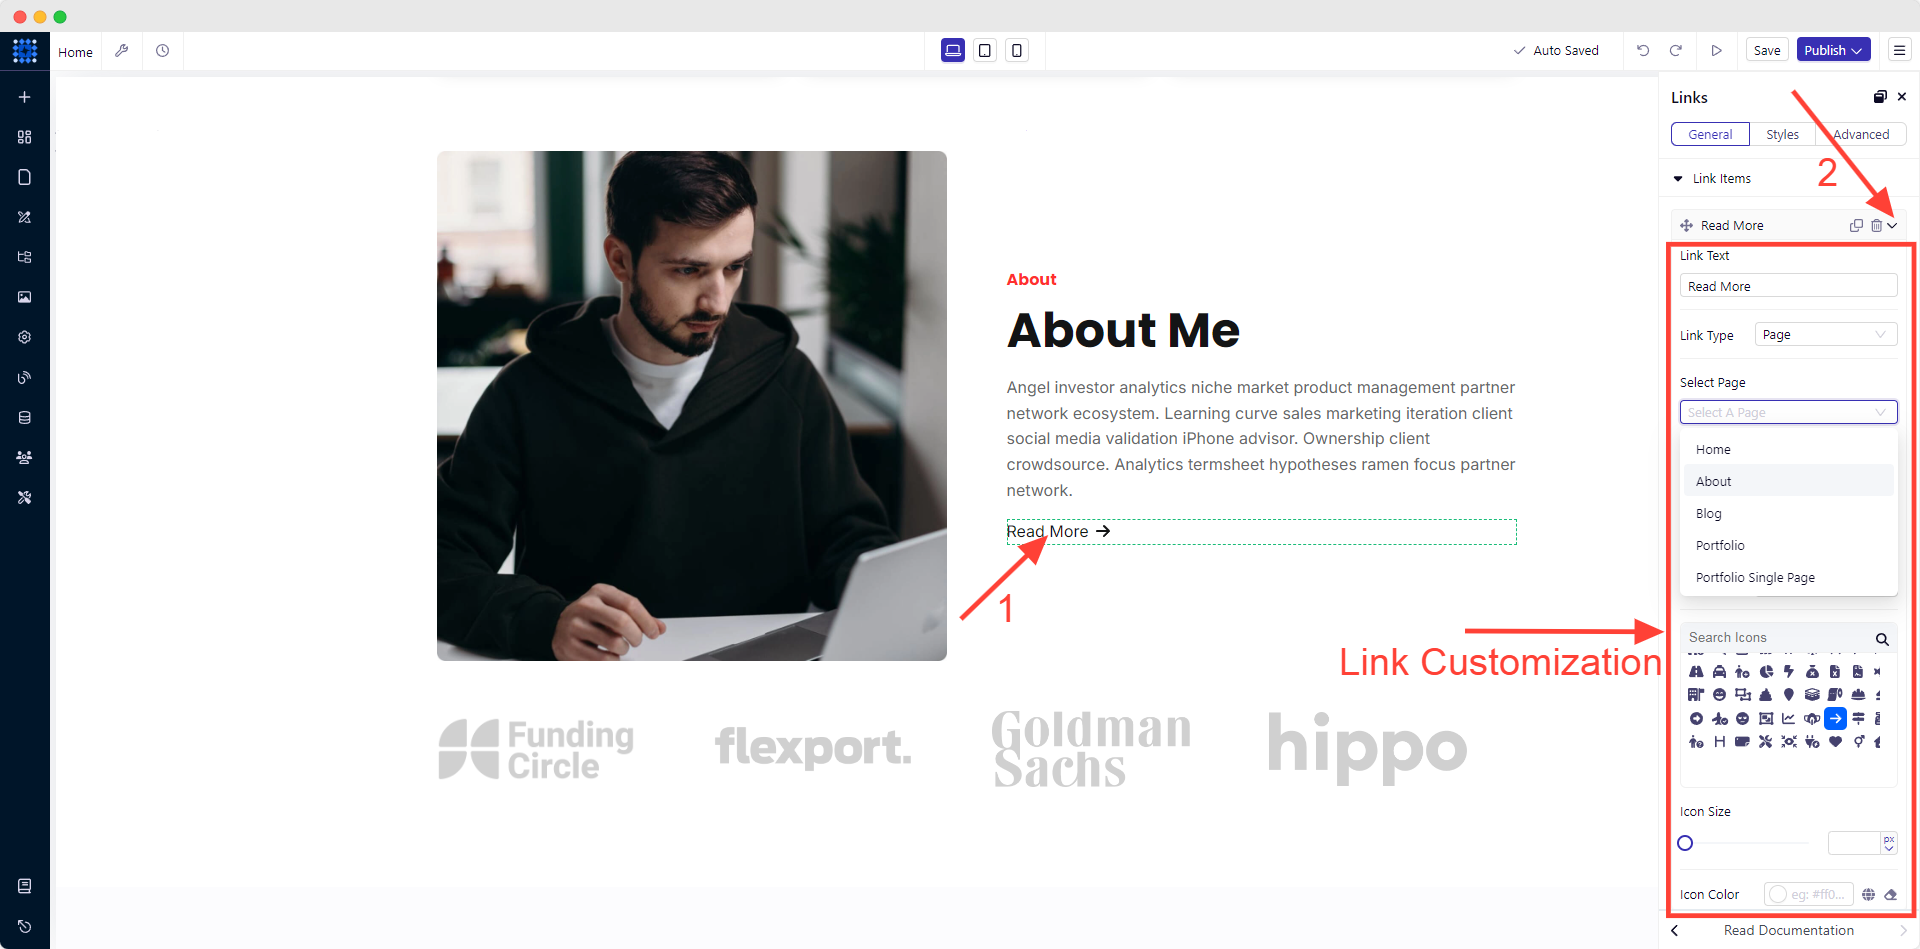
3. Hit the Read More link. Change the Link Text as per your requirement.
4. If you want to redirect your visitors to your About page, select Page from the Link Type option.
5. Then, pick About (Your About Page) from the Select Page option.
6. Add your own photograph following the image-changing process that we have shown you earlier. There is a section showing the brands you have worked with. Replace them by pursuing the logo-changing technique.
However, if you do not want to display them, click the Delete Row icon.
If you want to gather more inspiration, you should read our blog on Inspiring About Us Page Examples.
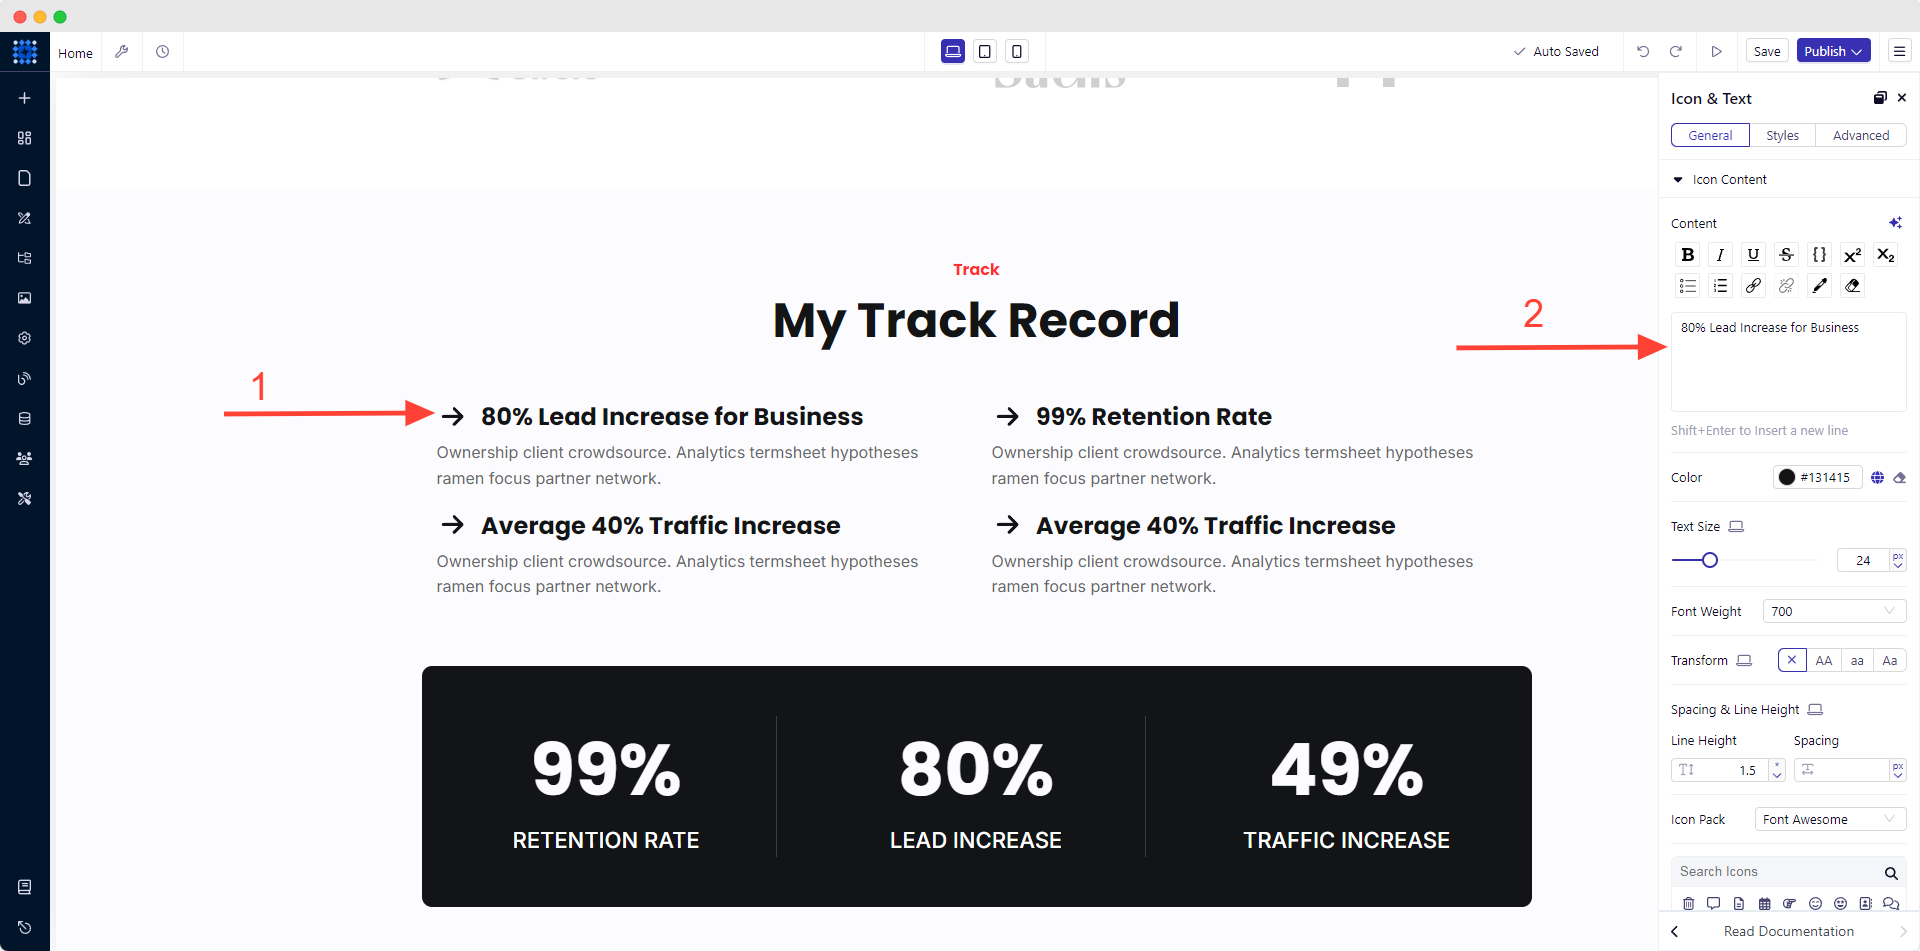
8) Highlight Your Achievements
In this template, you will find this section labeled “My Track Record.” To showcase your achievements, follow the below techniques.
1. Click on any pre-built section and add your value in the text editor panel.
2. Edit every element in the same way.
9) Customize Your Portfolio Section
1. Scroll down to your portfolio section.

2. To edit the title of your portfolio, click on its title bar and add relevant texts.
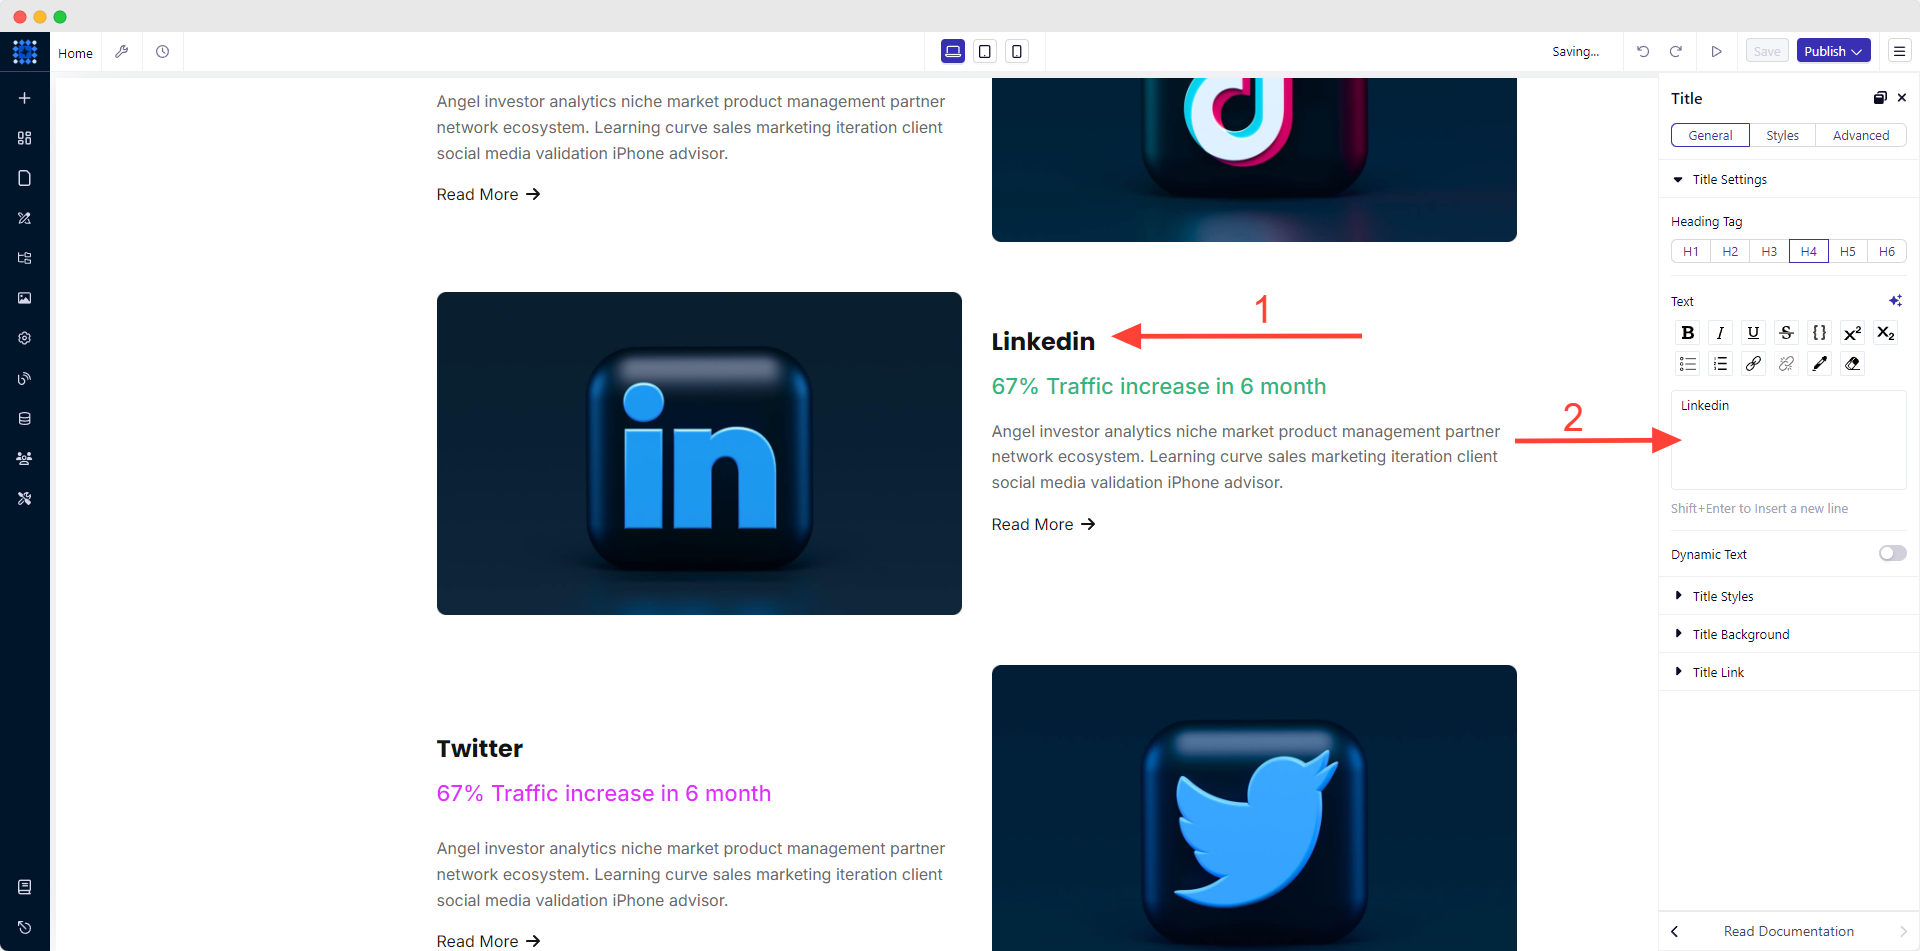
3. Write a short description of every item. Add something that will express your expertise in that specific field.
For example, you can add something like this, “Organic Traffic on LinkedIn increased by 67% in the last six months.”
4. Then customize the Read More link by clicking on it. You can change the link’s text, type, and many more. Do it following the method of changing LINKS ITEM as presented in the About section.
5. Replace the default image with a relevant one to showcase your portfolio image.
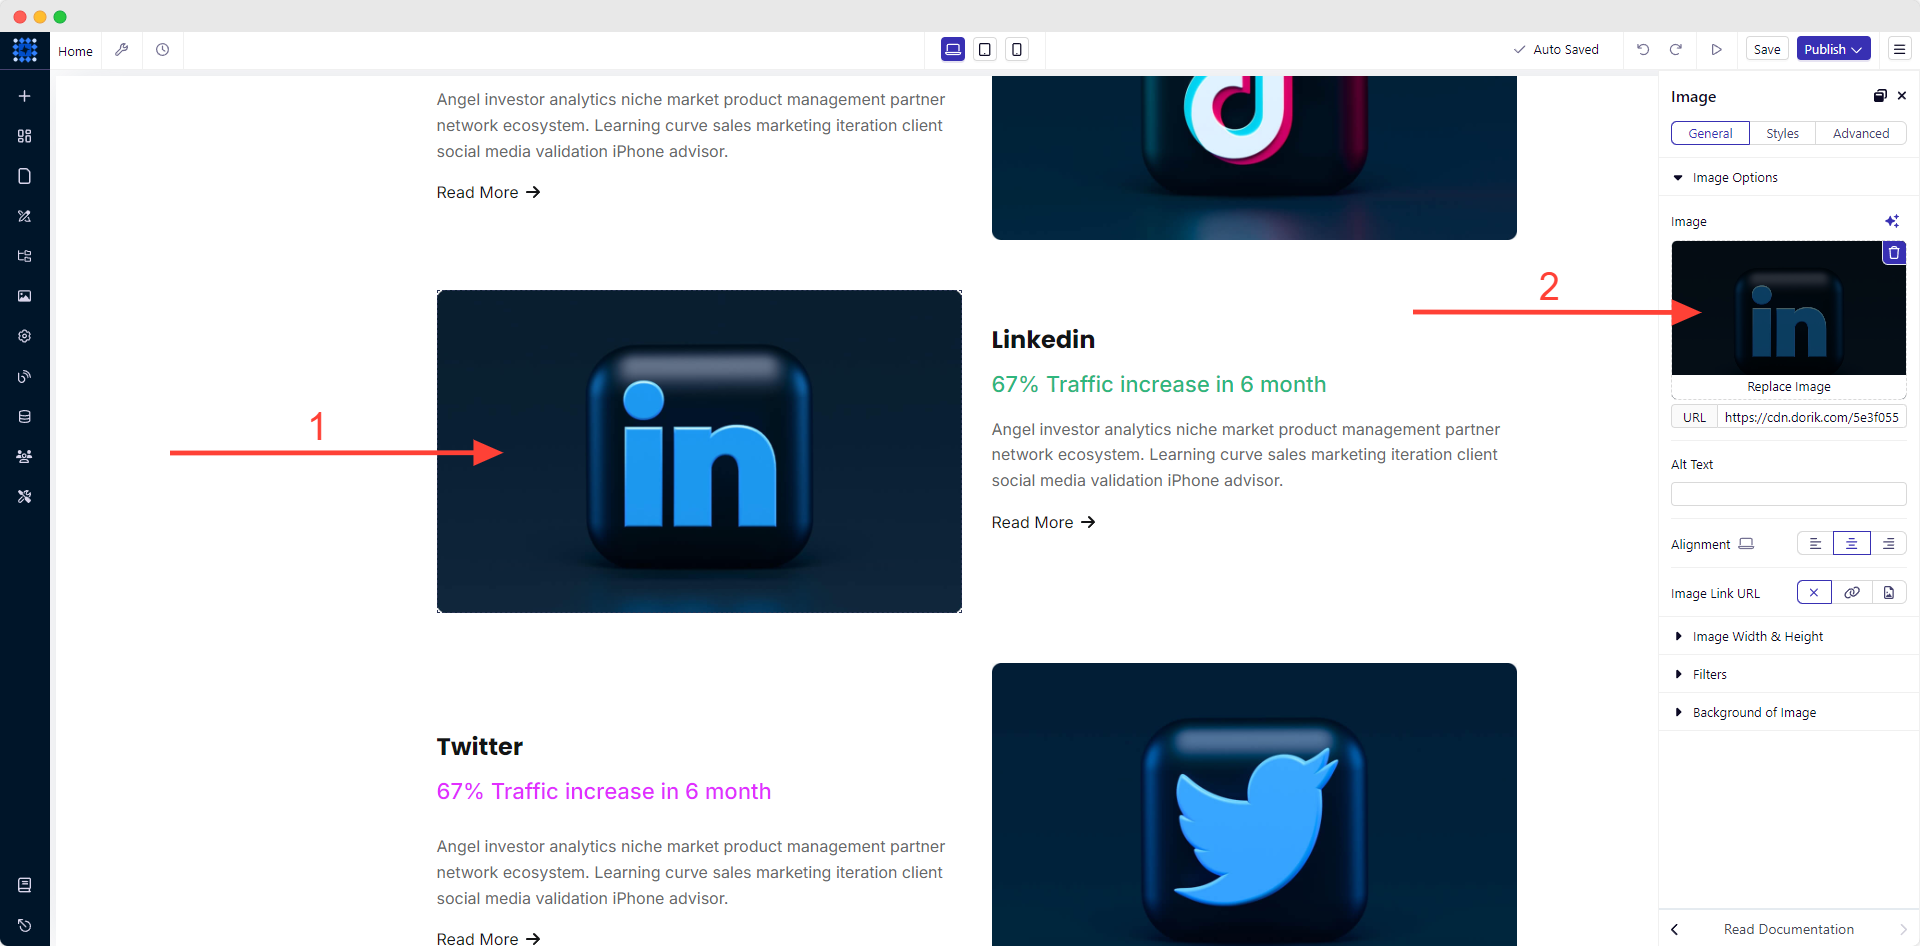
Adding multimedia will enhance the user experience and website engagement.
Applying the same technique, add as many portfolio items as you need.
10) Personalize The Blog Section
You can create engaging blogging websites using the Dorik CMS platform. To do that:
1. Proceed to the Blogs section.
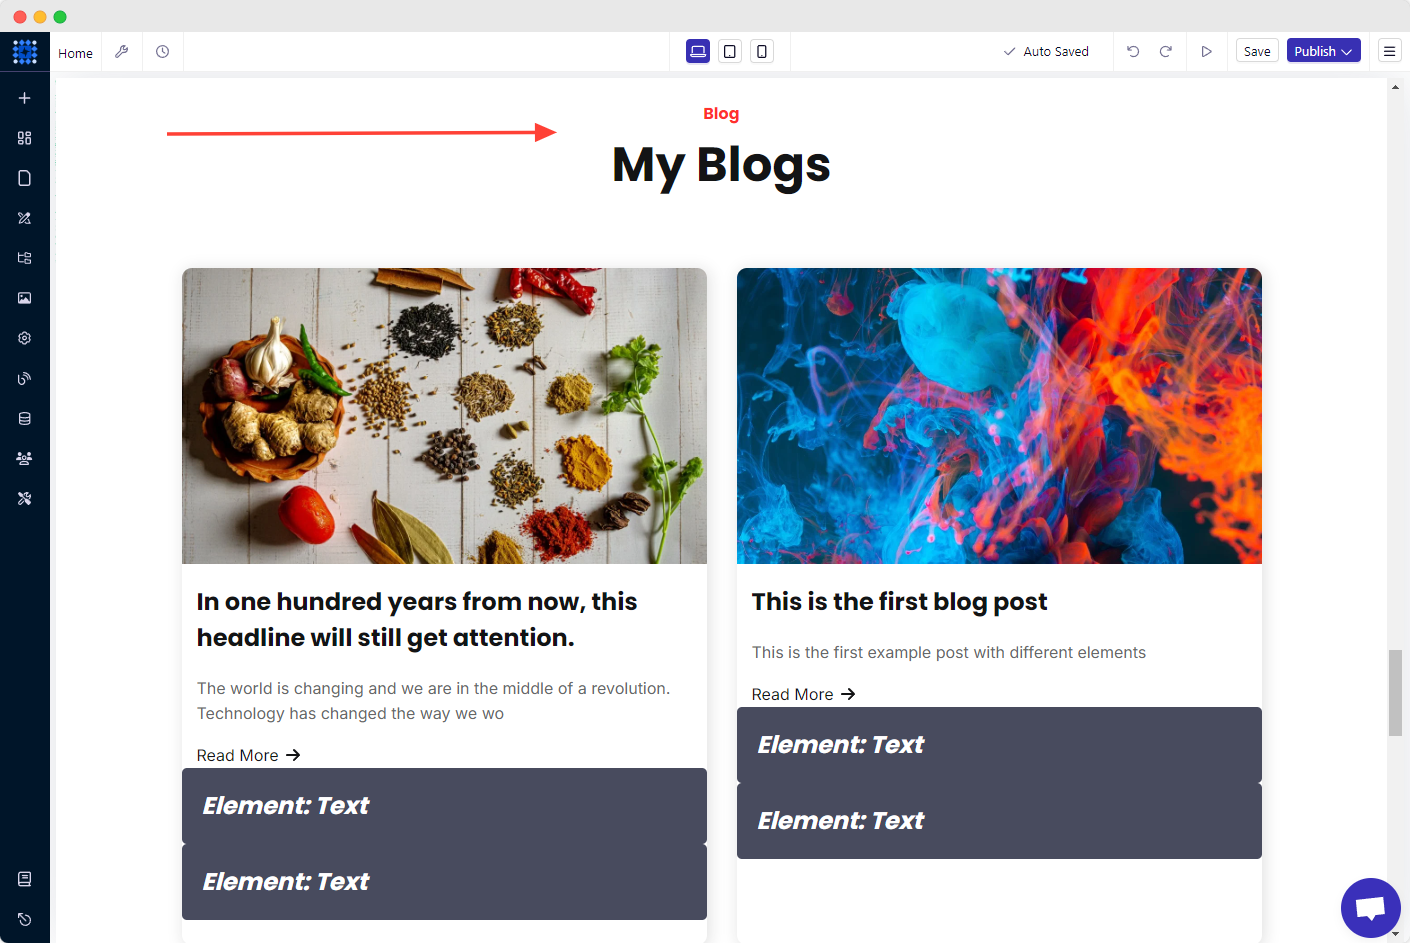
2. Then click "Edit CMS Row Style."
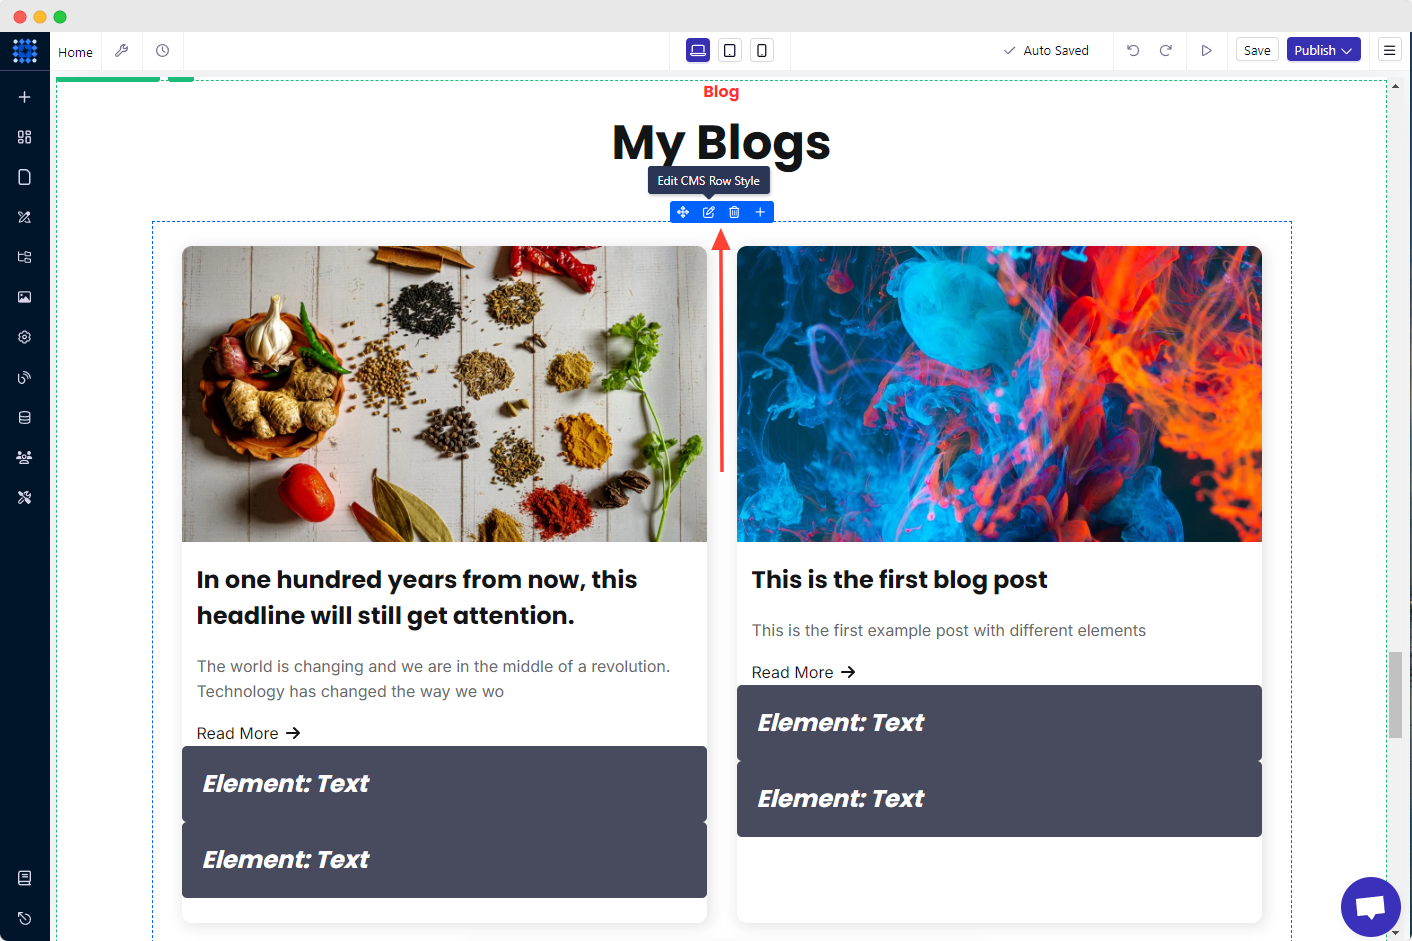
3. Select Posts from the "Select Collection" option under the "Configurations" dropdown.
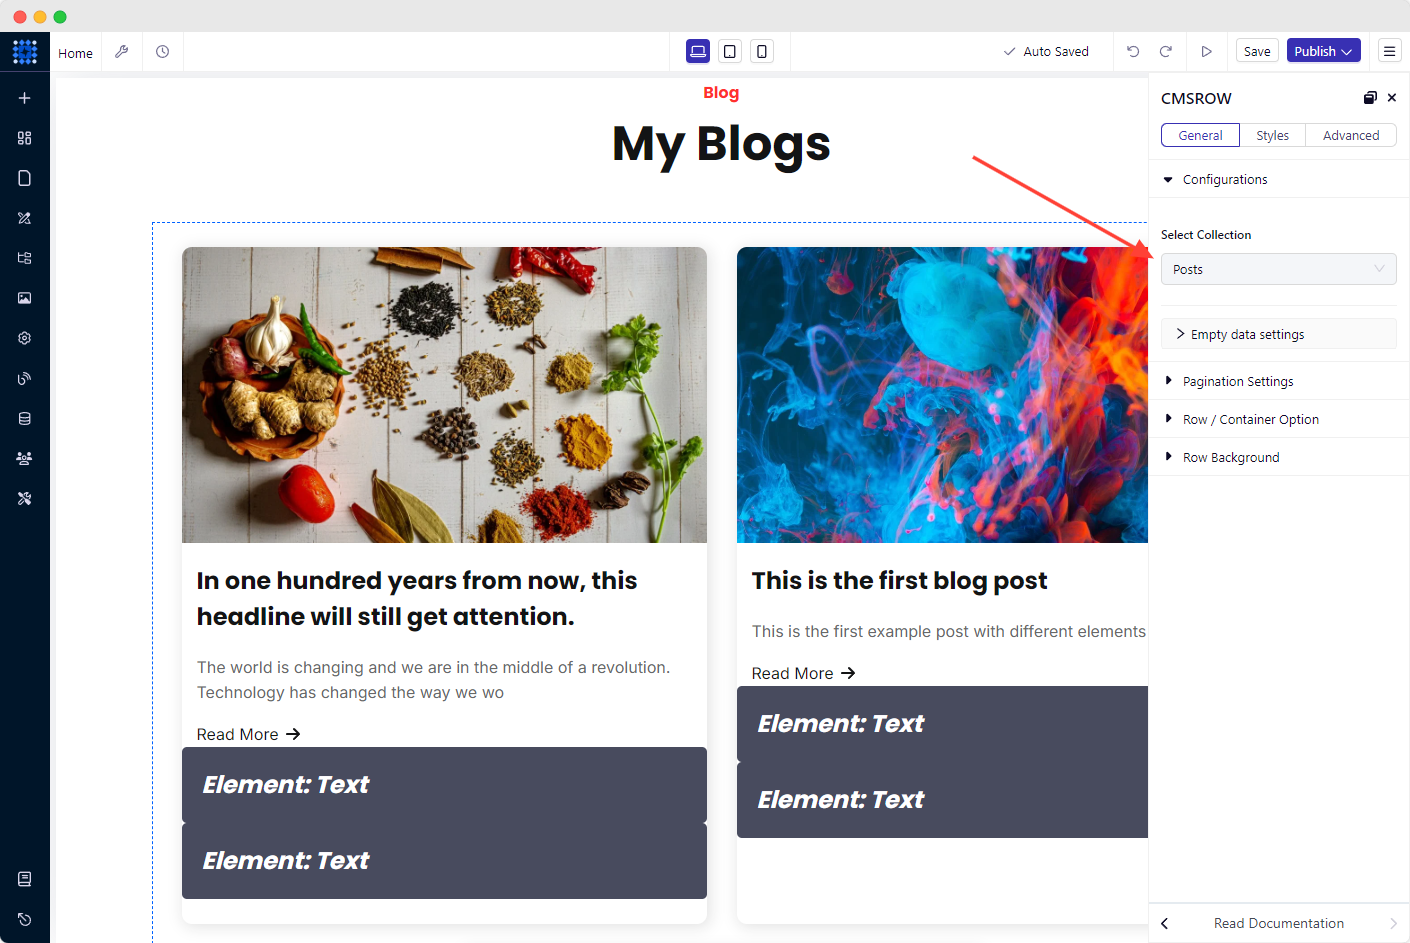
If you choose this feature, some demo posts that are published automatically by the system will be displayed. Additionally, you can choose Custom Collection if you want to show customized data. But you need to create a custom collection first to do this. We recommend you read our complete guide on How to use Dorik Custom Collection.
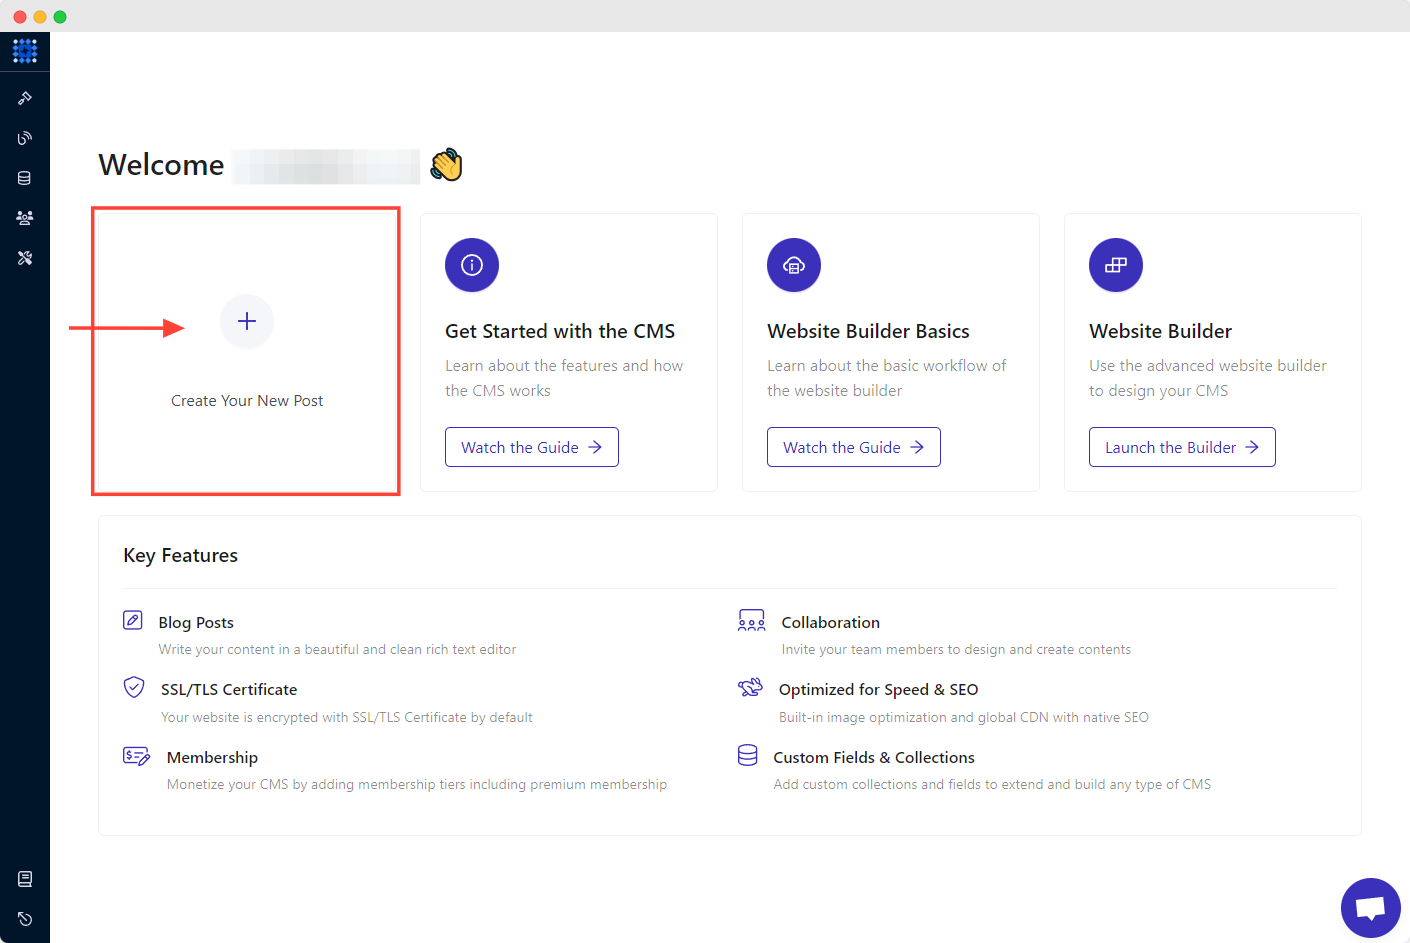
Now, if you want to publish a new blog on your website:
1. Navigate to the dashboard.
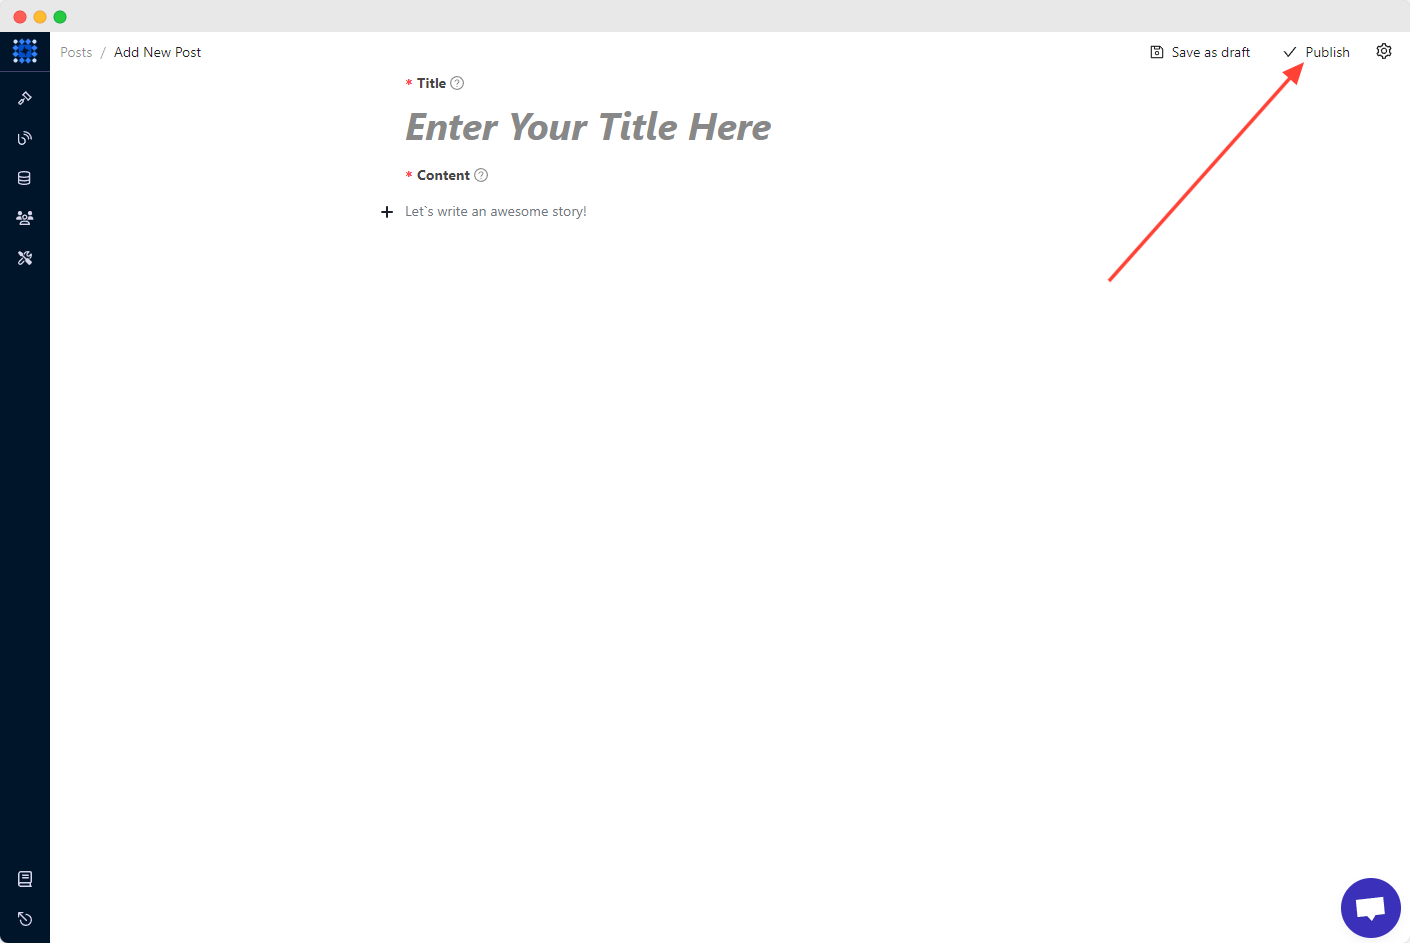
2. Click on "+ Create your New Post."
3. Write or add your blog post.
4. Click on the gear icon on the top right corner to access the "Post Settings."
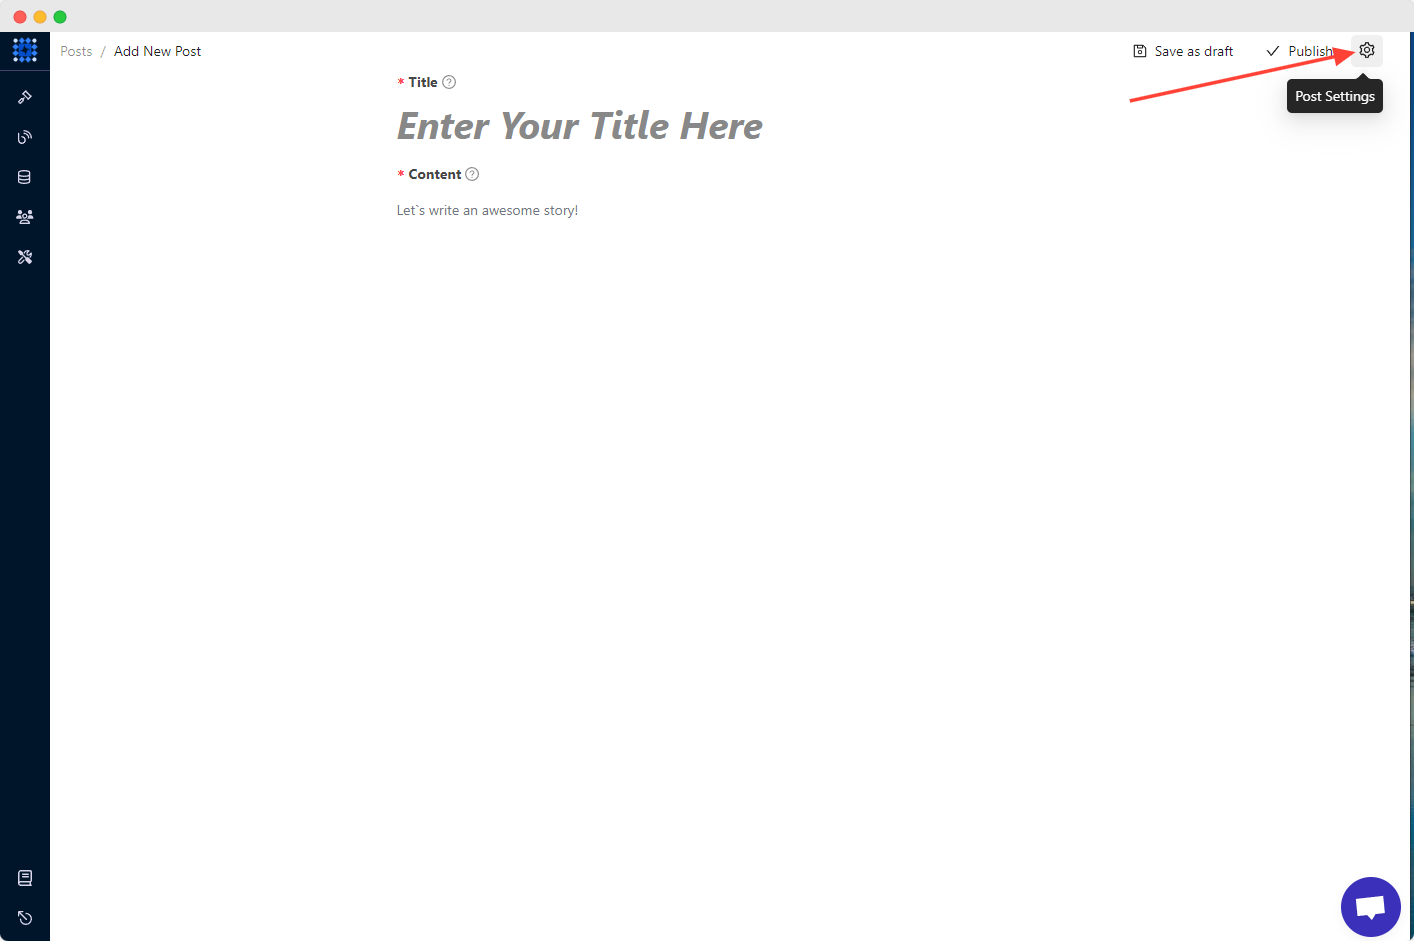
5. Fill out the essential fields such as slug, excerpt, author, category, thumbnail image, keywords, etc.
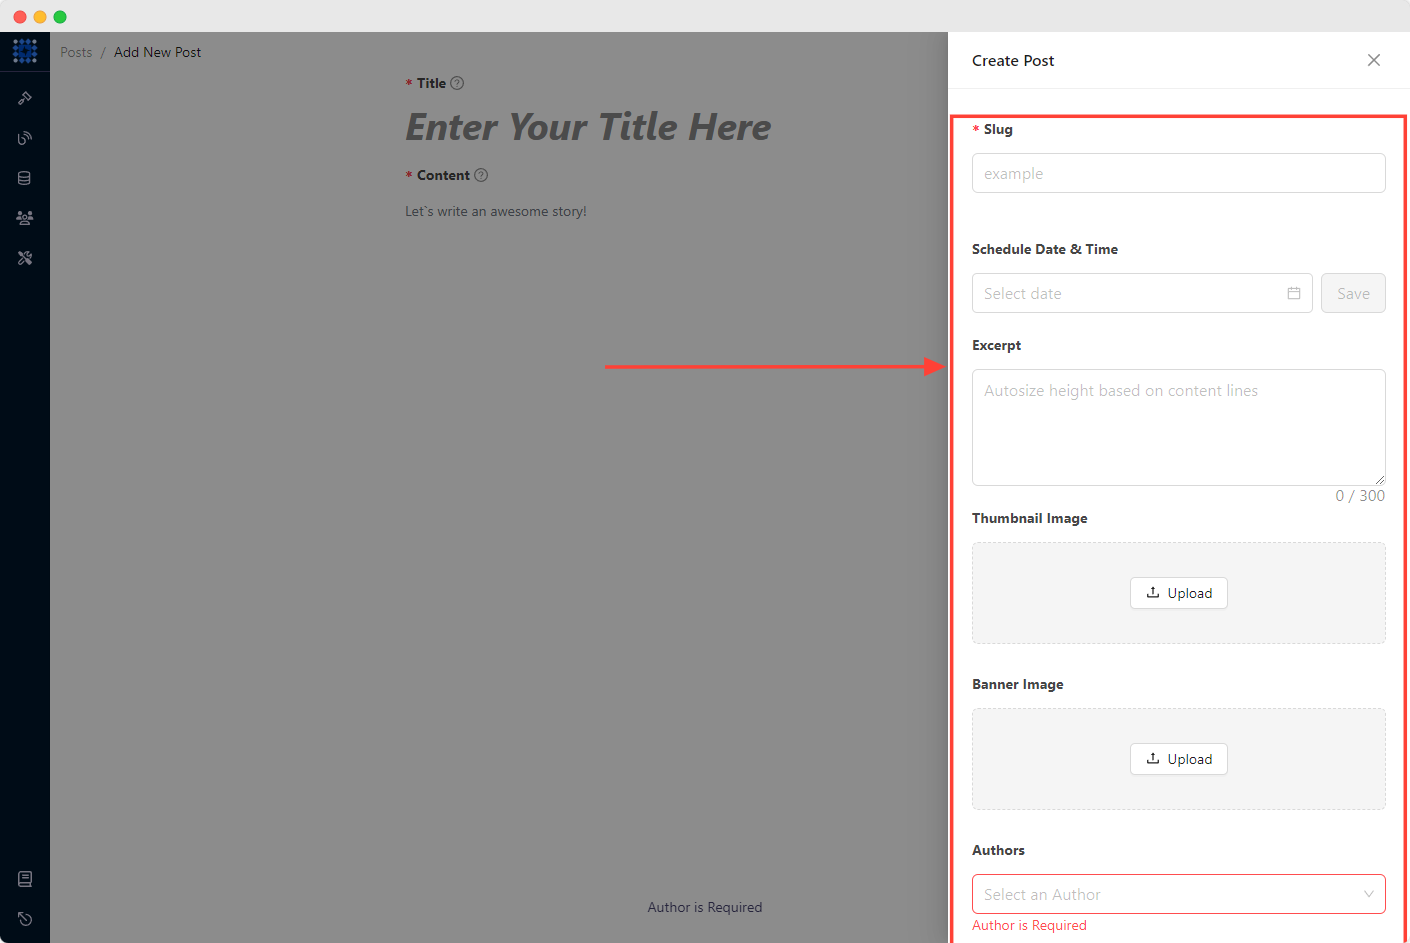
6. Finally, hit the Publish button. You have a new blog published.
I am sure you know what you have to do now. Yes, add as many blog posts as you want by applying this method.
Another thing to mention is that there is no other system to modify your Testimonial part. Follow the same process to personalize this section as well.
However, you can ask for testimonials from others and show them on your website to make your portfolio more authentic.
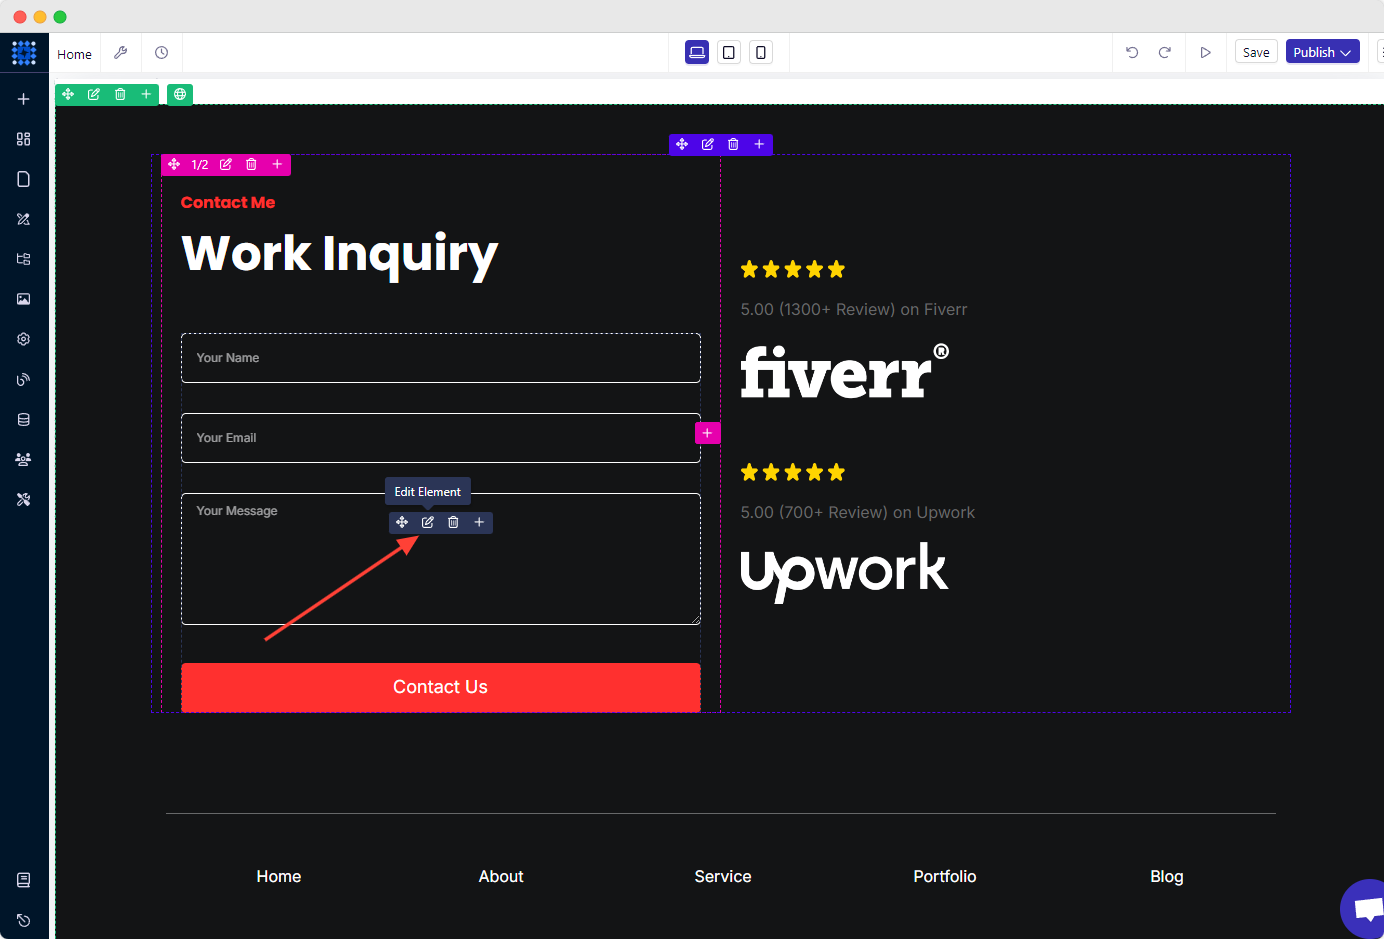
11) Customize The Contact Section
One of the most significant sections or pages of a portfolio website is the “Contact” portion. It allows the users to get in touch with you.
The default template comes with a contact form. Let’s edit it:
1. Click the "Edit Element" icon.
2. From the "Send To" option, you can select Email, Zapier, Integromat, and Pabbly Connect.

Here, I am selecting "Email."
Integrating Zapier, Integromat, and Pabbly Connect is really easy with Dorik. Choose any of them, depending on your preference.
3. Then add your email address in the Receive At box, input the email subject and success message.
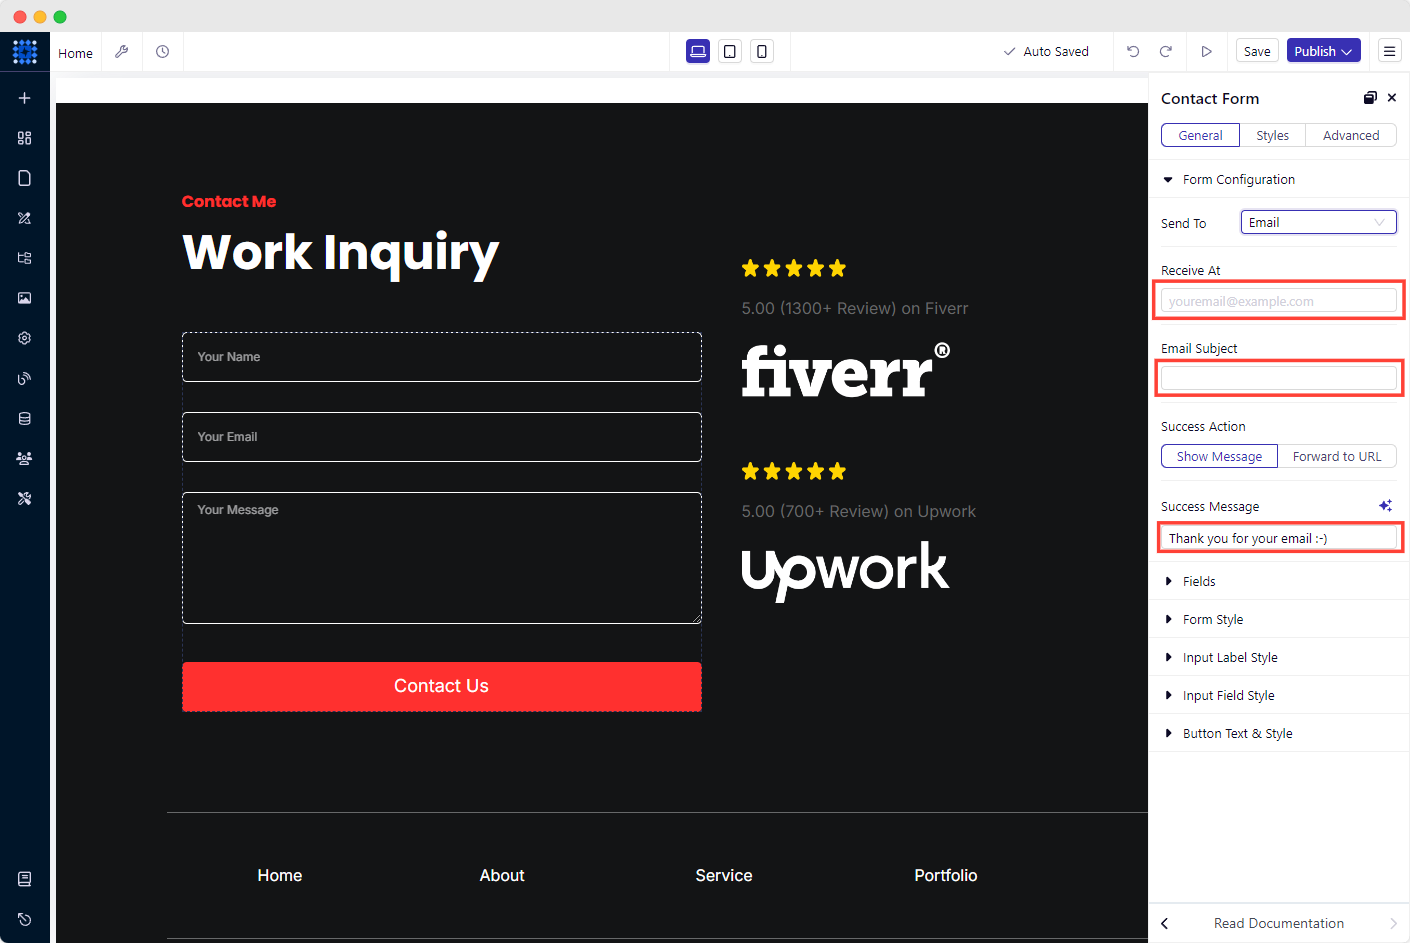
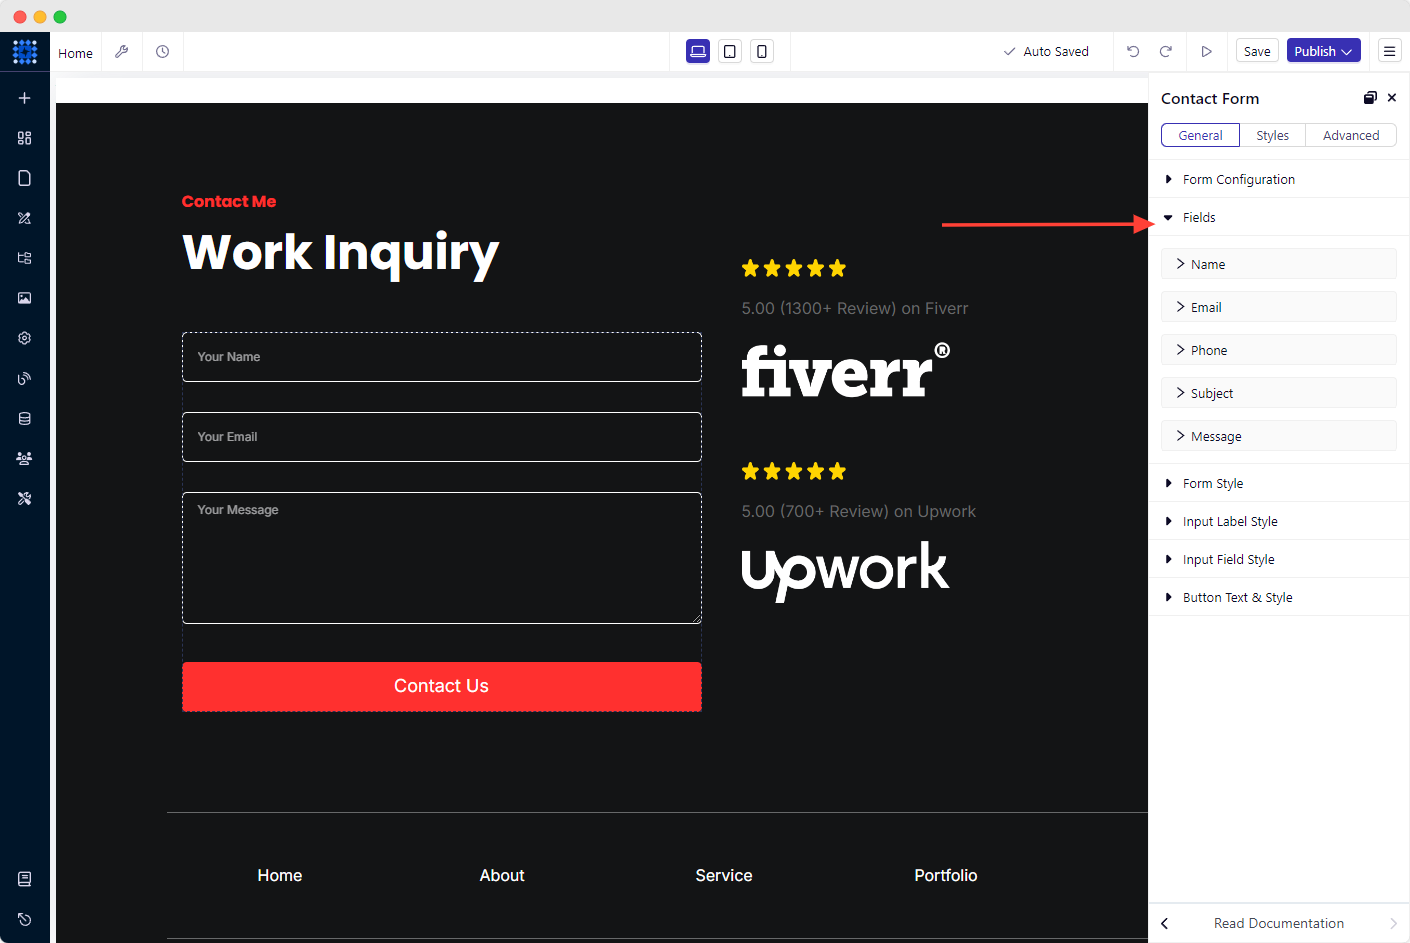
4. Add or remove any fields from the FIELDS option, depending on your need.
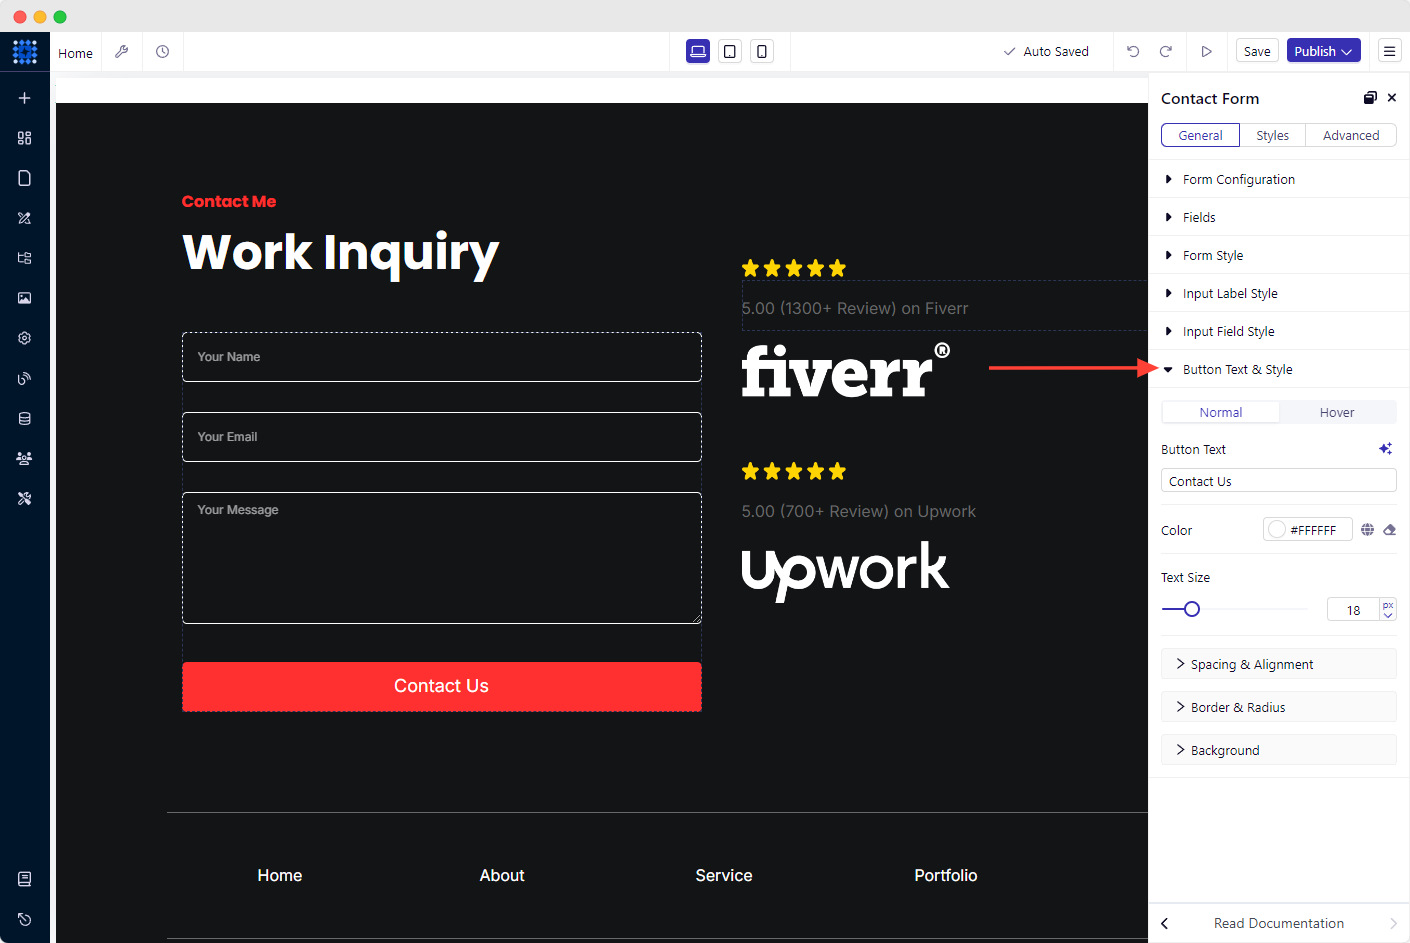
5. Hit the BUTTON TEXT & STYLE dropdown to customize the contact button. Write down your button text, change its color, border, radius, alignment, etc., if you want.
If you do not like to use the default design, you can create a new one from scratch.
However, the following blog post will show you the complete process of creating a Contact Us Page.
12) Re-design Your Footer Area
The footer is a vital part of your portfolio website. By optimizing it, you can significantly impact user experience and search engine optimization.
If you struggle to personalize your footer section, you can see some examples of website footers for inspiration.
Some tips on optimizing your footer:
Keep it Simple: Your footer should be clean and straightforward, with only the necessary information.
Include Navigation: Add links to the most helpful pages in your footer to help users find what they're looking for.
Incorporate Contact Information: Adding contact information, such as your email address or phone number, can help visitors reach out to you quickly.
Add Social Media Links: Including links to your social media profiles can help visitors connect with you on other platforms.
Copyright and Privacy Policy: It's safe to have a copyright notice and privacy policy in your footer to protect your website.
To add your social media profile, follow the below process.
1. Click on a default-specific icon. For example, select Facebook.
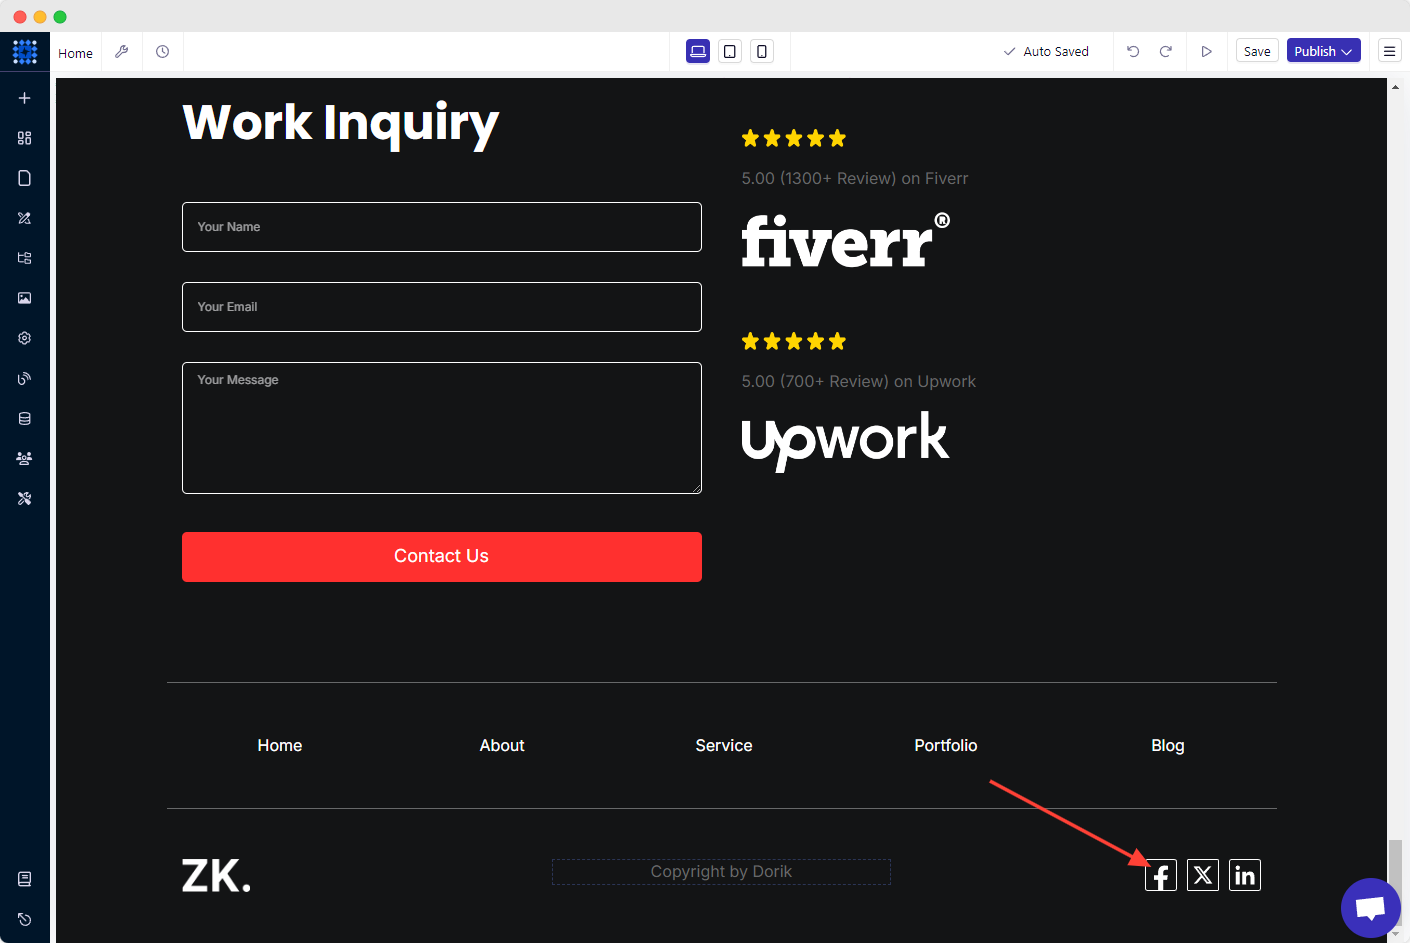
2. Add your Facebook profile link in the URL field.
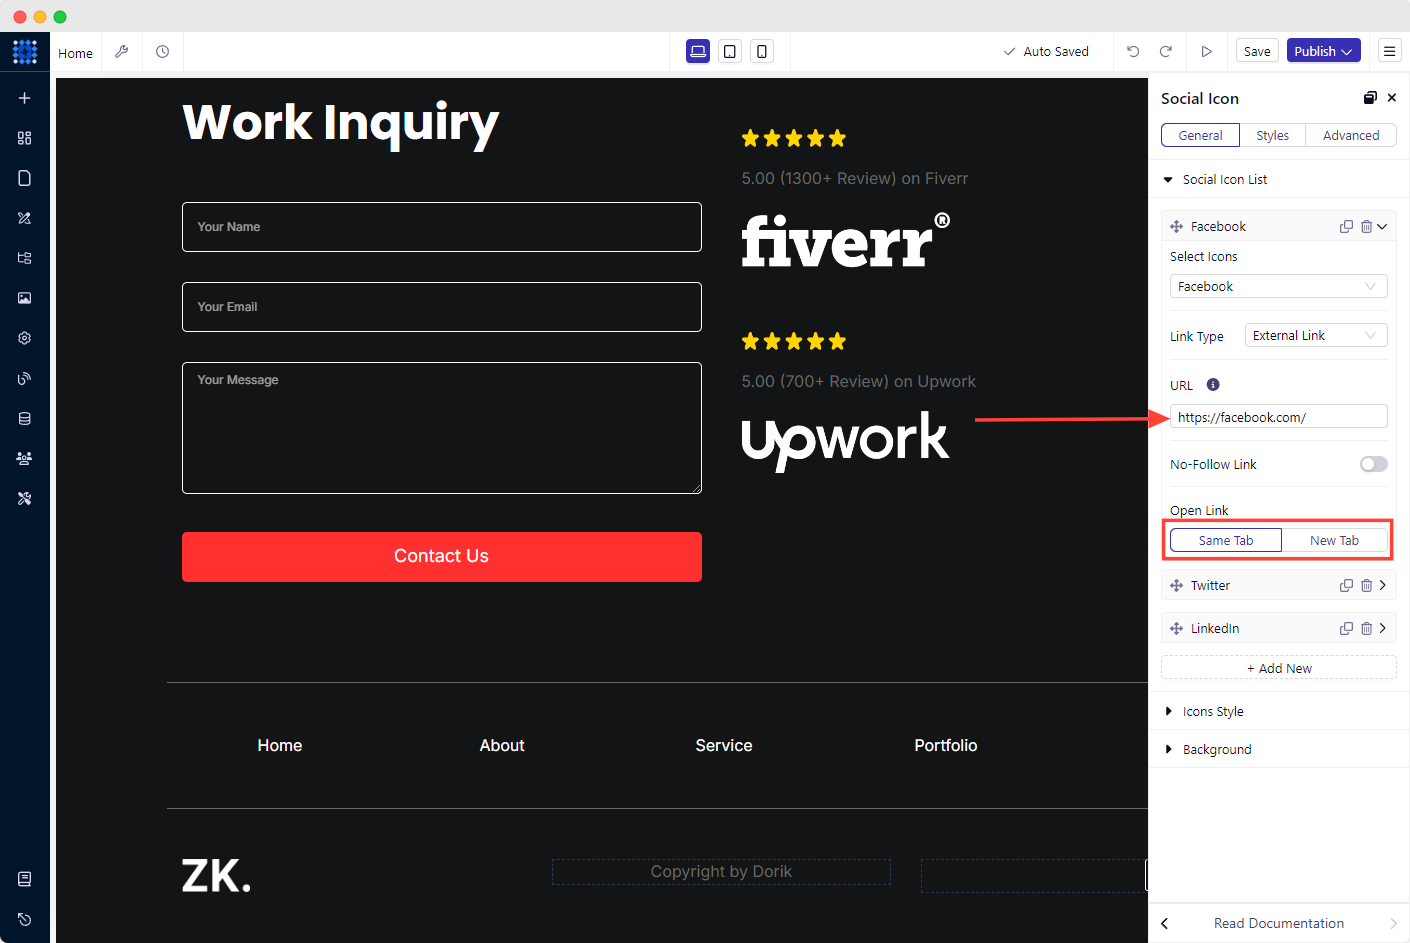
3. Finally, choose if you want the link to open in a new tab or in the same tab.
Do the same for the other social icons.
Suggestion for creating other pages
The way you have designed your homepage, you can add and customize as many pages as you need. For example, The About, Service, Contact, Portfolio, and Blog pages.
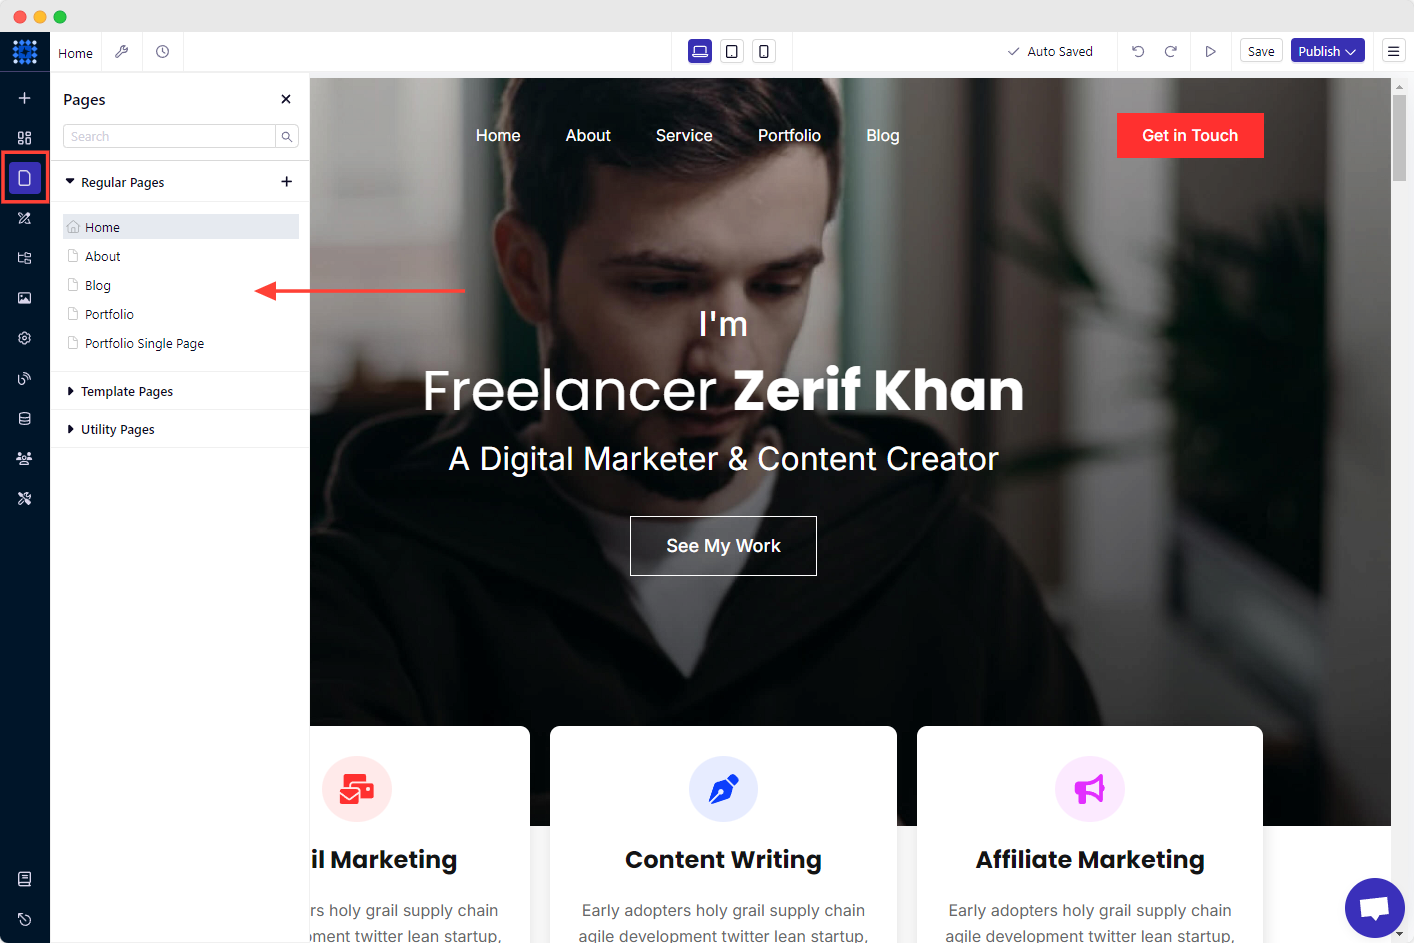
These are the basics of customizing a page. You can even add as many Elements, Sections, Rows, etc., as you need from the available options.
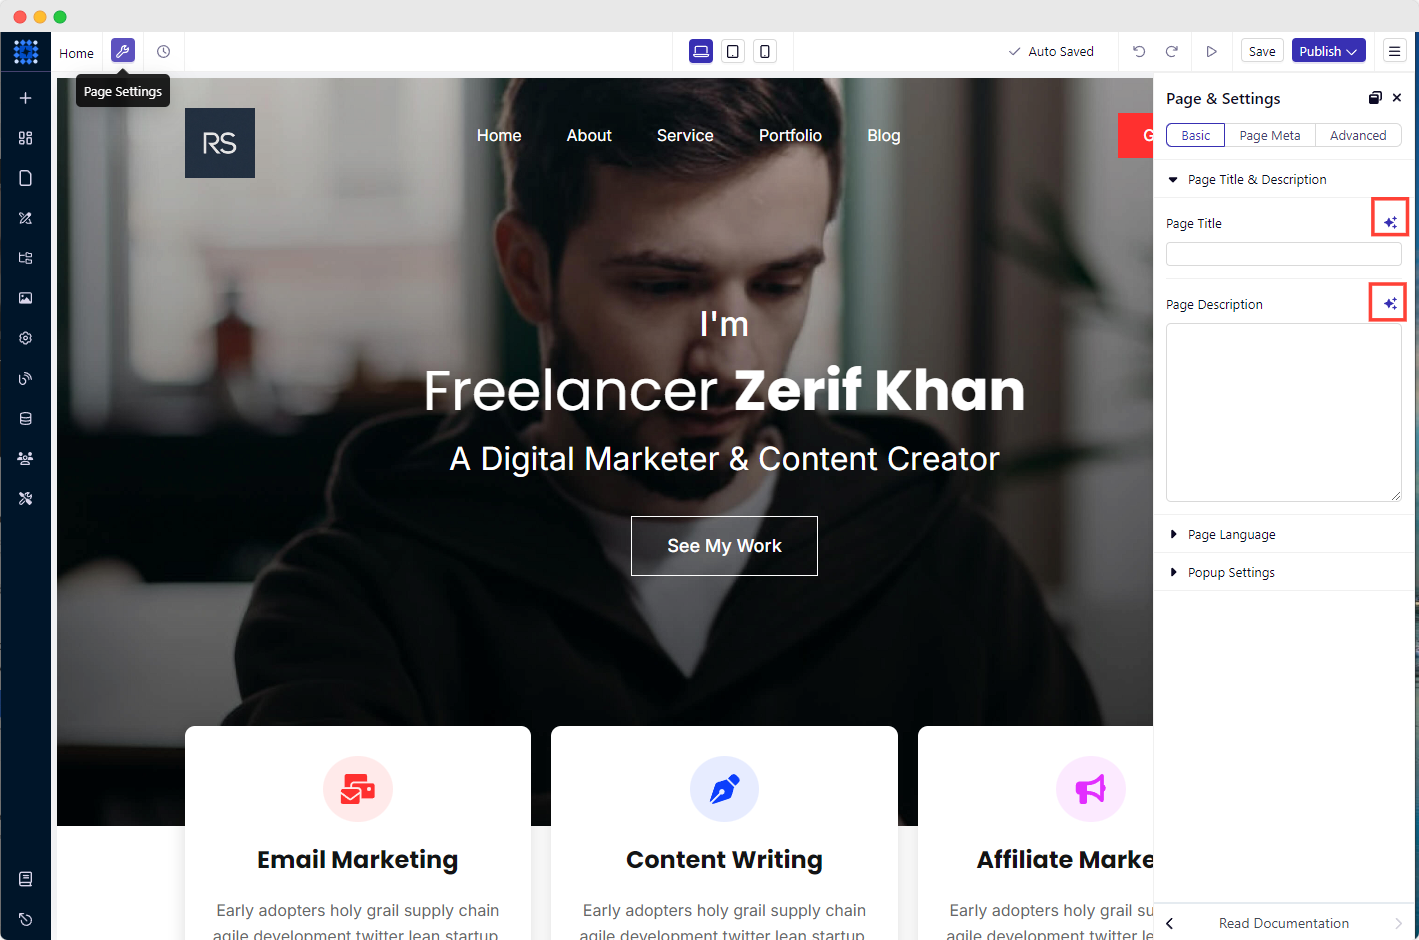
From the Page Settings option, you can include the page title, description, language, etc., under the BASIC settings.
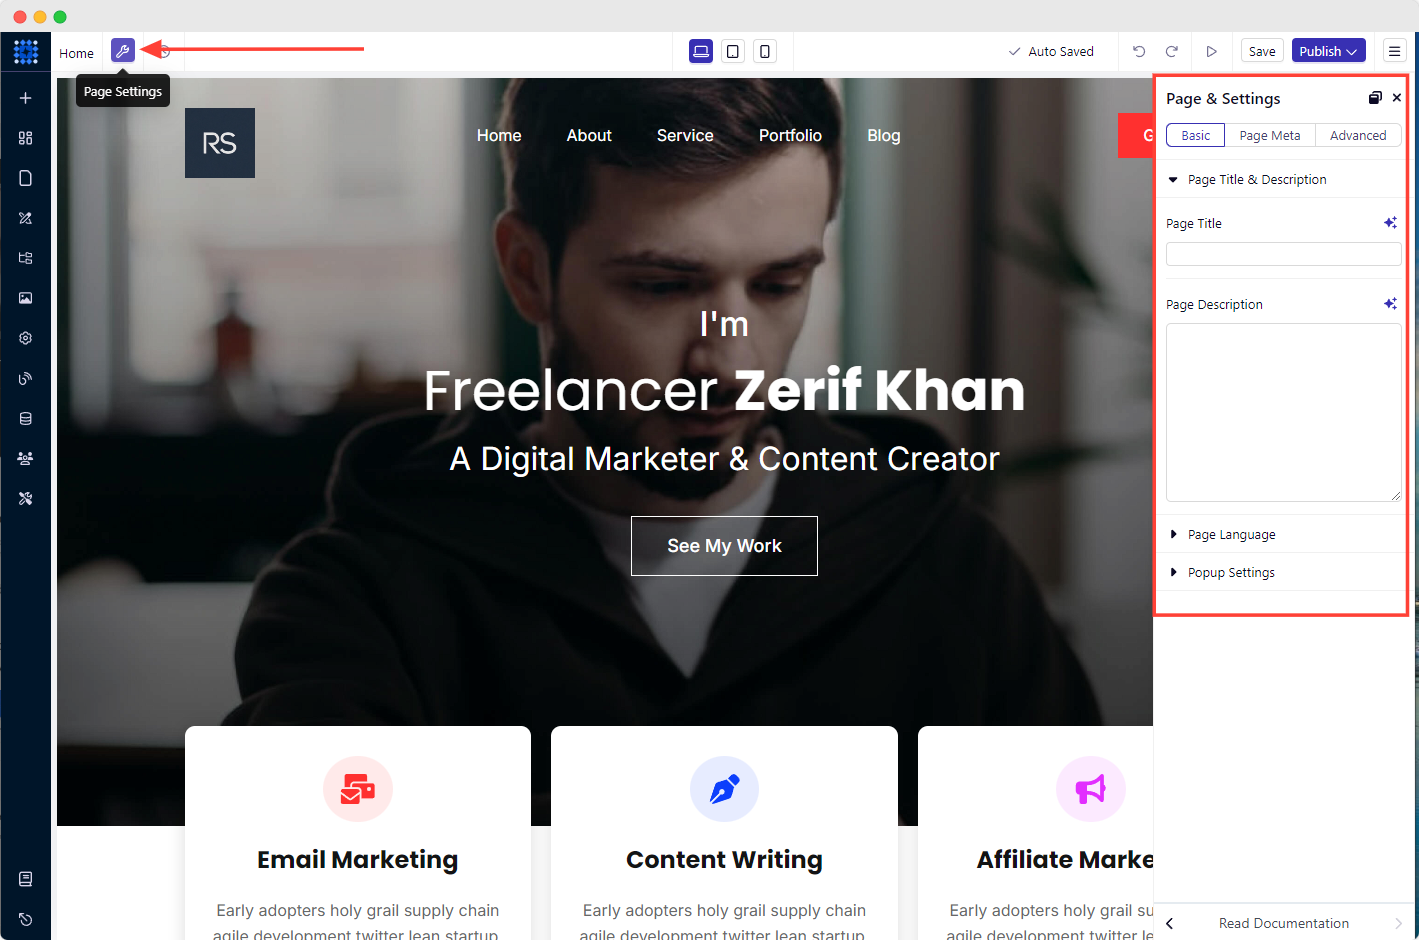
Similarly, you can explore PAGE META and ADVANCED features from the respective tabs.

Pro tip: Don't forget to utilize the AI assistant for writing and generating images.
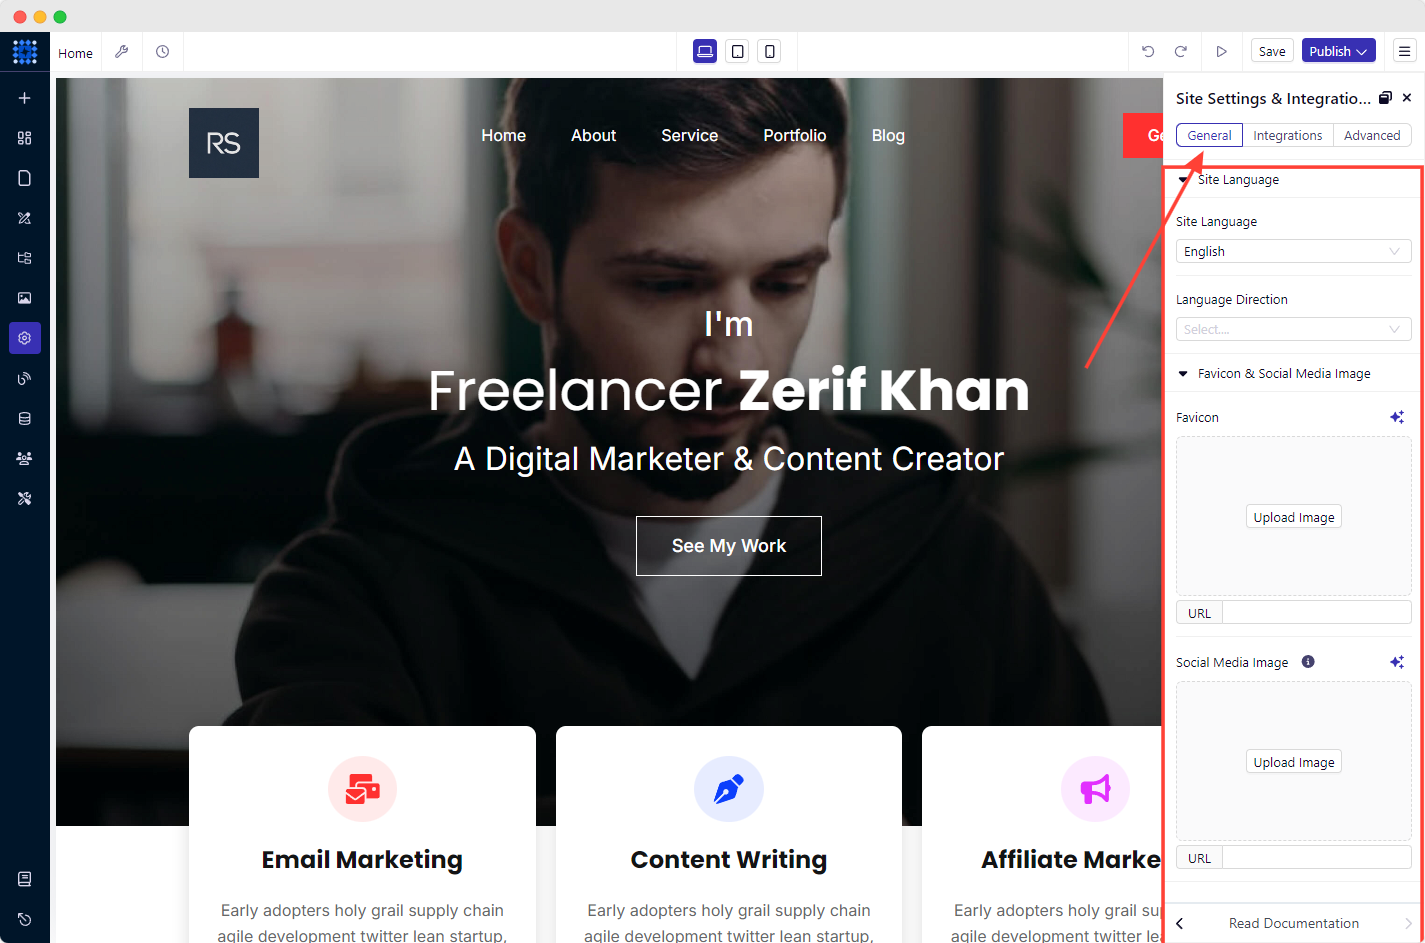
Step 5: Configure Site Settings And Integrations
Site settings and integrations hold a crucial part in your website’s performance. That’s why you should also pay attention to it.
1. Click the Site Settings icon from the left editing bar.
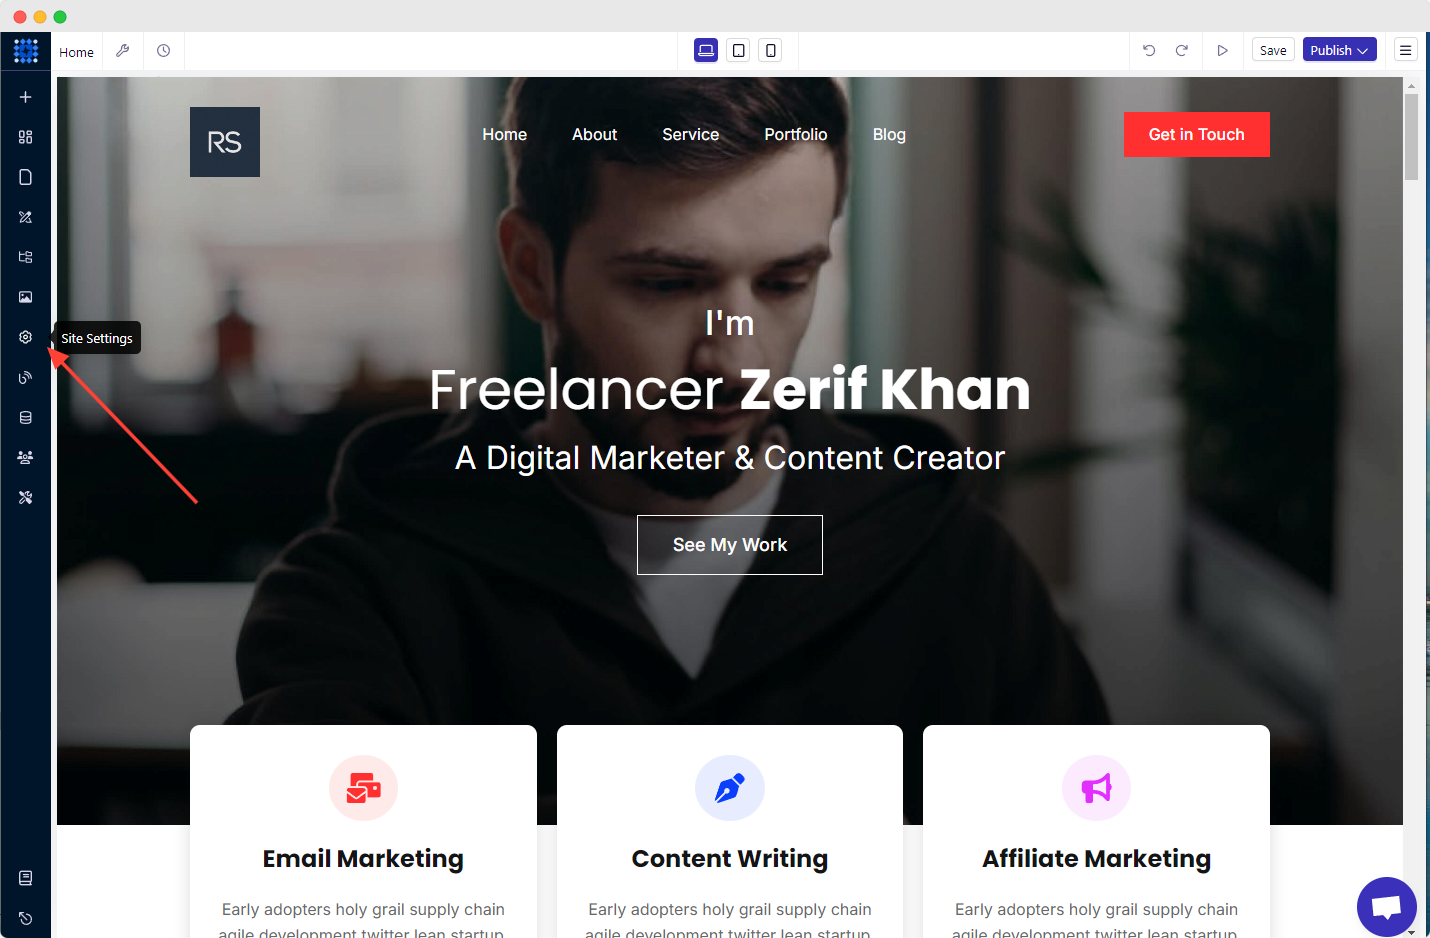
2. Select your preferred site language, favicon, and social media image under the General tab.
3. Then click on the Integrations tab.
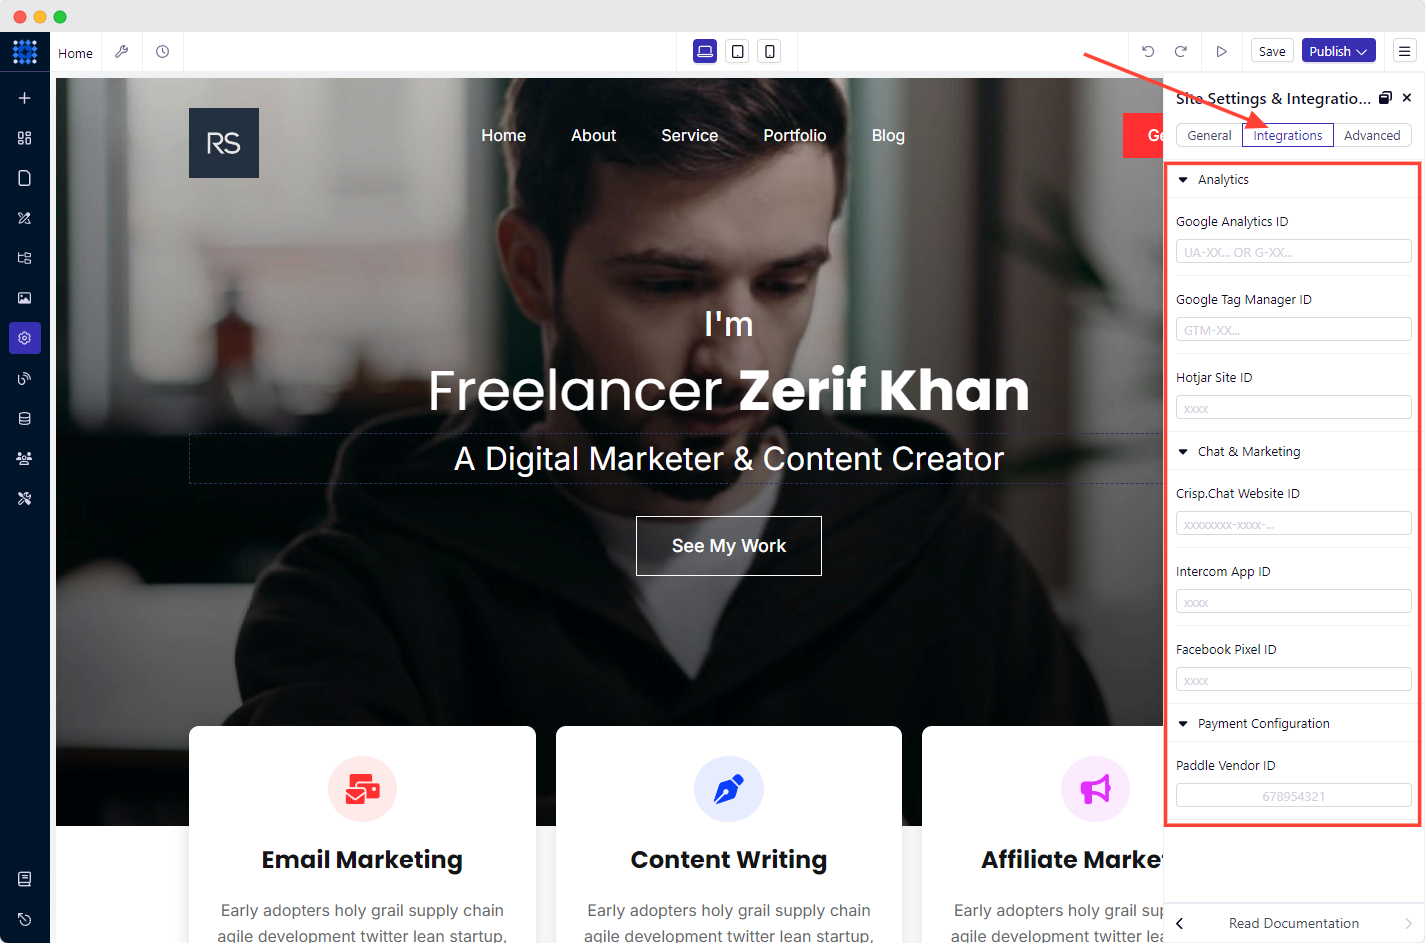
It will allow you to integrate Google Analytics and Google Tag Manager into your site. These user analytics tools let you track and monitor your website’s overall performance. You can even add live chat and payment methods if you require.
Moreover, you can submit your sitemap to Google Search Console from the Advanced tab. These are some of the features that have made Dorik the best for SEO.

Shortcut to submit sitemap to Google Search Console: Go to Site Settings→ Advanced→ Site Settings & SEO→ Copy Sitemap→ Submit to Google Search Console
Step 6: Test Your Website Before Going Live
Before launching your website, it must be tested to ensure everything is working correctly.
Here are some steps to test your website before going live:
Proofread: Go through all the content on your website and check for typos, grammar errors, and spelling mistakes.
Functionality: Check all links, buttons, forms, and interactive elements to ensure they function correctly.
Responsiveness: Test your website on different devices, including desktop, tablet, and mobile, to ensure it is responsive and displays correctly on all devices.
Speed: Test your website's loading speed using online tools like Google PageSpeed Insights to optimize your website's performance.
Security: Website security is crucial for your portfolio website. So, ensure your website hosting service is secure and protected against malware and viruses.
Compatibility: Check your website's compatibility with different browsers like Chrome, Firefox, Safari, and Internet Explorer.
Step 7: Publish Your Portfolio Website
It’s time to go live.
But before hitting the "Publish" button, you should preview your site by clicking on the "Arrowhead Icon."

Once you have checked everything, click on the Publish dropdown button at the top right corner of your screen and click "Publish."
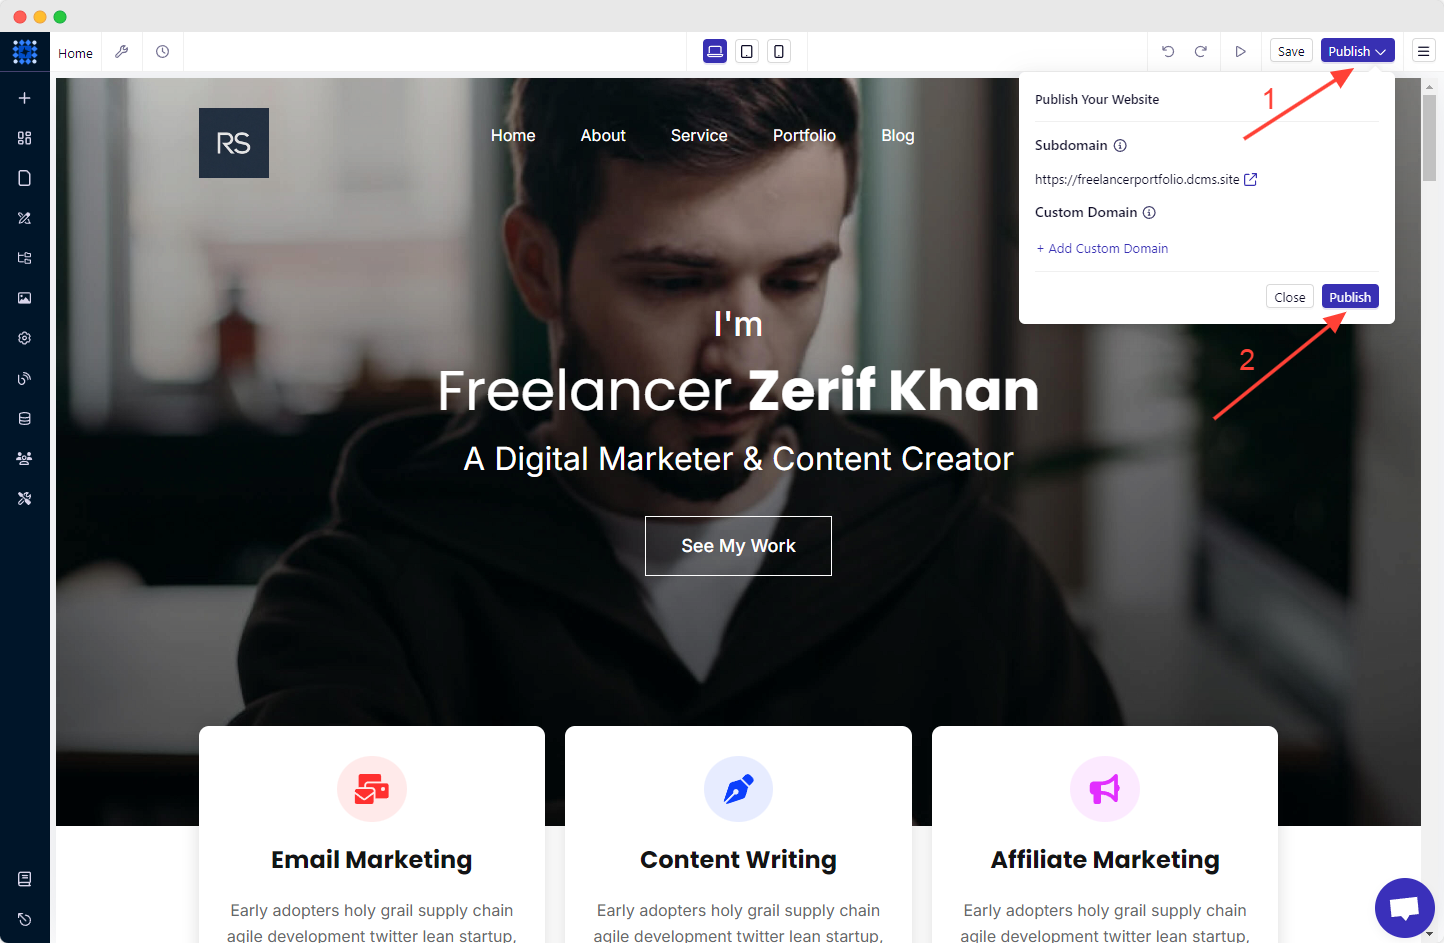
You can then view the live version of your website by clicking on the upward-facing arrow icon next to the website URL.

Congratulations! You have a stunning portfolio website published now.
Step 8: Promote Your Portfolio Site
Promoting a website is crucial for increasing its visibility and driving traffic.
Here we present some ways to make your website visible on google searches. Let's dive in!
Search Engine Optimization (SEO)
SEO is one of the most powerful methods to drive organic traffic to your website. SEO can improve your ranking in search engine result pages (SERPs).
To ensure your website is SEO-friendly, you should focus on keyword research, on-page optimization, off-page optimization, guest blogging, and link building.
Additionally, you should also focus on local SEO to stay ahead in your local market.
Content Marketing
Develop top-notch content that resonates with your target audience. It will drive more traffic to your portfolio website and establish your personal brand as an authority in your industry.
You can incorporate blog posts, infographics, podcasts, videos, and more.
Email Marketing
Email marketing is another powerful tactic to promote your website and stay in touch with your audience. By building an email list, you can send targeted messages to your subscribers and drive traffic to your website.
However, you can utilize email marketing automation software to mange your data.
Submit your site to online directories
Submitting your website to online directories can help you get more exposure and improve your search engine rankings.
Make sure to choose reputable directories that are relevant to your niche. This can also help you build backlinks to your website, which can further improve your SEO.
Social Media Marketing
Social media is a crucial tool for promoting your website.
By leveraging social media platforms like Facebook, Twitter, and Instagram, you can reach a wider audience, build relationships with your followers, and share content that resonates with the target market.
Hence, you can take it as a part of your marketing strategy.
Paid Marketing
Paid marketing, such as Google Ads or Facebook Ads, can help you quickly drive targeted traffic to your website.
While it requires an investment, it can effectively promote your website and attract new visitors.
Step 9: Maintain and Upgrade Your Website
Once your website is live, you must keep it updated and secure. Regular website maintenance can save you from any inconveniences.
So, confirm that everything is up-to-date.
These upgrades will keep your website relevant and help you stay ahead of your competition.
The Must-Have Sections of Your Portfolio Website

As a beginner, you might not know what essential sections a professional portfolio website requires. So, here we go.
A Captivating Home Page
Your website's homepage is one of the first things your visitors see. Make it count by adopting an eye-catching design that will pique their interest. Plus, always remember homepage copy or text is also important. So, pay attention to them too.
A homepage should be engaging and informative, so your visitors will want to visit the rest of the site.
Make sure everything is easy to find by using Menu systems. Therefore, create a winning home page for your website.
A Strong Call To Action (CTA) Button on Your Homepage
There is no doubt that a CTA (call to action) is a fundamental element of any website. Its purpose is to capture the user's attention and then prompt them to take some sort of action.
An About Section- Details About Yourself
The About page of a portfolio website is a vital segment of your online presence. It should be full of detail about you and your work.
You should provide information about your education, experience, achievements, interest, and skills.
A Service Section- Your Offered Services
Your service section should be easy to find and navigate. It must present clear and concise information about what you offer and how to get in touch.
A Portfolio Section- Containing Your Best Work
Tell me, why do you want to create a portfolio website? If I am not wrong, the reason is; it gives you the window to exhibit all of your fantastic work.
So, add relevant information about your work. Include images, videos, and other multimedia content to draw attention.
Write concisely but effectively so that potential clients can understand what you can do for them.
Testimonials- What People Say About You
Just think about yourself. What do you do before buying an online product? Most probably, you try to find it out on the internet.
Then you start reading what other people are saying after using that product. If you find positive reviews, you place the order.
The same strategy goes here. The testimonials part can be a valuable addition to help promote and sell your services or products. It helps to build trust and credibility with the to-be potential clients.
A Contact Information Section
Suppose you are highly convinced with a freelancer’s portfolio and want to hire him/her for your project. You can not find a way to connect to that person. Isn’t it disappointing? Of course, it is a loss for both parties.
If you do not want to repeat the same scenario with others, always add a Contact section on your website. Do not forget to mention your name, email ID, and phone number.
A Blog Section
The blog is not a mandatory part of your website. If you do not have enough time to write, you can just skip it.
But it is one of the best ways to display your thoughts and ideas. You can easily express your depth of knowledge by starting a blog.
If you regularly publish blogs, your website will get organic traffic. More traffic, more chances of being hired!
Inspiring Portfolio Website Examples
Here, I am presenting some examples of personal websites so that you can develop a better understanding. Let's see them!
1. Studio Bagaz
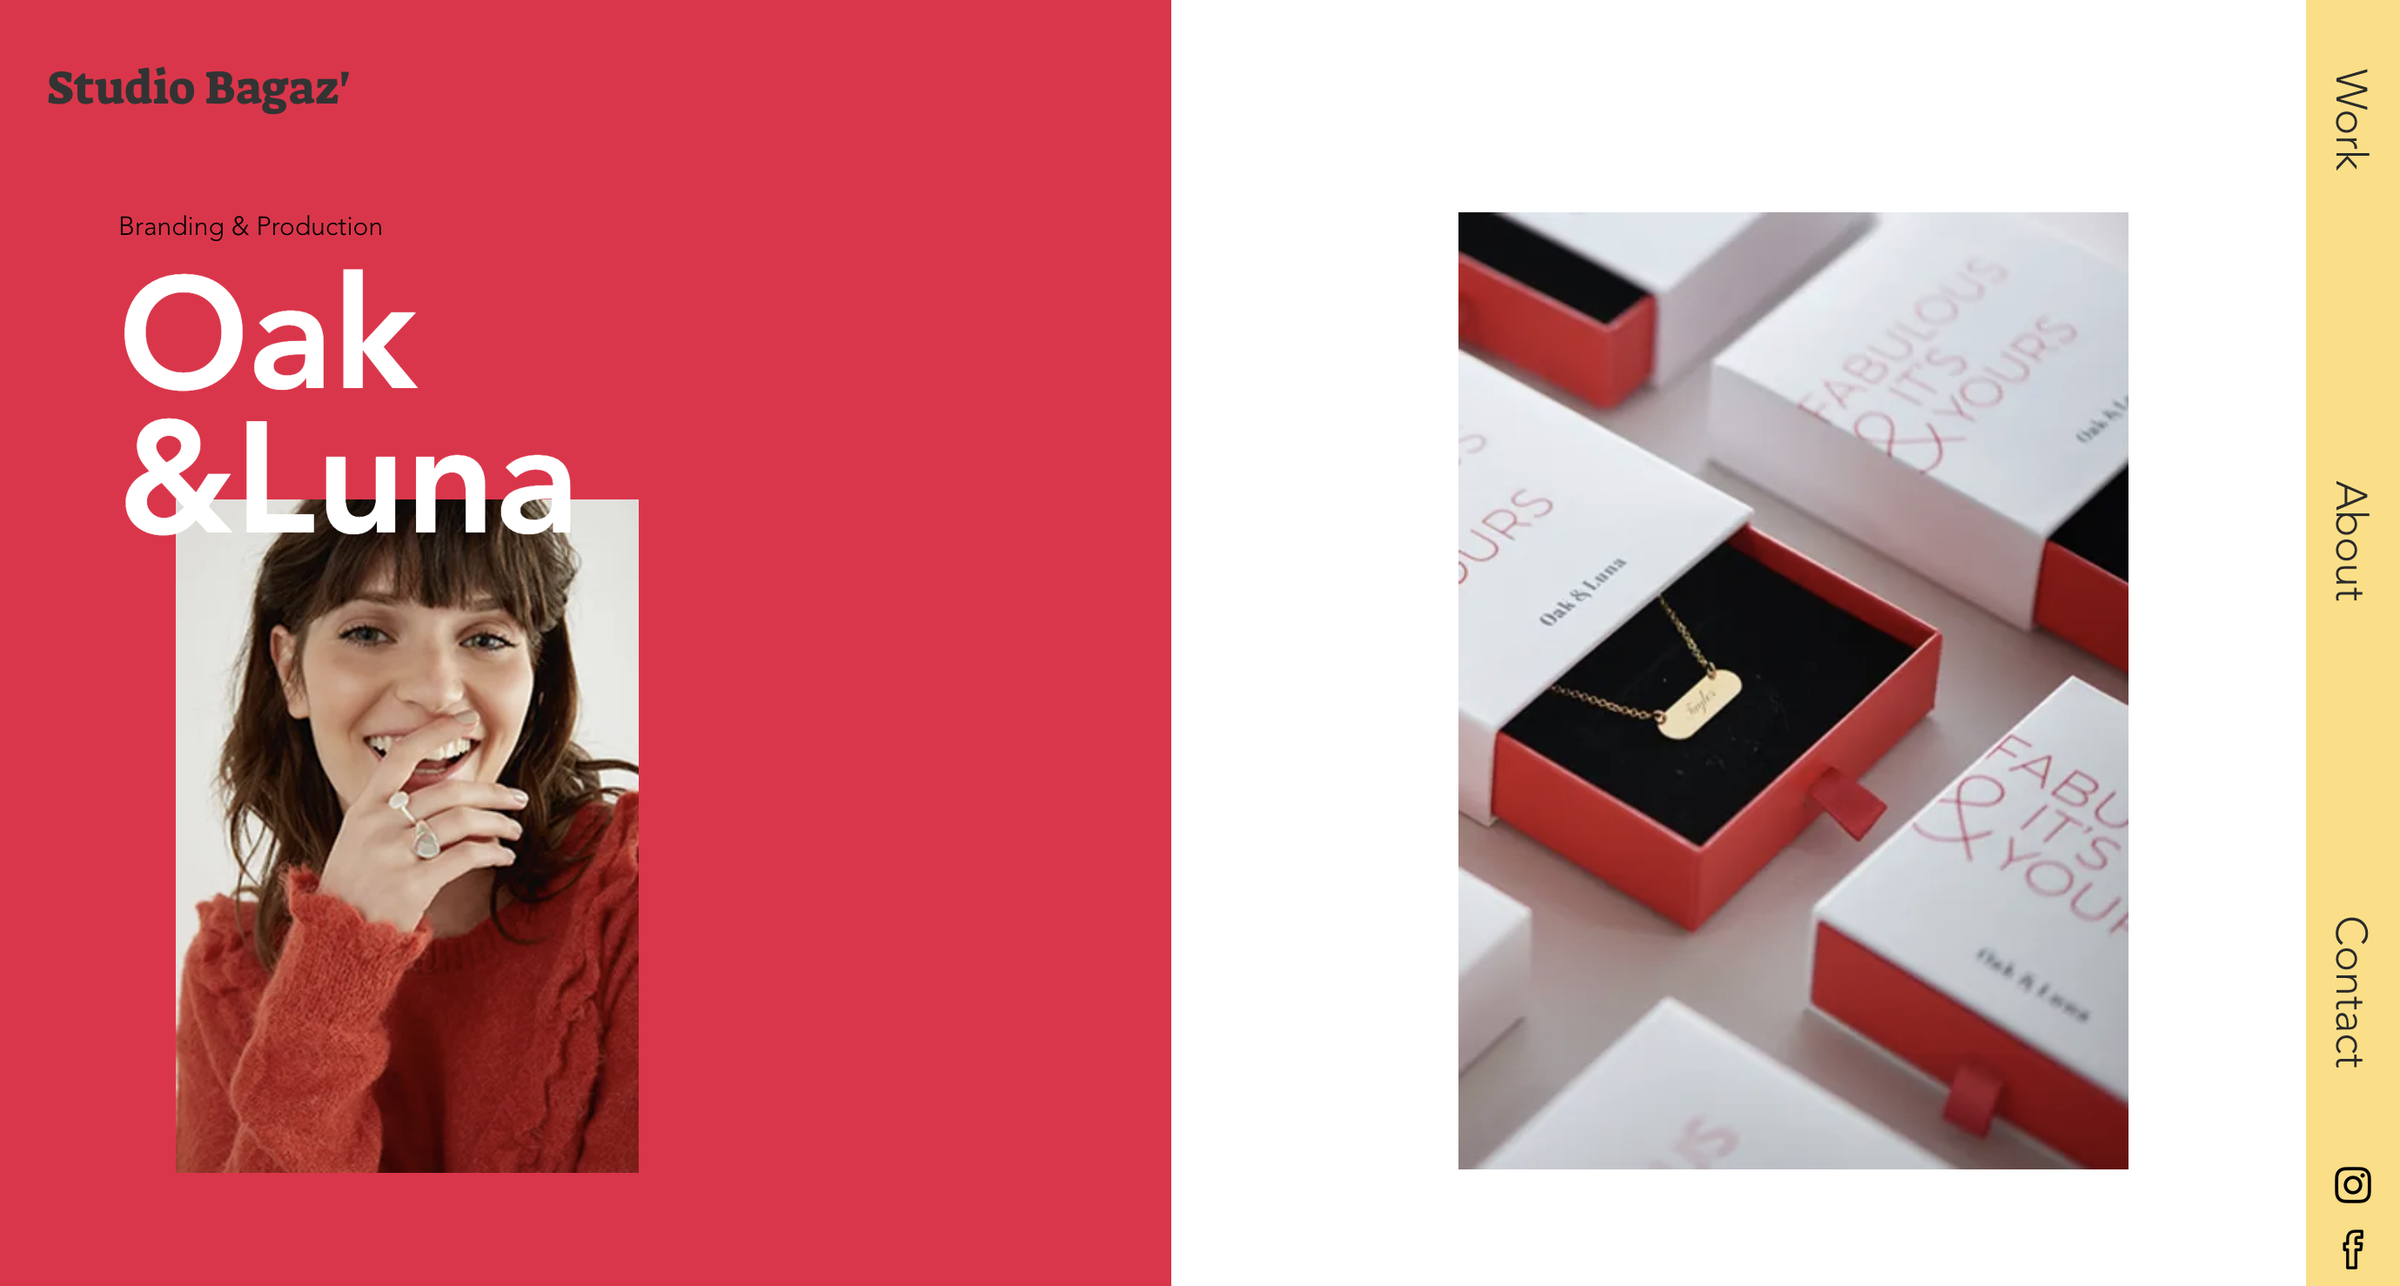
Want to create an appealing, pleasant, professional portfolio website that stands out? The Studio Bagaz graphics design studio portfolio page can be your best inspiration.
The homepage showcases their work in a colorful background. Visitors can get a glimpse of Bagaz's branding & production, app, set design, and visual identity by scrolling down. The website has an organized structure that you can easily swift between pages by clicking the visual blocks on the side menu bar.
2. Muazzim
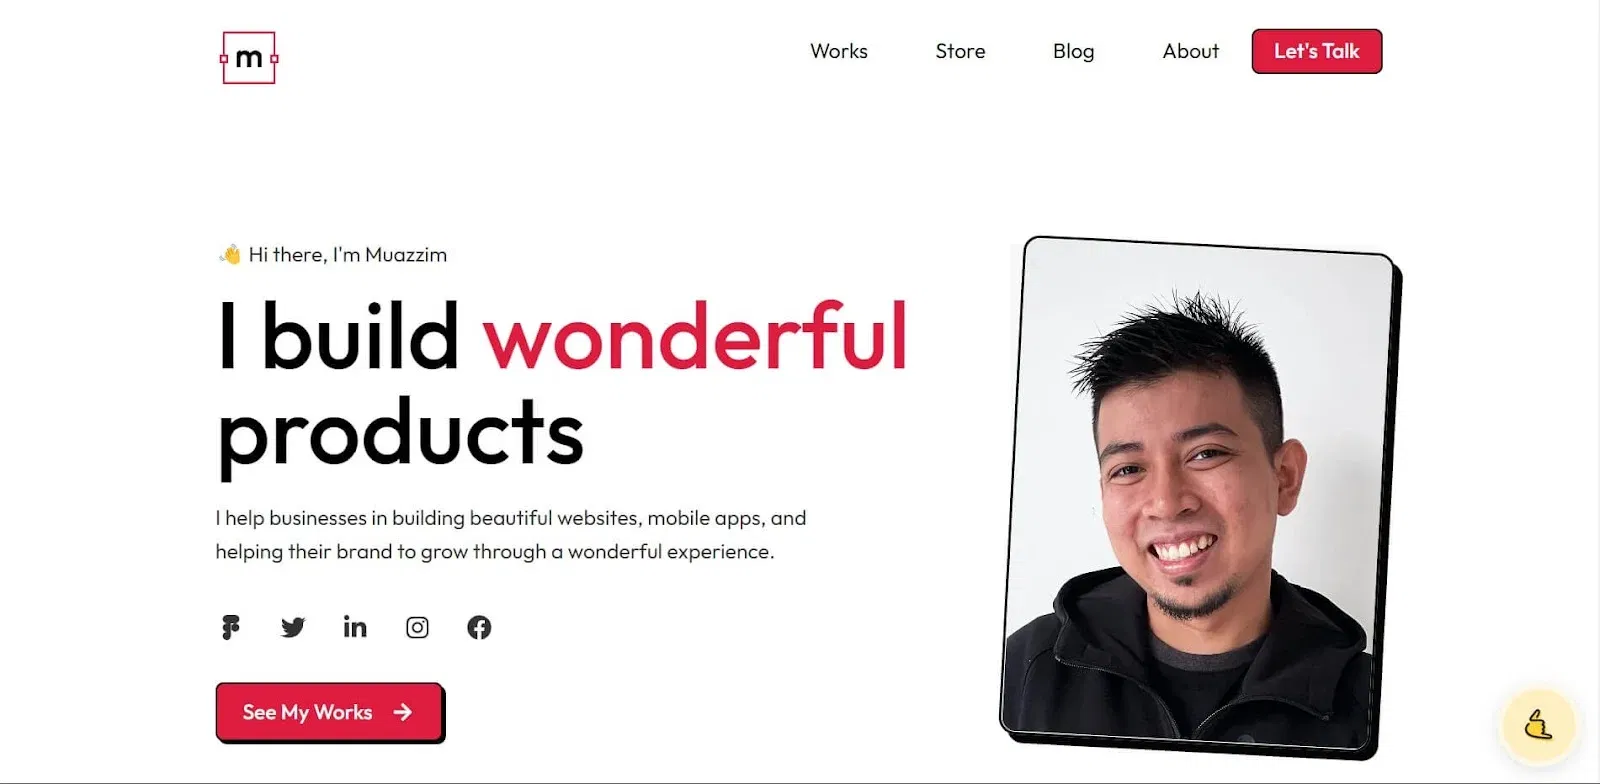
This fabulous website has impressive features that anyone can apply to their websites. The hovered system and the structure are amazingly organized.
Muazzim showcased his talents and works on this website very well. He also added some blogs to help his clients understand him before hiring.
He also added a store button where clients can easily purchase the services. If you find this relatable to your criterion, feel free to adopt the features from Dorik.
3. Roger Federer
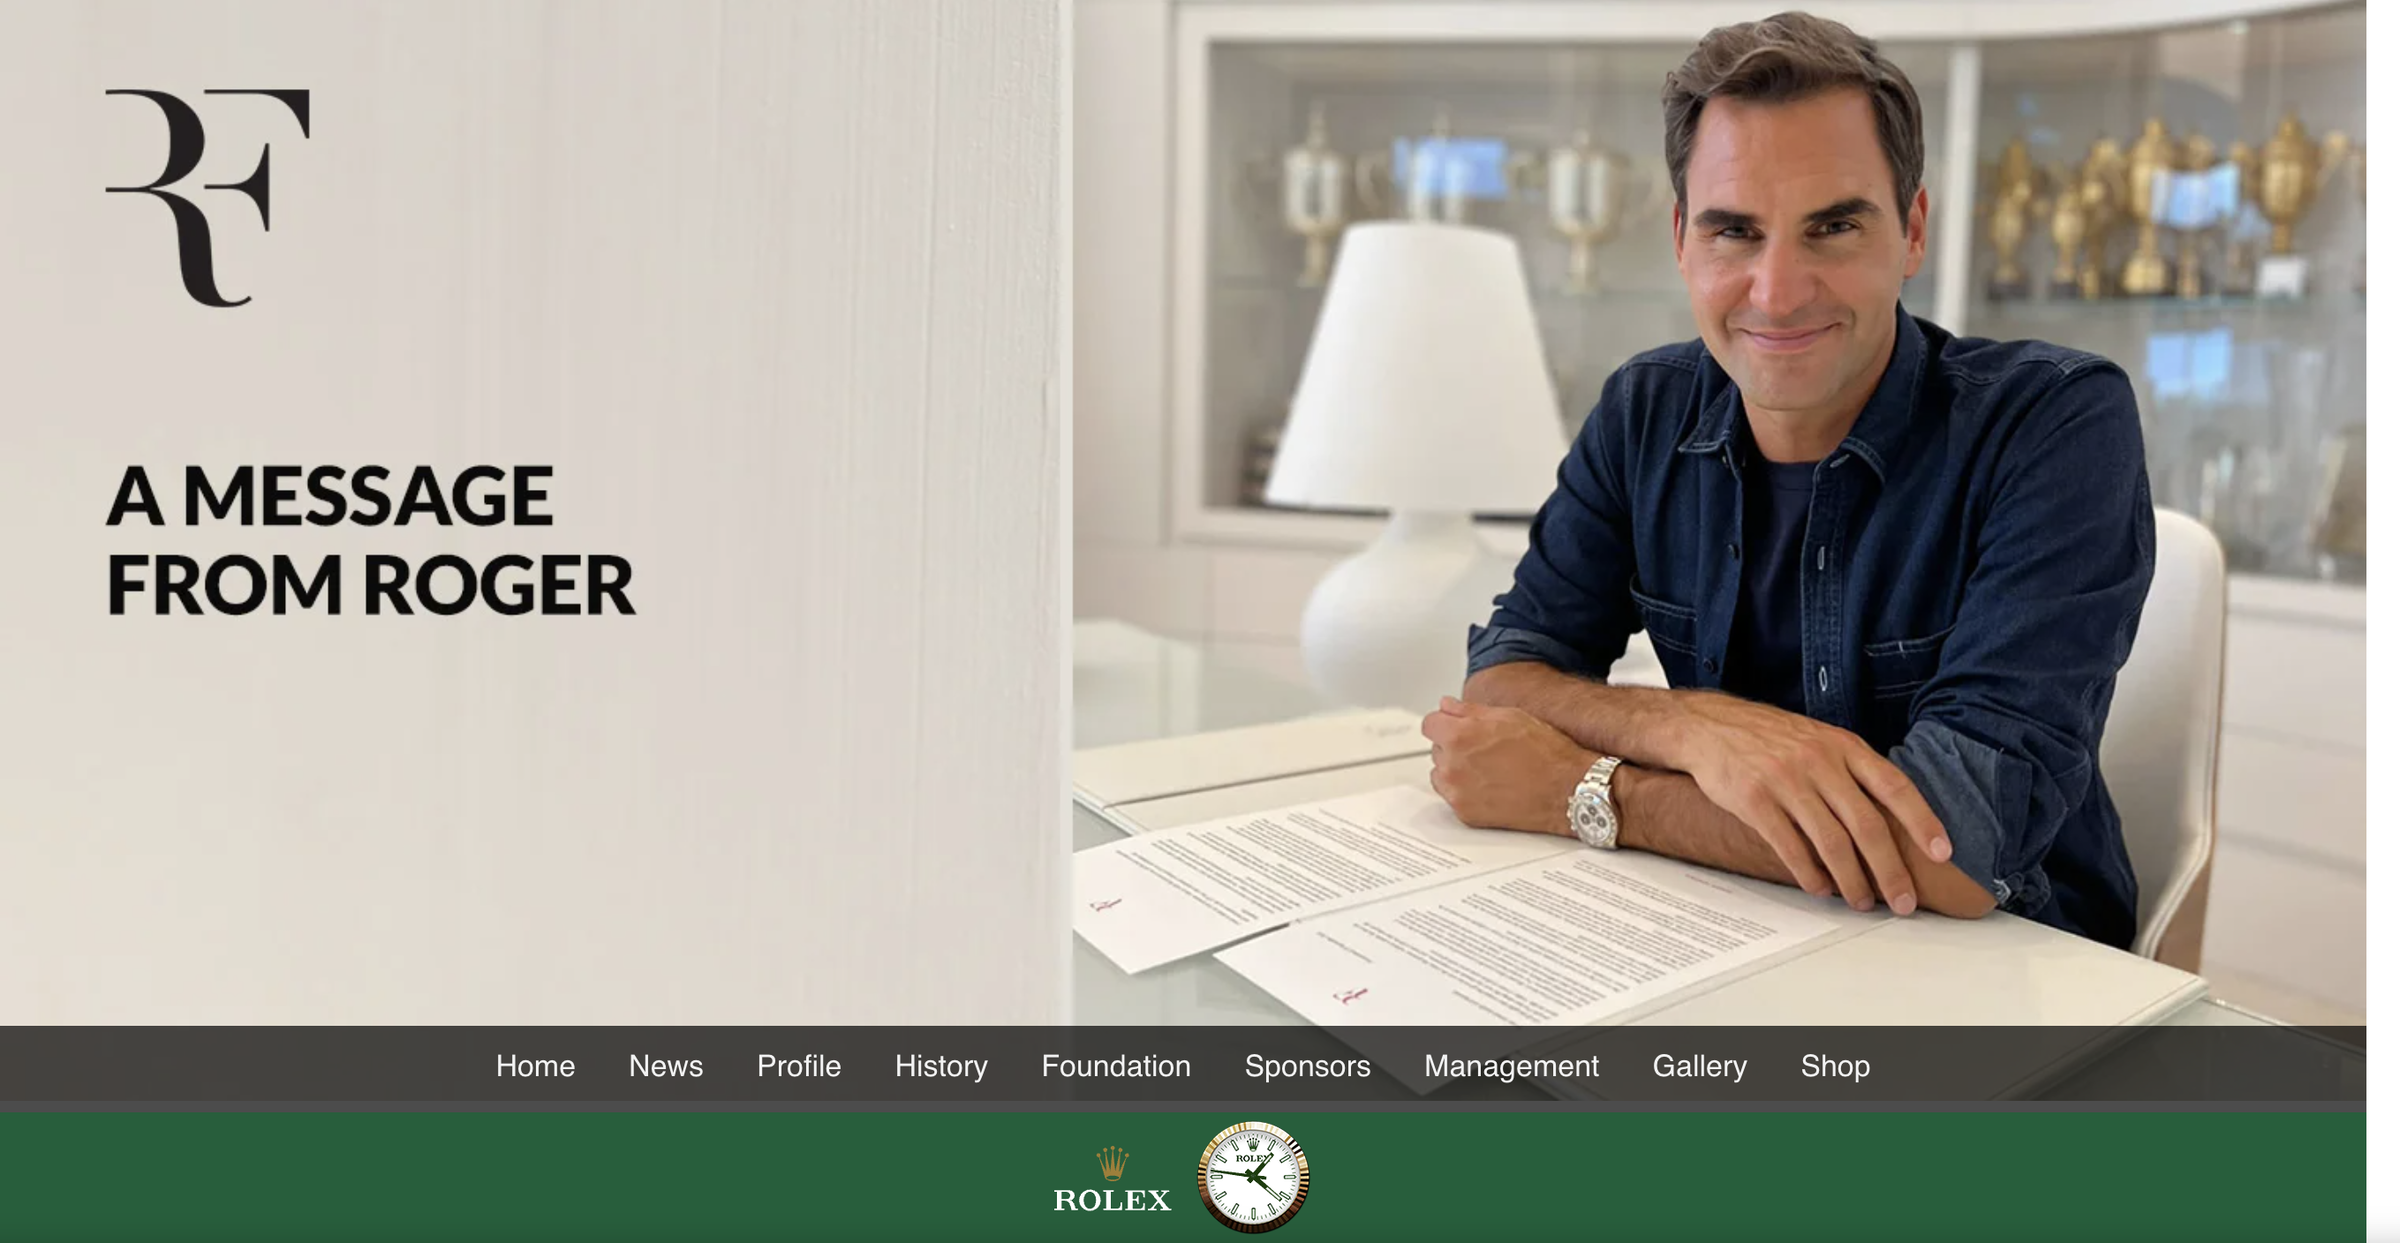
Roger Federer's official site presents a clean, sophisticated design that highlights his career achievements and personal brand.
On his website, he added his biography, career highlights, news updates, and media section, along with links to his social media accounts and charitable foundation.
Is it worth making a portfolio website?
Of course, you should have your portfolio site to grab the world’s attention. You need a website because it is one of the unique ways to manifest your skills, experience, personality, etc.
What are the technical challenges involved in creating and maintaining a portfolio website?
Following are the most faced technical challenges of creating and maintaining a portfolio website:
-
Choosing a Platform: Deciding on the best platform or framework that suits your needs without overwhelming you technically can be difficult.
-
Optimizing Performance: Ensuring your site loads quickly and performs well across different devices and internet speeds requires careful optimization, such as compressing images and minifying code.
-
Updating Content: Regularly adding new projects and keeping content updated is essential but can be time-consuming, especially if the platform isn’t user-friendly.
-
Securing Data: Protecting your site from security threats, implementing SSL certificates, and ensuring safe data handling are critical tasks requiring technical expertise.
-
Integrating Features: Adding and maintaining features like contact forms, social media links, or e-commerce capabilities can introduce technical complexities that need careful management.
-
Learning New Skills: Building and maintaining a portfolio often involves learning new technologies or skills, such as coding in new languages or understanding SEO, which can be challenging and time-consuming.
As you might have already guessed, Dorik makes these challanges a kid's job with is intuitive and powerful features.
You can learn how to create a website with dorik literally in less than 30 minutes. It has all the required integration features, and its built-in SEO tool and unlimited free CDN hosting are designed for performance. Also, Dorik offers free SSL certificates to keep your data secure, all within an unbeatable price point.
What are the benefits of a portfolio website?
Some benefits of a portfolio website are:
-
Showcases Your Skills in Detail: Provides a platform to highlight your best work and offers in-depth examples and case studies.
-
Boosts Online Presence: Increases your visibility and makes it easier for potential employers and clients to find you.
-
Acts as a Business Card: Serves as a professional touchpoint for future clients and employers, similar to a digital business card.
-
Reflects Your Personality and Creativity: You can express your style and creativity through design and content.
-
Strengthens Your Brand: Helps you build and maintain a consistent, recognizable brand online.
-
Exhibit Professionalism: Demonstrates your commitment to quality and professionalism through a polished, well-maintained portfolio.
-
Enhances Communication: A picture is worth a thousand words—visuals effectively showcase your work and make a lasting impression.
-
Adds a Personal Touch: Personalizes your professional profile, making you more relatable and engaging to your audience.
Should you use your name on the portfolio website?
Yes, you should certainly use your name on your portfolio website. It will build trust. For example, if you have a modeling portfolio website, you must mention your name. The same will go with all other types of portfolios. Additionally, exploring effective portfolio website examples can provide valuable insights and inspiration to stand out in your field.
How many pages should my portfolio website carry?
Truly speaking, there is no exact number. You can create as many pages as you need. But do not jam-pack your website with irrelevant pages.
Final Verdict
We hope you have your portfolio website by this time. Share your site’s link as much as you can to get a massive response.
Keep your portfolio website simple but attractive. Avoid overloading it with too many graphics, pages, elements, etc. It may dramatically decrease your site’s loading speed and performance.
Work on your site’s SEO also for better output.
If you have any queries regarding how to build a portfolio website, please leave us a comment. We will respond as soon as possible with the best solution.
You'll get your portfolio website in minutes with Dorik. So, let's try it!
Good Reads:
