

You don’t need coding skills or weeks of trial and error to launch a professional website. With the right tools and a clear plan, you can publish your first website today in just a few focused hours.
This guide shows you exactly how to do it step by step. Whether you're starting a personal blog, small business site, or digital portfolio, you’ll learn how to:
-
Choose the right website builder
-
Pick and connect a domain name
-
Customize your design
-
Add essential pages and content
-
Optimize for SEO
-
Hit “Publish”—same day
-
Promote & maintain your site
Let’s get started.
TL;DR:
-
Build a professional website in hours using no-code builders like Dorik, even without technical experience
-
Dorik offers fastest launch with AI-powered site generation, unlimited storage, and multi-site hosting for $39/month
-
Follow 7 core steps: choose builder, create pages with AI, optimize for SEO, connect domain, and publish same-day
-
Drive traffic immediately through email lists, social media, and small paid campaigns starting at $5/day
This guide delivers exactly what it promises - a complete roadmap for launching a professional website today, with specific tool recommendations, cost comparisons, and actionable promotion strategies for immediate results.
Step 1: Decide Your Website Type and Goals
Before picking templates or adding content, clarify why you're building a site and who it’s for.
Ask yourself:
-
What’s the primary goal? (e.g., sell products, get leads, build an audience)
-
Who’s your target user? (e.g., freelancers, parents, small business owners)
-
What type of site do you need? (e.g., one-page site, online store, portfolio, membership)
Quick example: A yoga instructor creating a booking site will need a different layout and tools than a startup showcasing SaaS features.
Whether you're a photographer looking to showcase your work, a restaurant owner wanting to attract more diners, or a teacher planning to create an educational hub – we have you covered with step-by-step instructions tailored to your field.
Here's our collection of comprehensive website-building guides:
Set a Measurable Goal
Set one clear, measurable launch goal to keep your build focused.
Examples:
-
“Launch with 3 service pages and a working contact form today.”
-
“Publish with 1 product collection, 10 items, and Stripe checkout by tonight.”
These goals should be specific, measurable, achievable, relevant, and time-bound (SMART).
Stay realistic. You can add more later.
Step 2: Choose Your Website Builder (And Build Today)
To create a website today, start by picking a builder that fits your needs and experience level. If you're new to web design or just want to move fast, website builders offer a clear path forward; no coding required.
Here’s a quick comparison of four popular platforms for launching a business or personal site:
| Features | Dorik (Business) | Wix (Business) | Squarespace (Business) | Webflow (Business) |
| Monthly Cost | $39 | $39 | $23 | $39 |
| Custom Sites Included | 3 | 1 | 1 | 1 |
| Annual Cost (3 Sites) | $468 | $1,404 | $828 | $1,404 |
| Storage | Unlimited | 100 GB | Unlimited | 100 GB |
| Bandwidth | Unlimited | Unlimited | Unlimited | 100 GB |
| Static Pages | Unlimited | 100 | 1,000 | 300 |
| Blog Posts | Unlimited | Unlimited | Unlimited | 10,000 via CMS |
| CMS Collections | Unlimited | 1,000 | Not specified | 40 |
| CMS Items | Unlimited | 20,000 | Not specified | 10,000 |
| Collaborators | 10 | 10 | Unlimited | 10 |
| White Label CMS | ✅ Available | ❌ Not available | ❌ Not available | ❌ Not available |
| Subscribers | 10,000 | Not specified | Paid add-on required | Paid add-on required |
Because Dorik delivers the fastest launch, lowest multi-site cost, and an AI toolset that eliminates code, we’ll use Dorik for the build that follows.
Why Dorik Speeds Up Same-Day Website Launches
-
Creative Freedom: Access 100+ templates, 250+ UI blocks, and 20+ elements to shape any layout.
-
AI-Powered Site Builder: Generate a full website, specific sections, images, or copy with a simple text prompt, then fine-tune or regenerate any section as needed.
-
Membership & Payments: Integrate Stripe, PayPal, Gumroad, or Paddle to monetize content or sell products.
-
Rock-Solid Hosting: Unlimited storage & bandwidth on AWS & DigitalOcean, plus a free global CDN for fast load times.
-
Built-in SEO Tools: Manage meta titles, descriptions, schema, and auto-sitemaps without extra plugins.
-
40+ Integrations: Connect email marketing, analytics, CRMs, and more with one click.
-
SSL & Security: Free SSL certificates, regular backups, and robust data protection out of the box.
-
Support & Docs: 24/7 live chat with an extensive documentation and video tutorial library to troubleshoot instantly.
-
Cost-Effective Multi-Site Plans: Host three custom sites for the price competitors charge for one.
-
Risk-Free Trial: 14-day free trial plus a 14-day money-back guarantee; no credit card required.
Step 3: Build Your Site in Dorik (Follow Along in a Second Tab)
Plan Your Site Structure (Offline)
-
List Required Pages – Home, About, Contact, plus any service or product pages.
-
Sketch a Simple Map – Aim for three-click access to every page. Use pen-and-paper or a free online mind-map.
Tip: Keep menus to 5-7 items; plan secondary links at the footer for a cleaner top bar.
Sign Up & Start a New Site
1. Log in or sign up at Dorik.com (14-day free trial).
2. On your Dashboard → Sites, click Create New Site with AI.
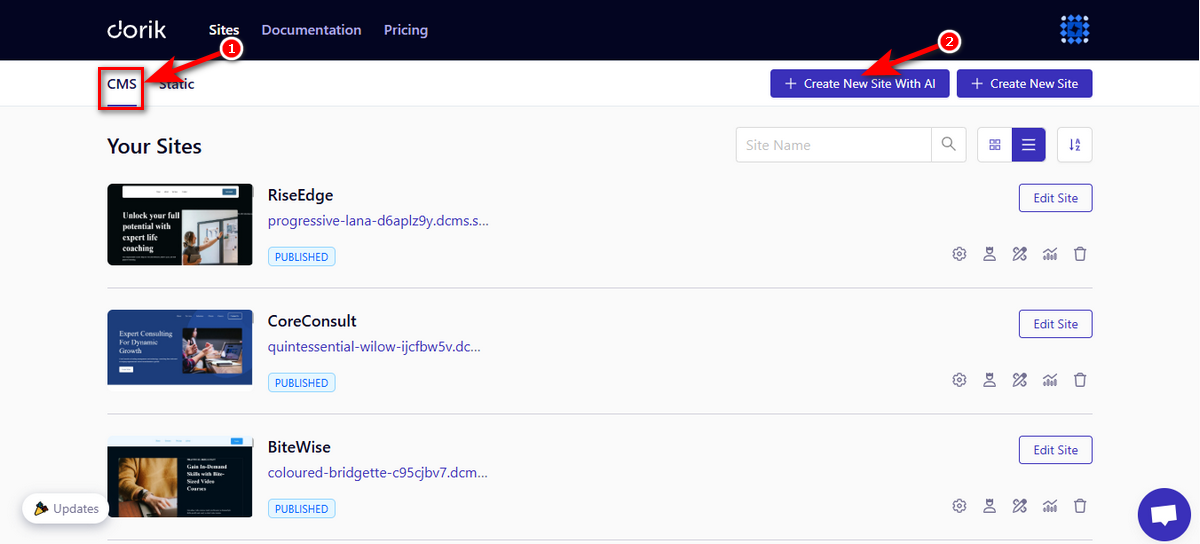
3. In the prompt window:
-
Site name – what you’ll see in your dashboard.
-
Detailed prompt – describe niche, brand colors, pages, and tone.
-
Language – pick from the dropdown.

Note: The clearer the prompt, the more accurate the build. Follow the example prompts for inspiration.
4. Hit Generate Your Website and wait a few seconds while Dorik AI assembles pages, images, and copy.
5. Review the result. Need tweaks? Click Regenerate Page or Regenerate Section until it matches your vision.
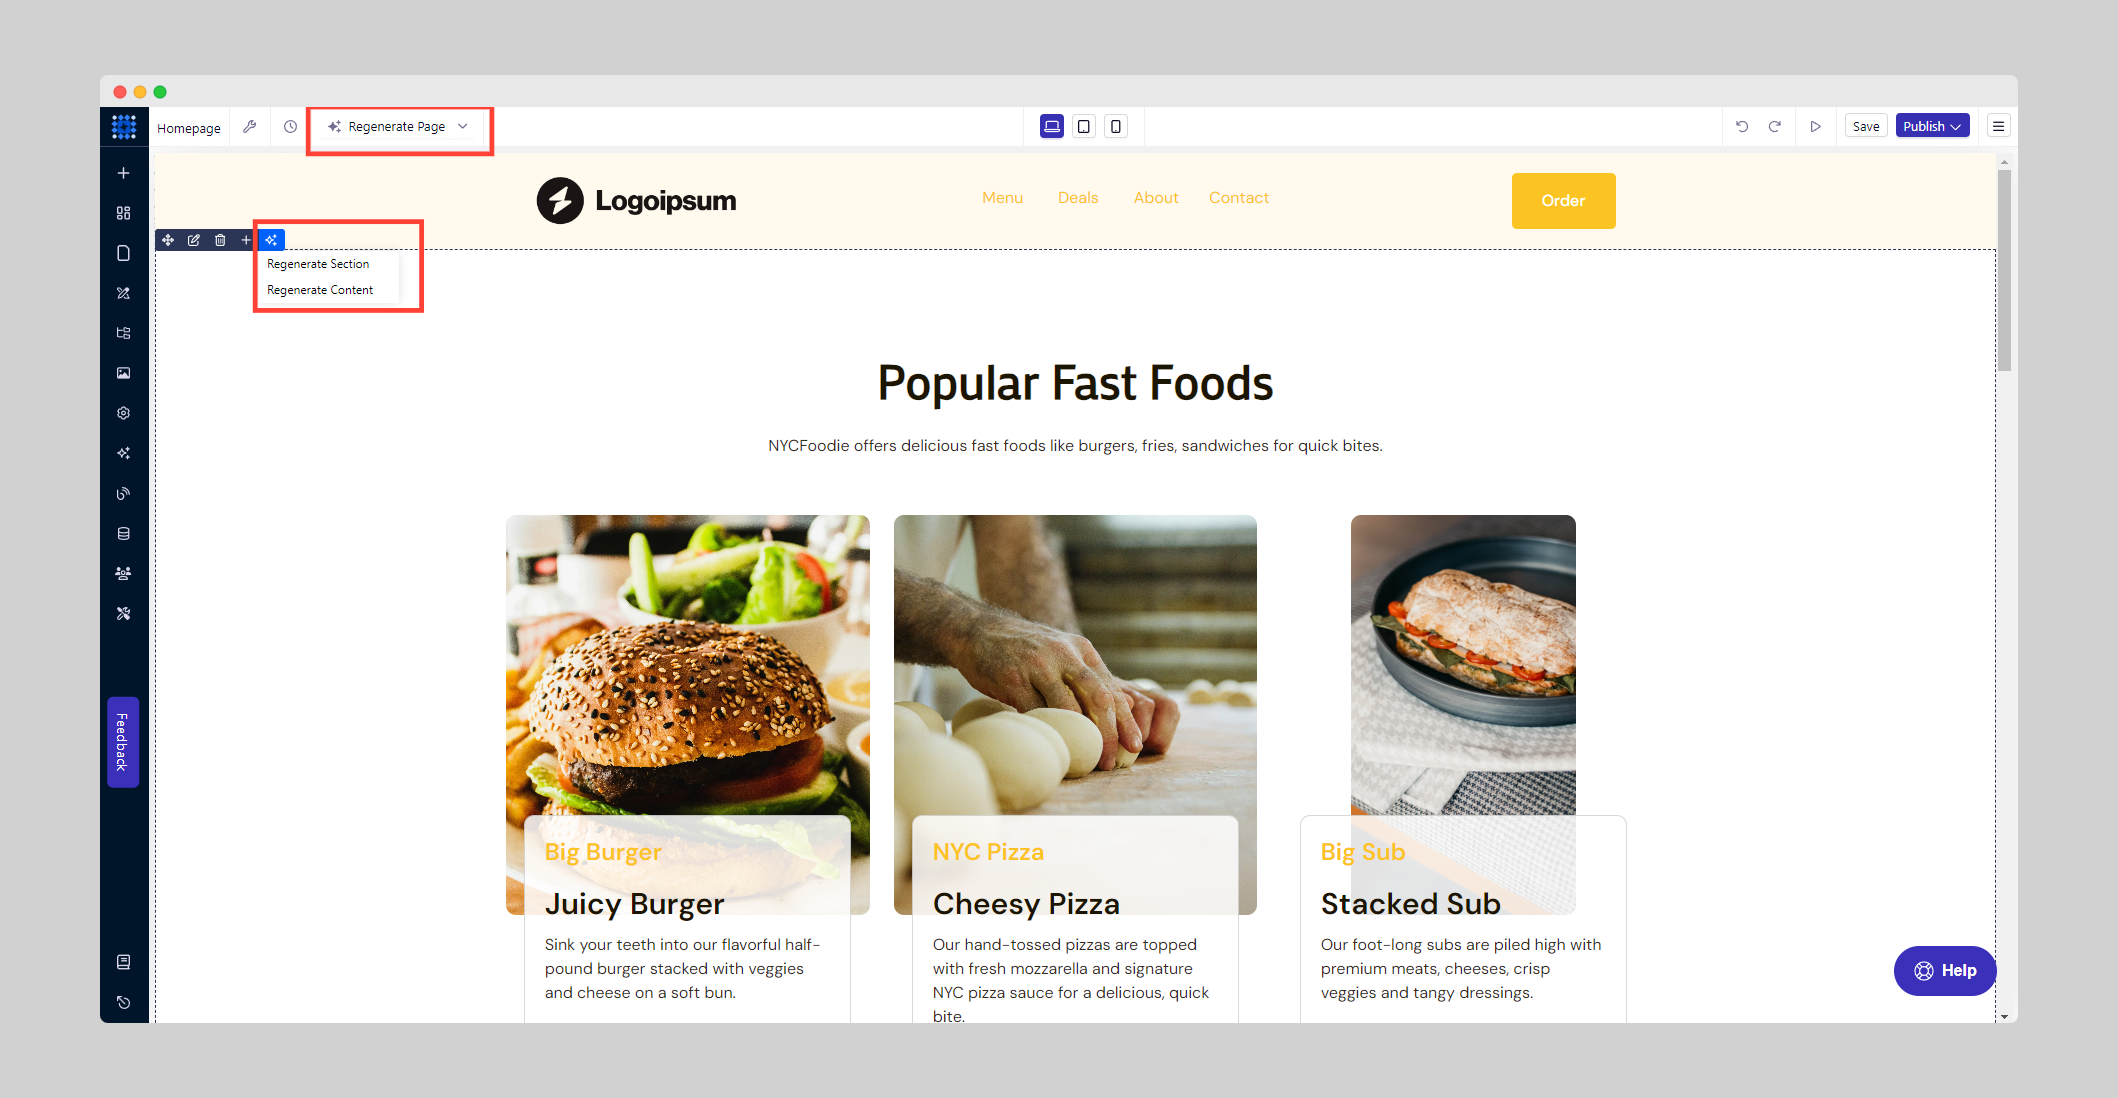
Here’s a website I created while writing this article:
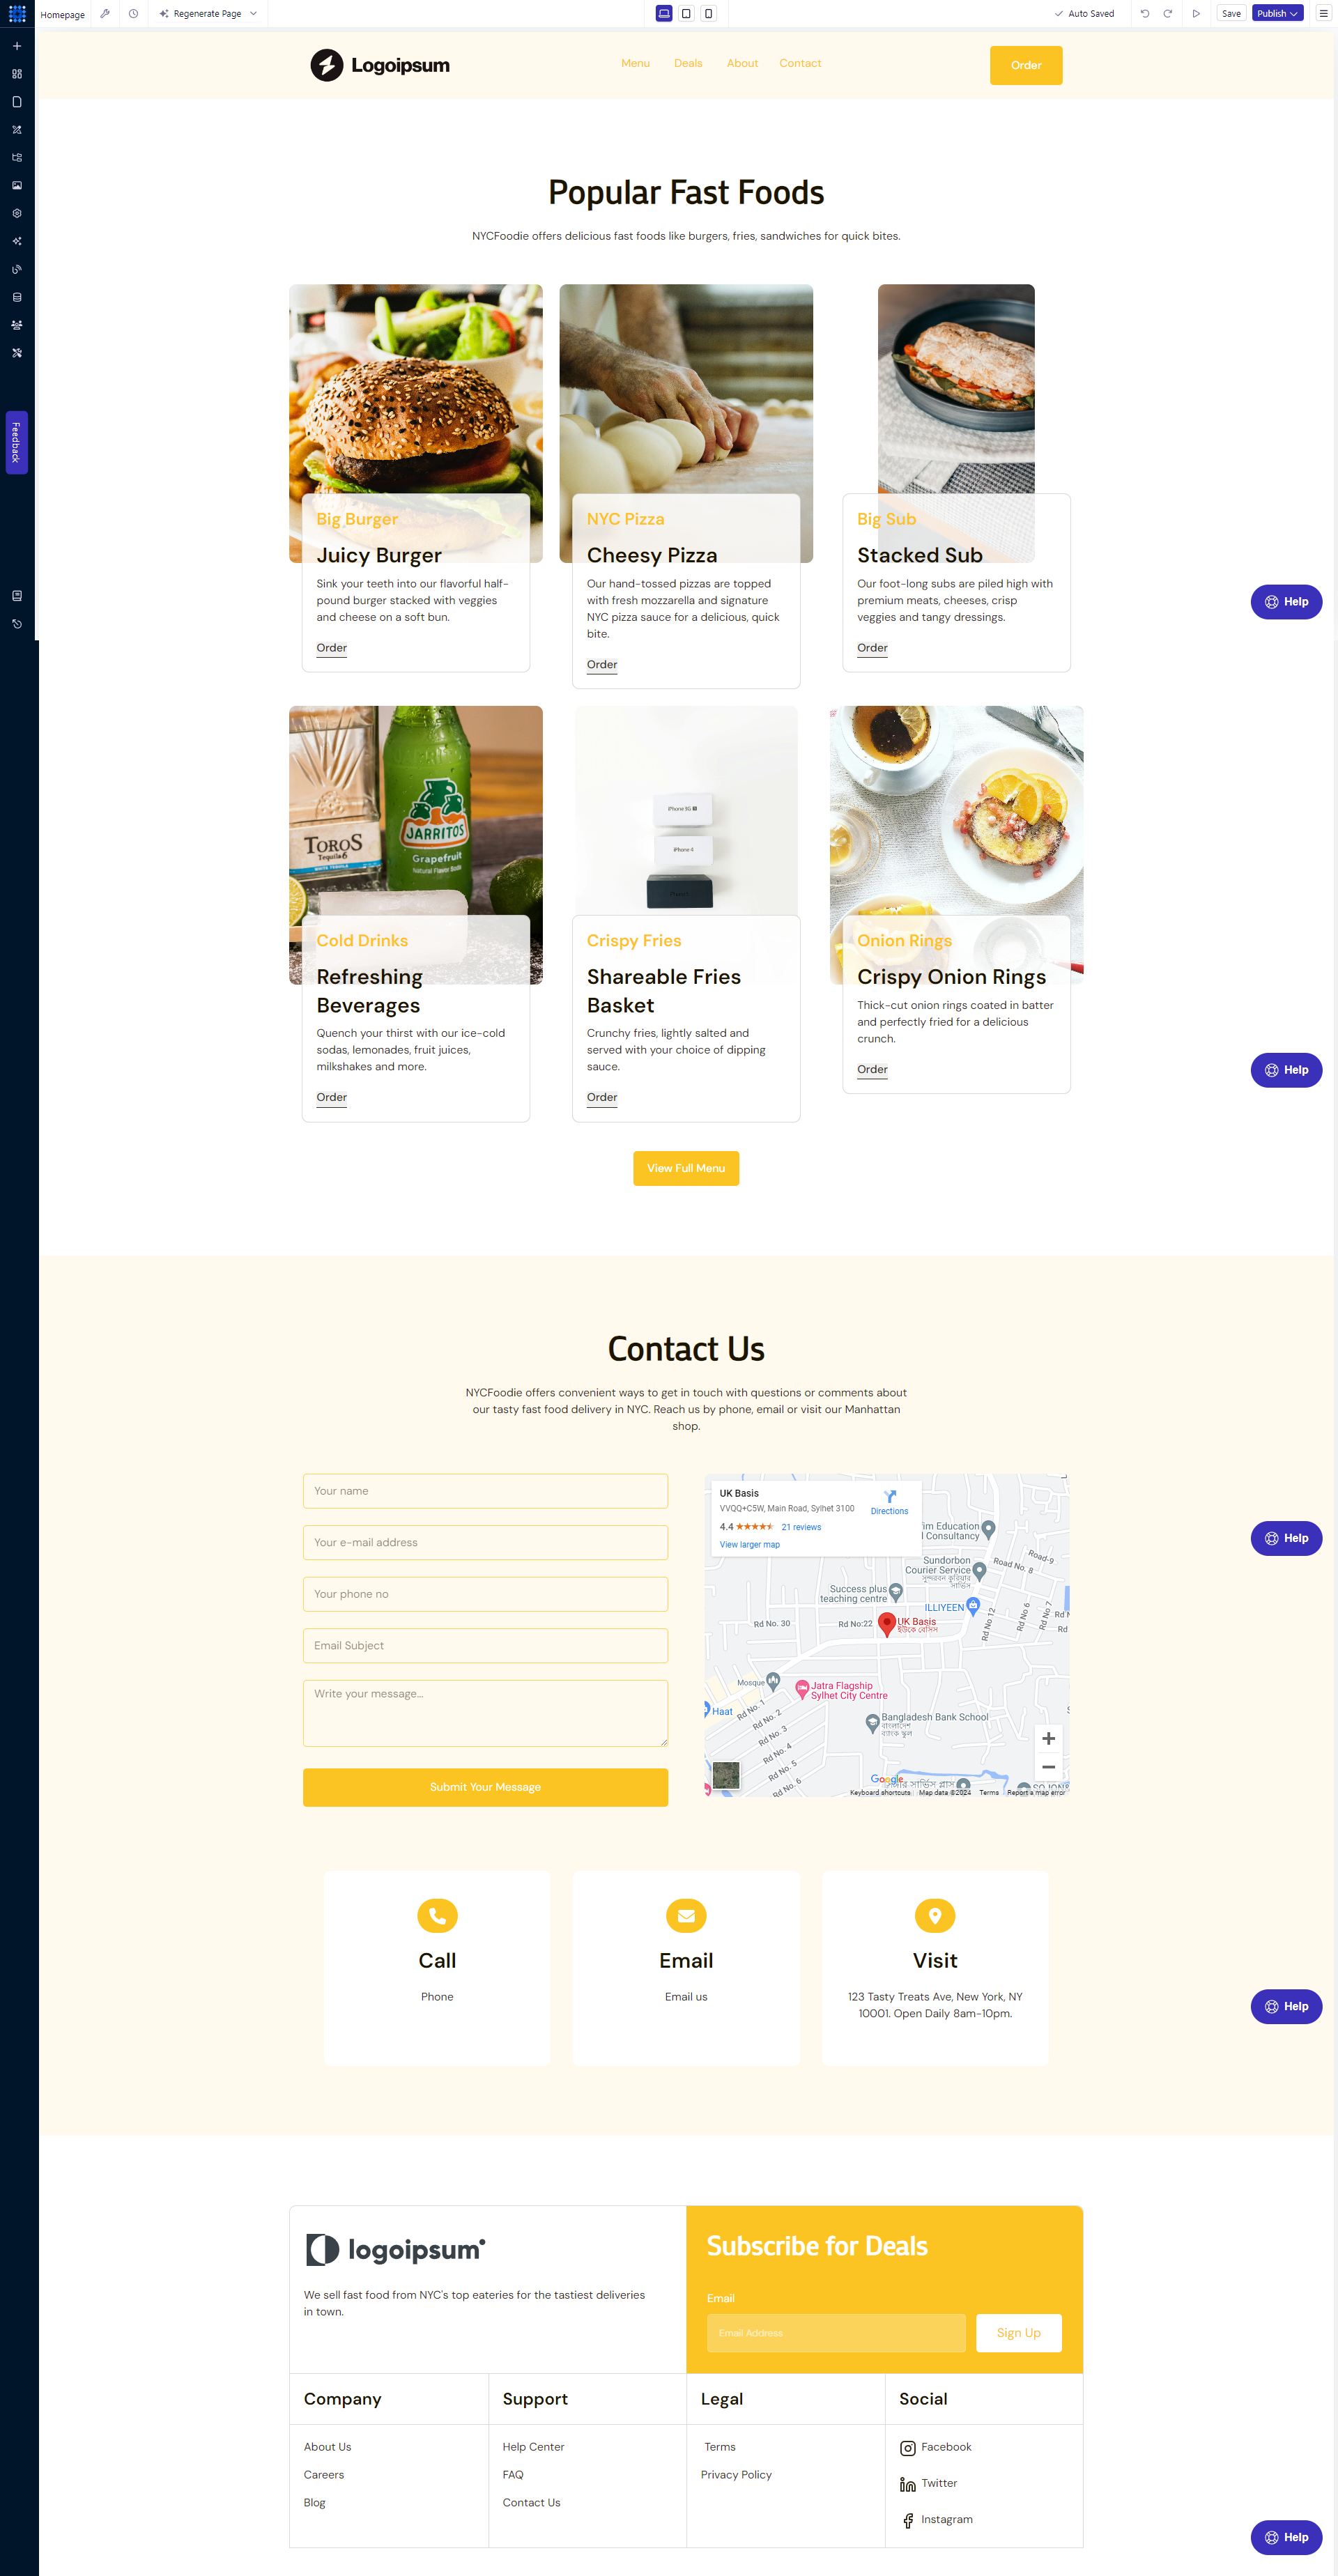
Example prompt that delivered a full food-shop site:
“Create a website for NYCFoodie, a fast-food shop in New York City offering online ordering and delivery. Use #FBC422 as primary color, #EE4E4E as secondary. Include sections for menu, ordering, delivery process, and contact. Design must look modern and appetizing, emphasizing quick service and NYC-style fast food.”
Related Read: How to Create a Website with AI
Prefer a template instead of AI?
1. Dashboard → Sites → Create New Site → browse templates.
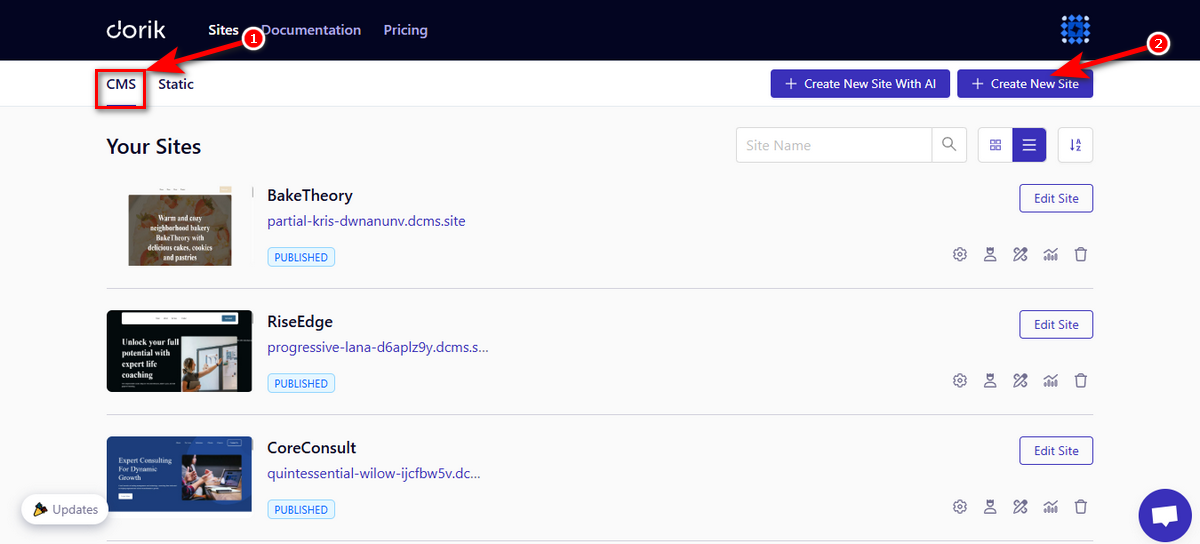
2. Preview any design, then Use Theme to create the site using the template.
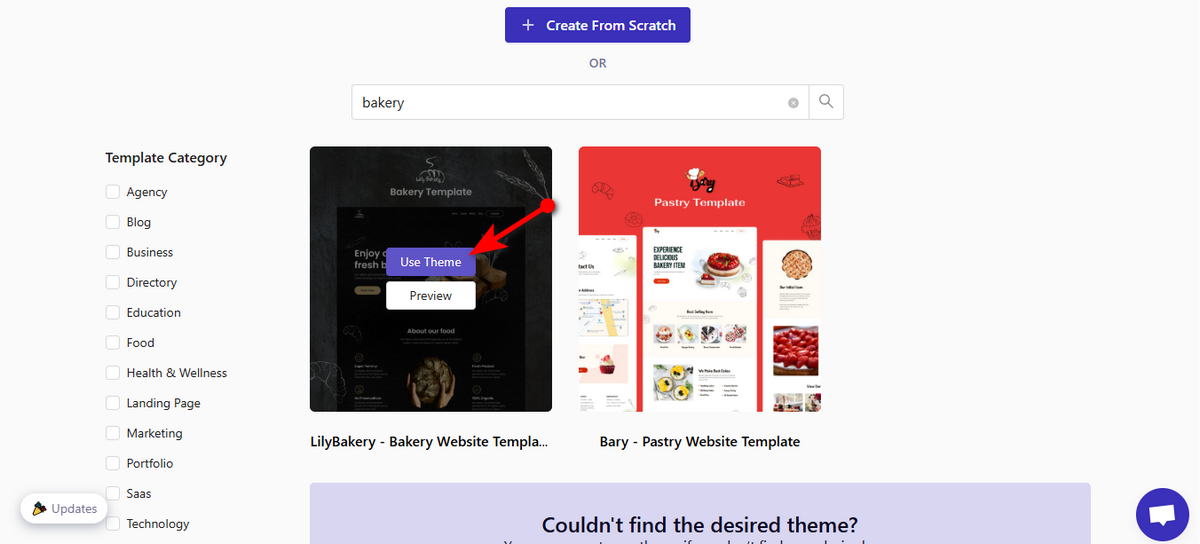
You can still drop AI-generated sections into a template later for a hybrid build.
Add Essential Website Pages
You can create your website pages with Dorik in two methods as follows:
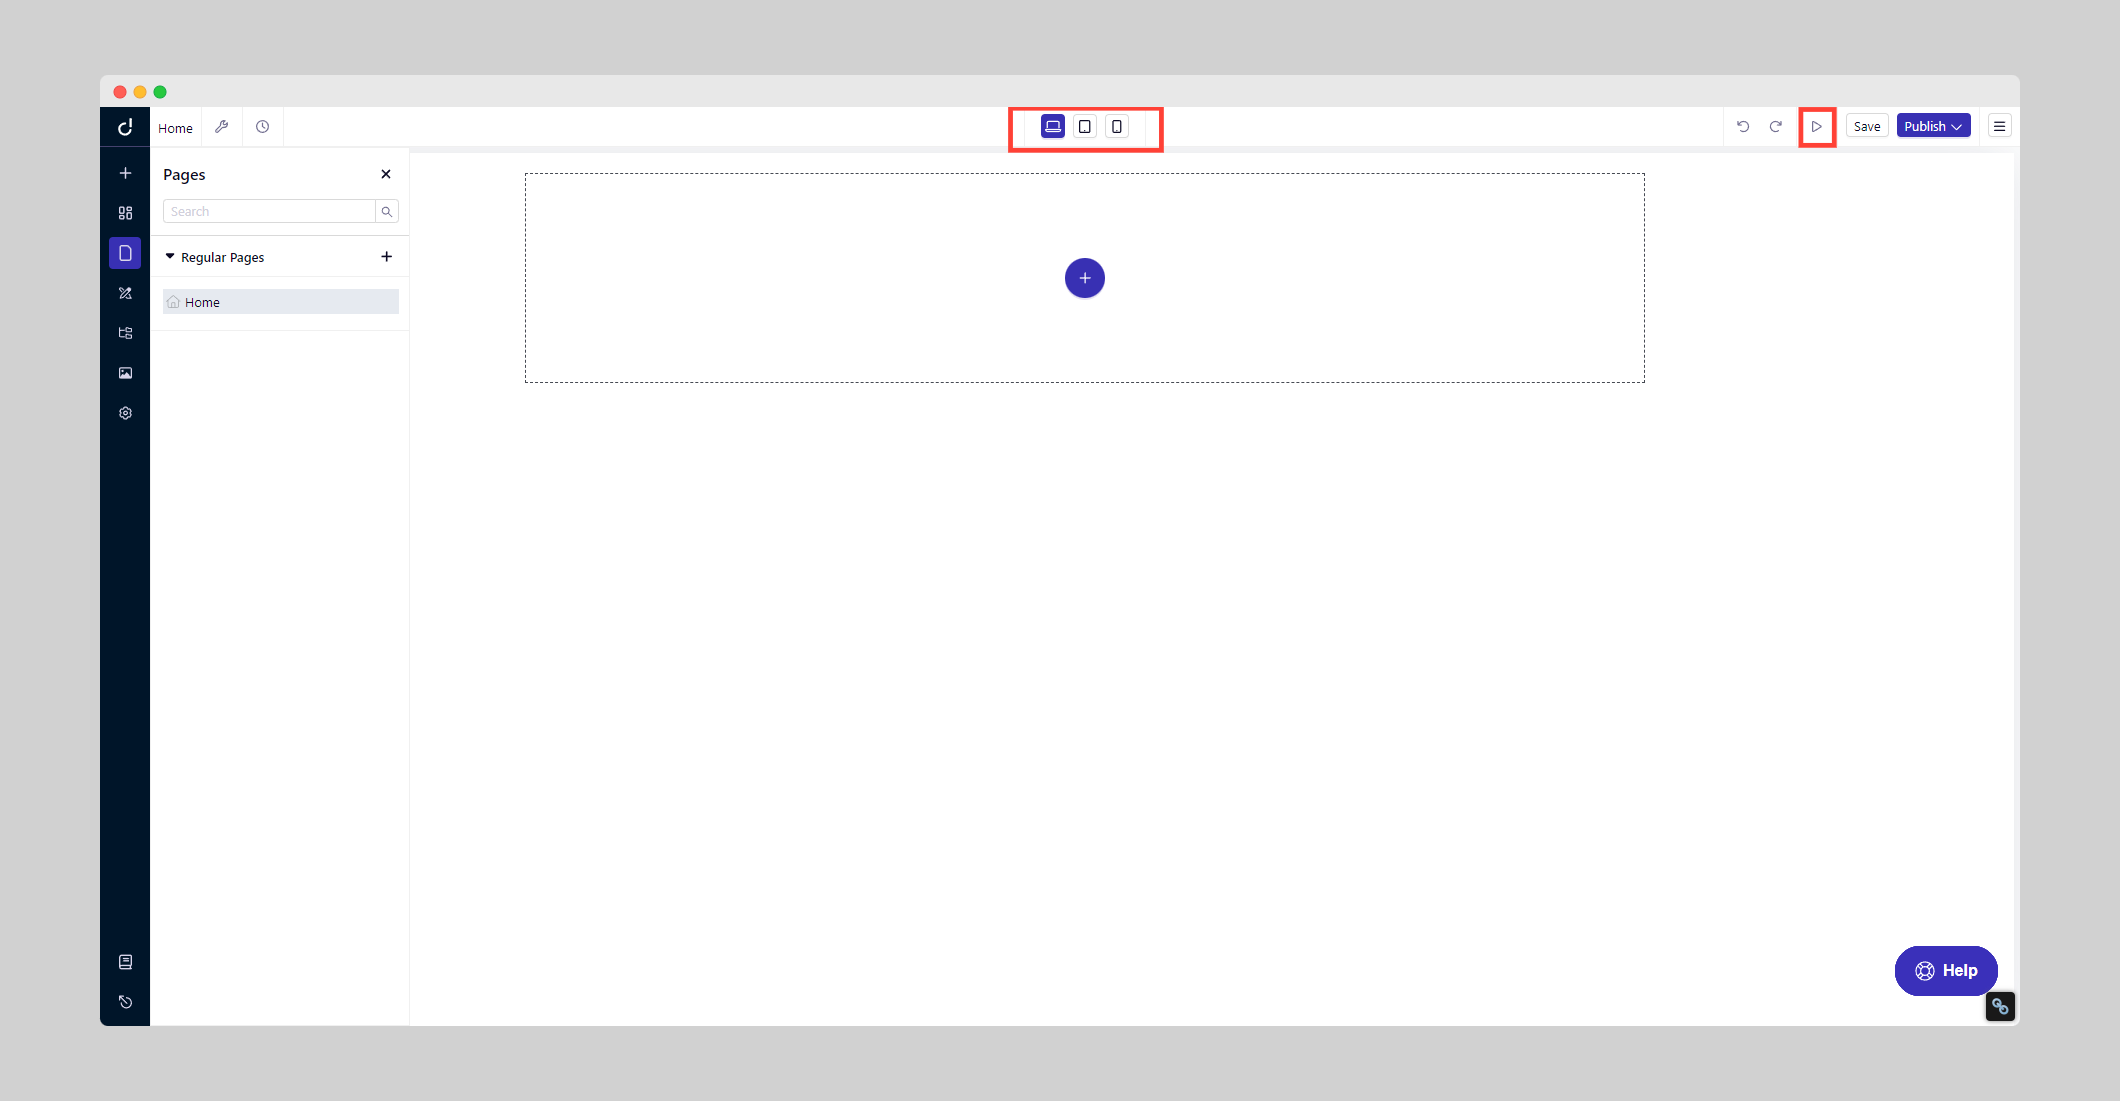
Method 1: Custom Page Creation
Click "Pages" in the left sidebar, then tap the "+" icon to begin.
Build your page from scratch by adding and customizing sections that align with your vision.
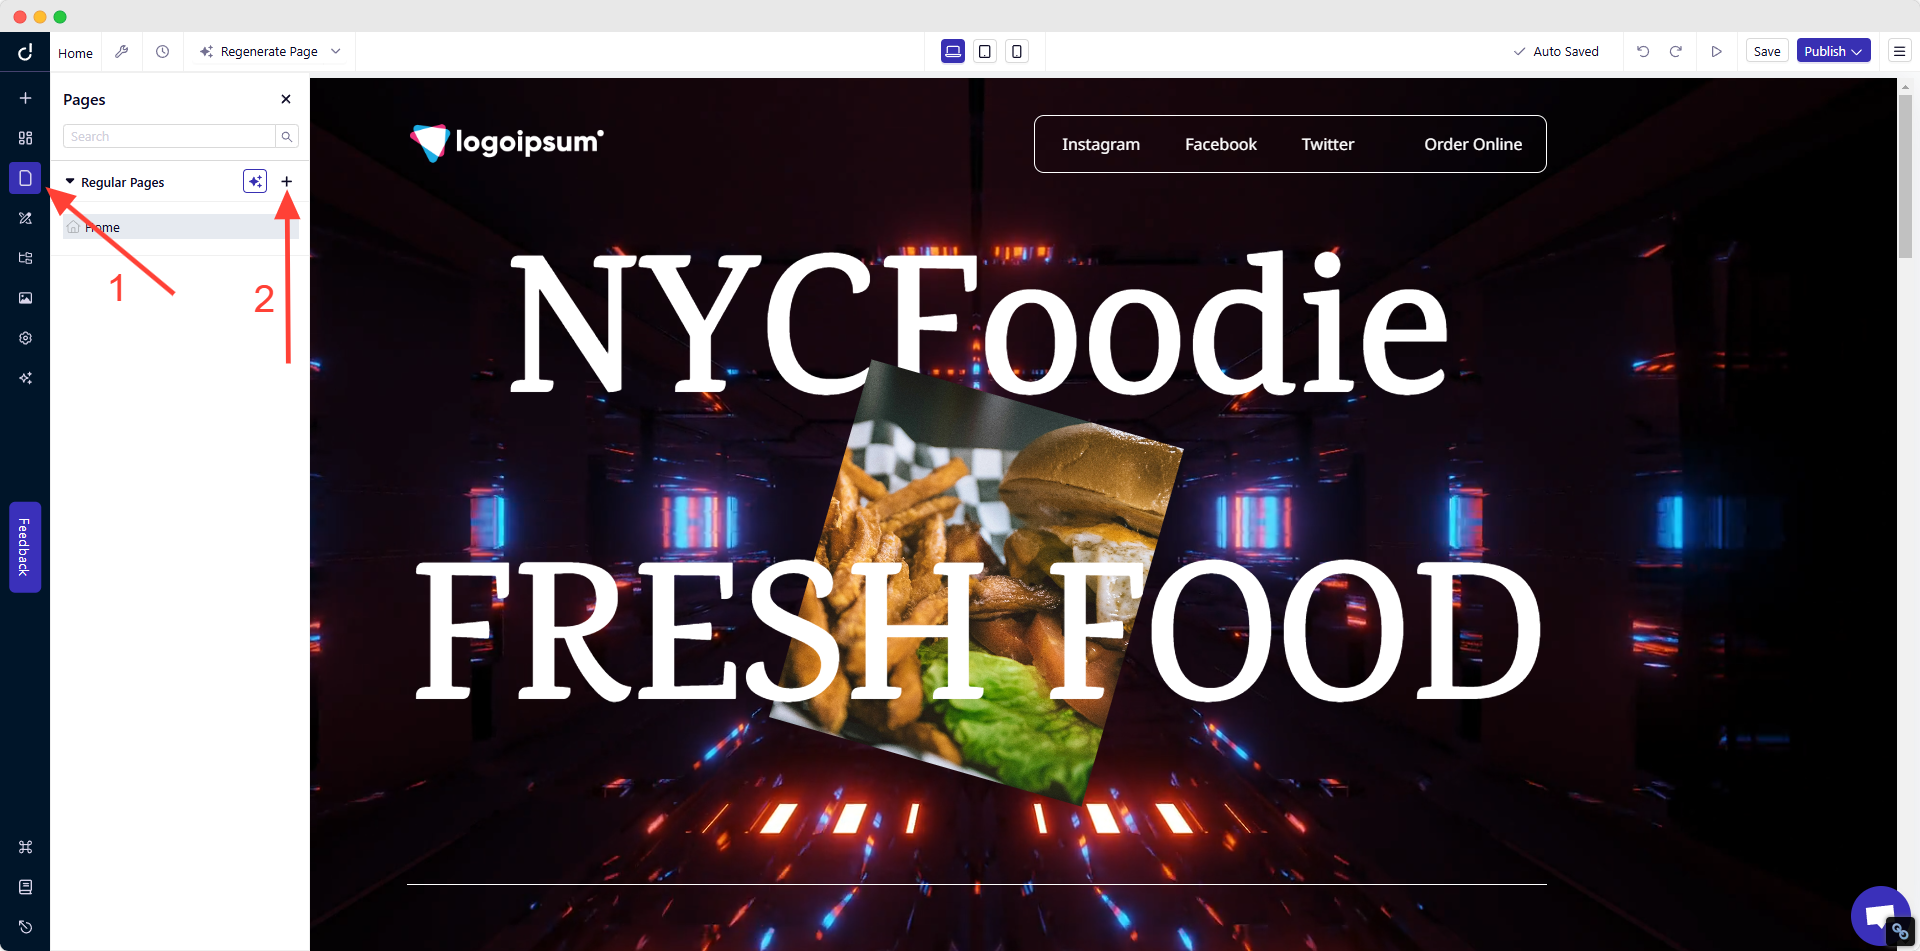
This method gives you complete creative control over every element of your page layout.
Method 2: AI-Powered Page Creation
For a faster approach, click the AI icon (Create New Page with AI) instead of the "+" icon.
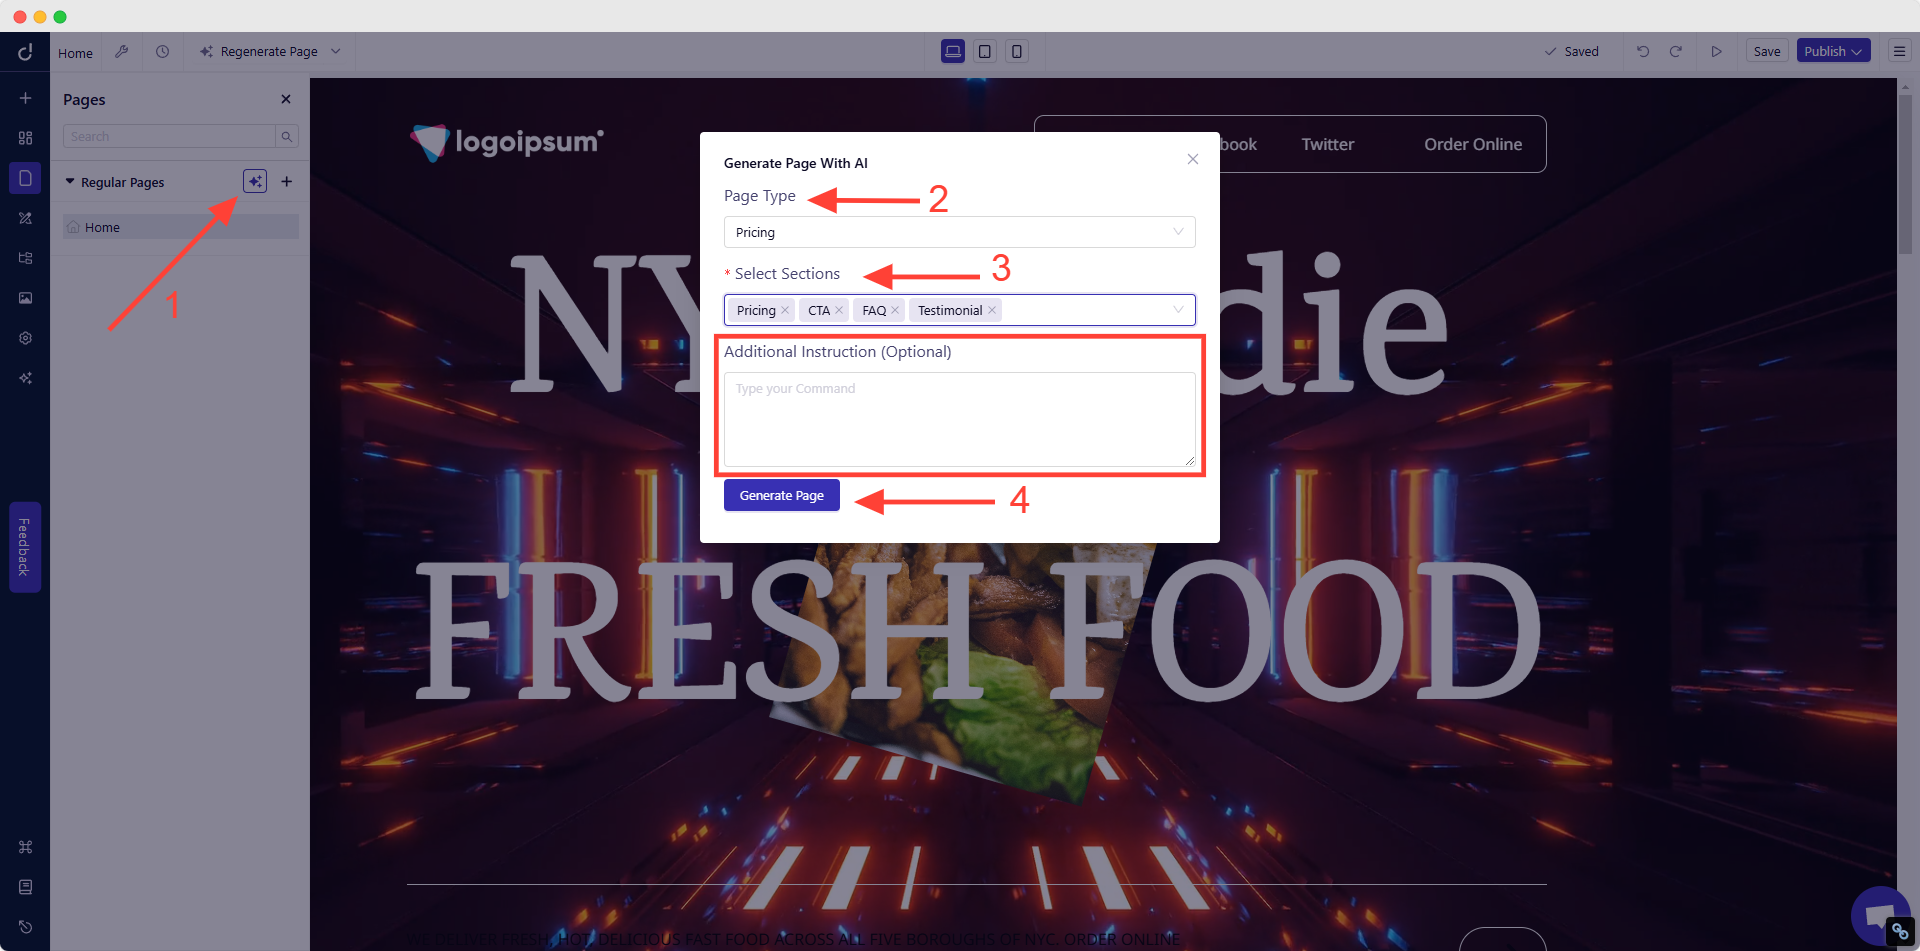
In the popup window, simply:
-
Select your desired "Page Type"
-
Choose sections from the dropdown menu
-
Provide specific instructions to guide the AI (Optional)
-
Click "Generate Page" and watch as Dorik AI crafts your page
Whichever method you choose, finish by specifying your page name and URL slug before publishing.
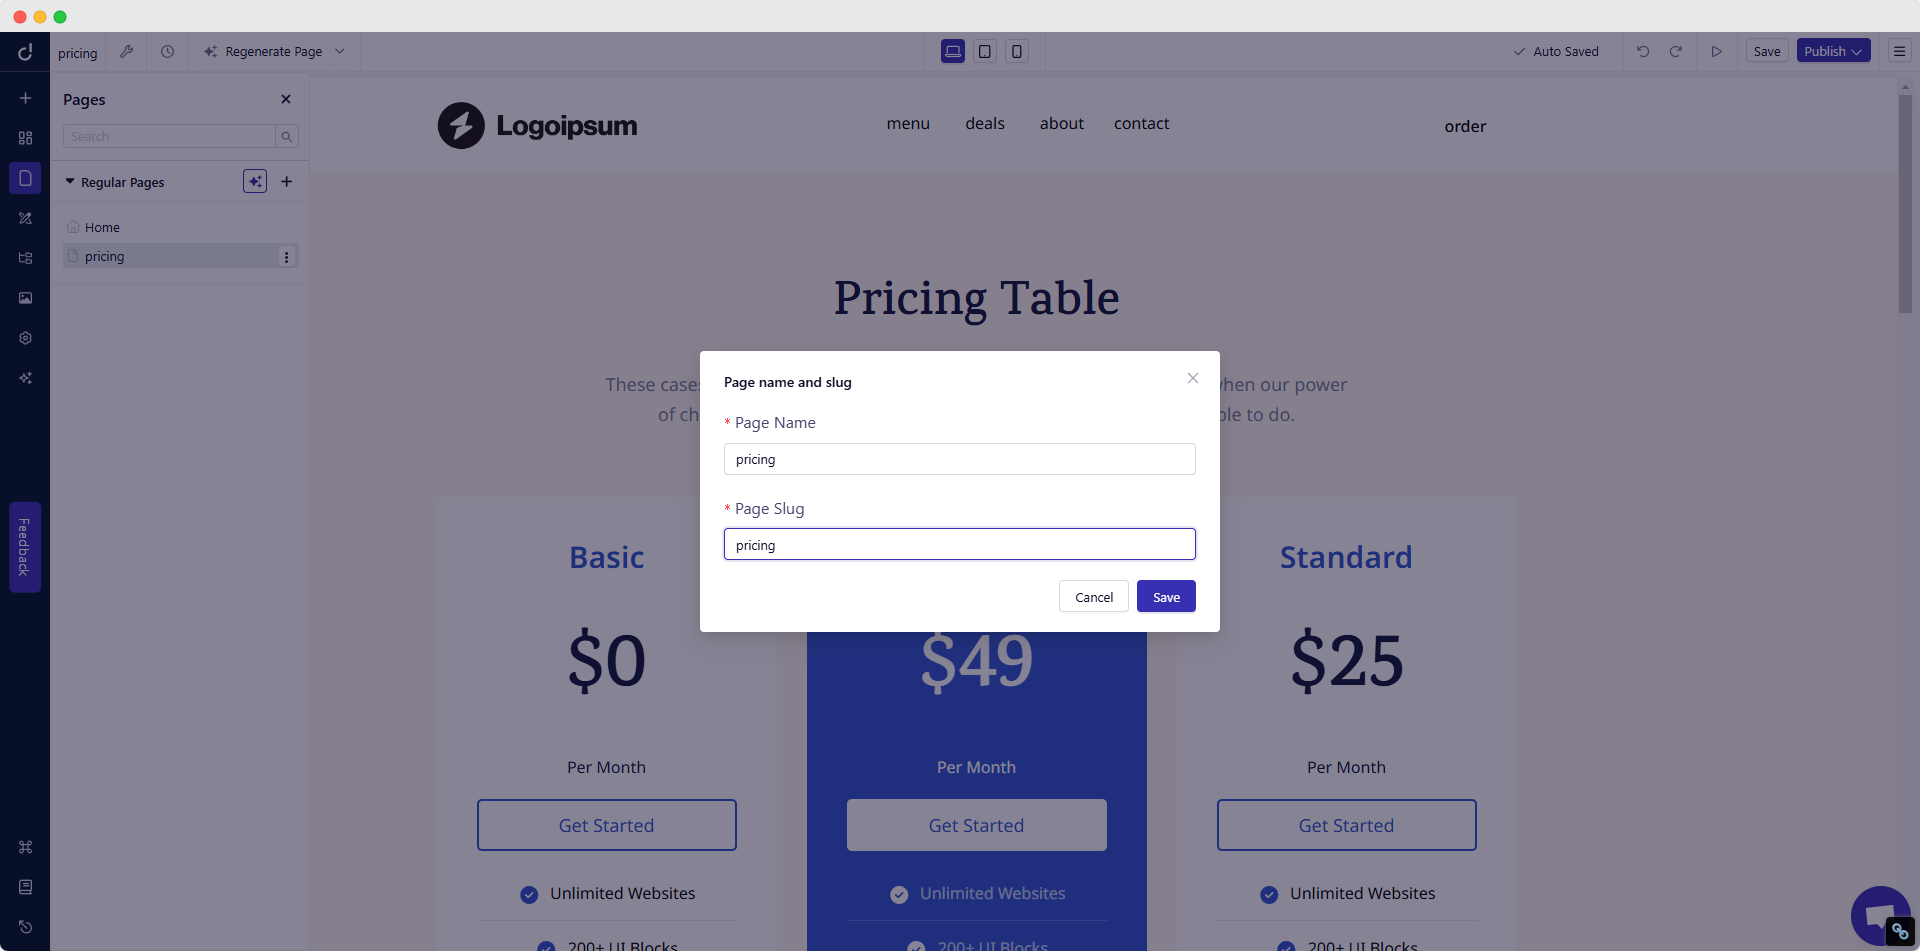
The best part? AI-generated pages retain full flexibility – you can regenerate the entire page, specific sections, or individual content elements until they perfectly match your vision.
Add Core Pages Quickly
| Page | Fastest Method |
| Home | Edit the hero block text; link the main CTA button to “Contact.” |
| About | Drop an Image + Text block; tell your story in 120 words. |
| Services/Products | Pricing Table component → fill in names, prices, and “Book Now” or “Buy” buttons. |
| Contact | Contact Form component → set email recipient; add Google Map block if you serve locally. |
| Blog | Enable Blog in the sidebar → New Post → write or paste your first article. |
Note: Dorik auto-generates SEO-friendly slugs (with the option to edit manually) and includes the blog feed in your sitemap.
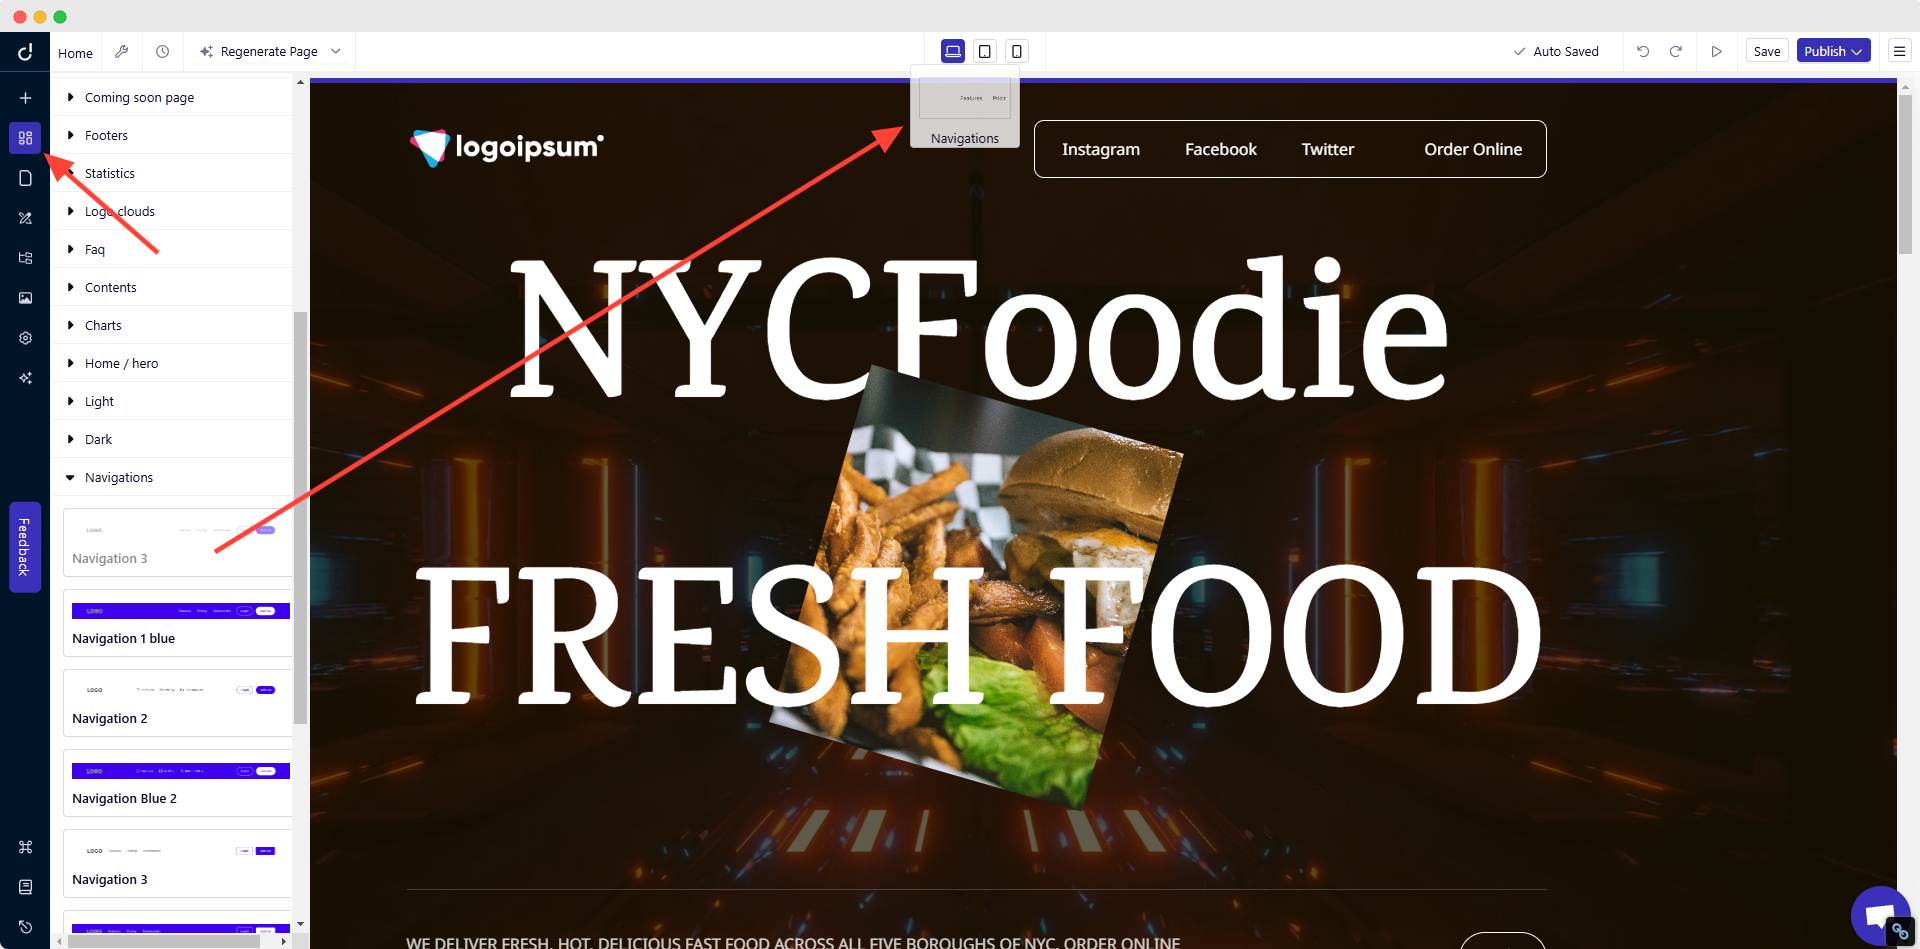
Create Navigation & Footer
Creating Header: Components → Navigations → drag a menu block to the top section.
-
Edit labels (keep to 5-7 items).
-
Toggle “Sticky” if you want the menu to stay visible on scroll.
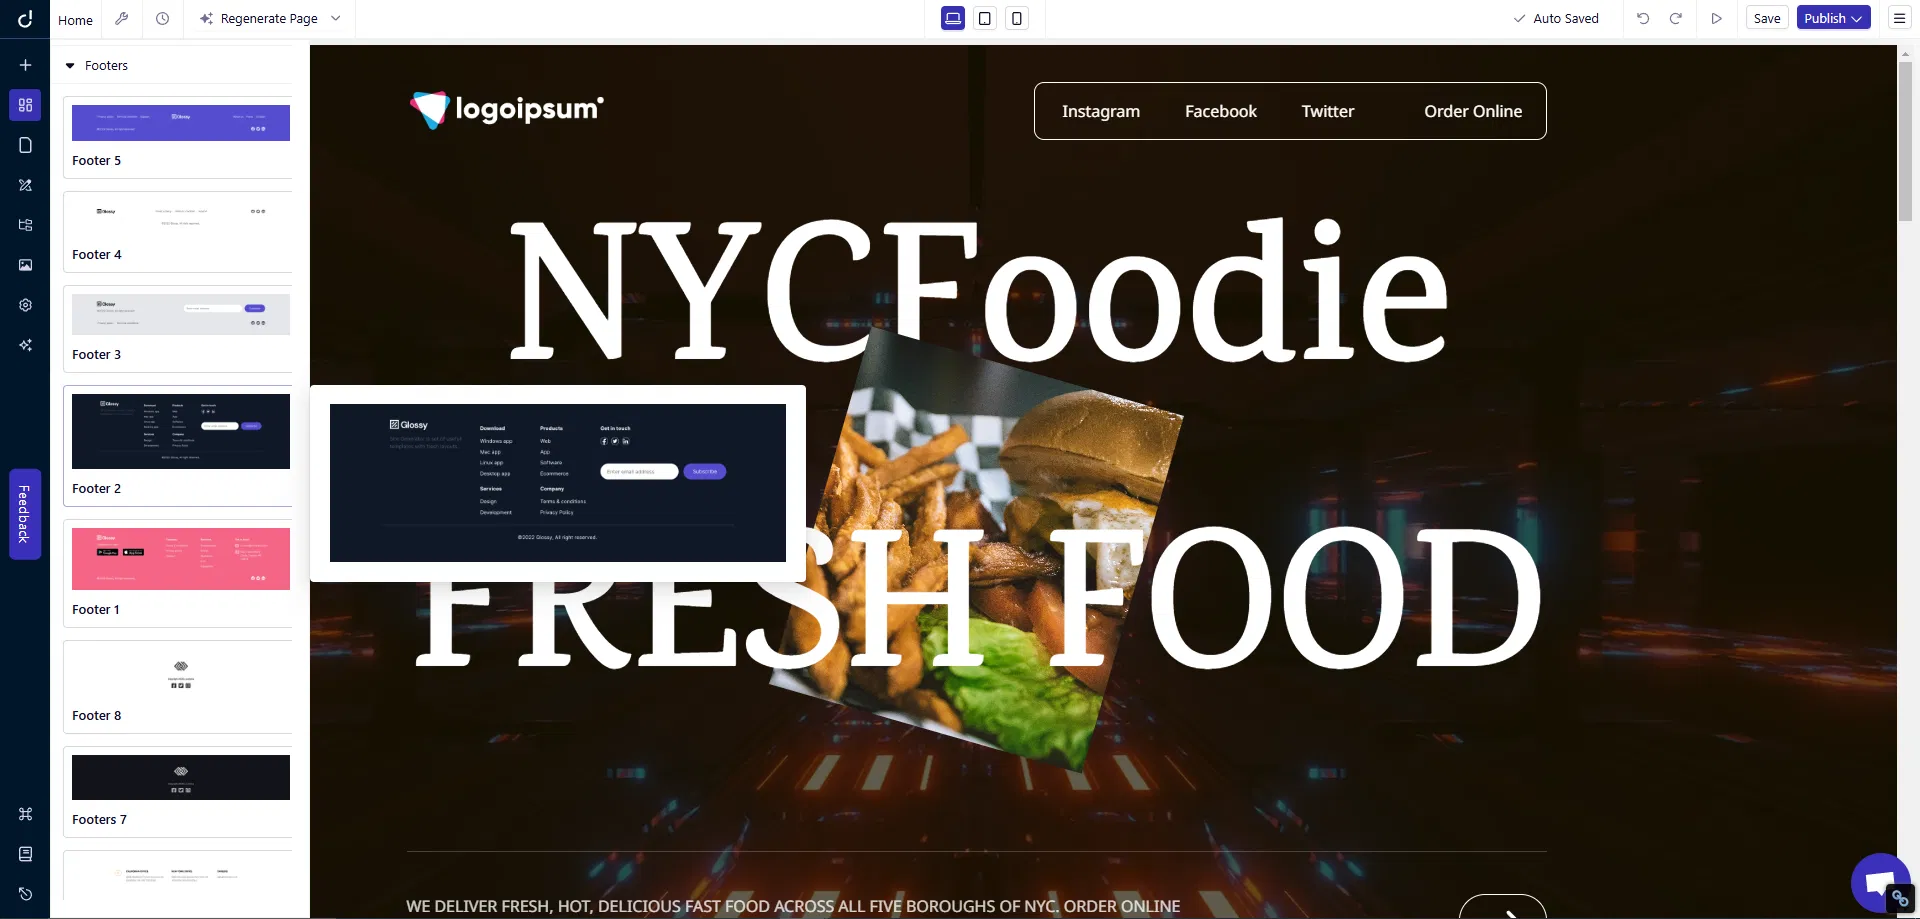
Creating Footer: Components → Footers → drop a footer block.
-
Replace placeholder text with phone, email, and quick links.
-
Add social icons; link them in the right-hand sidebar.
Design The Look of Your Website
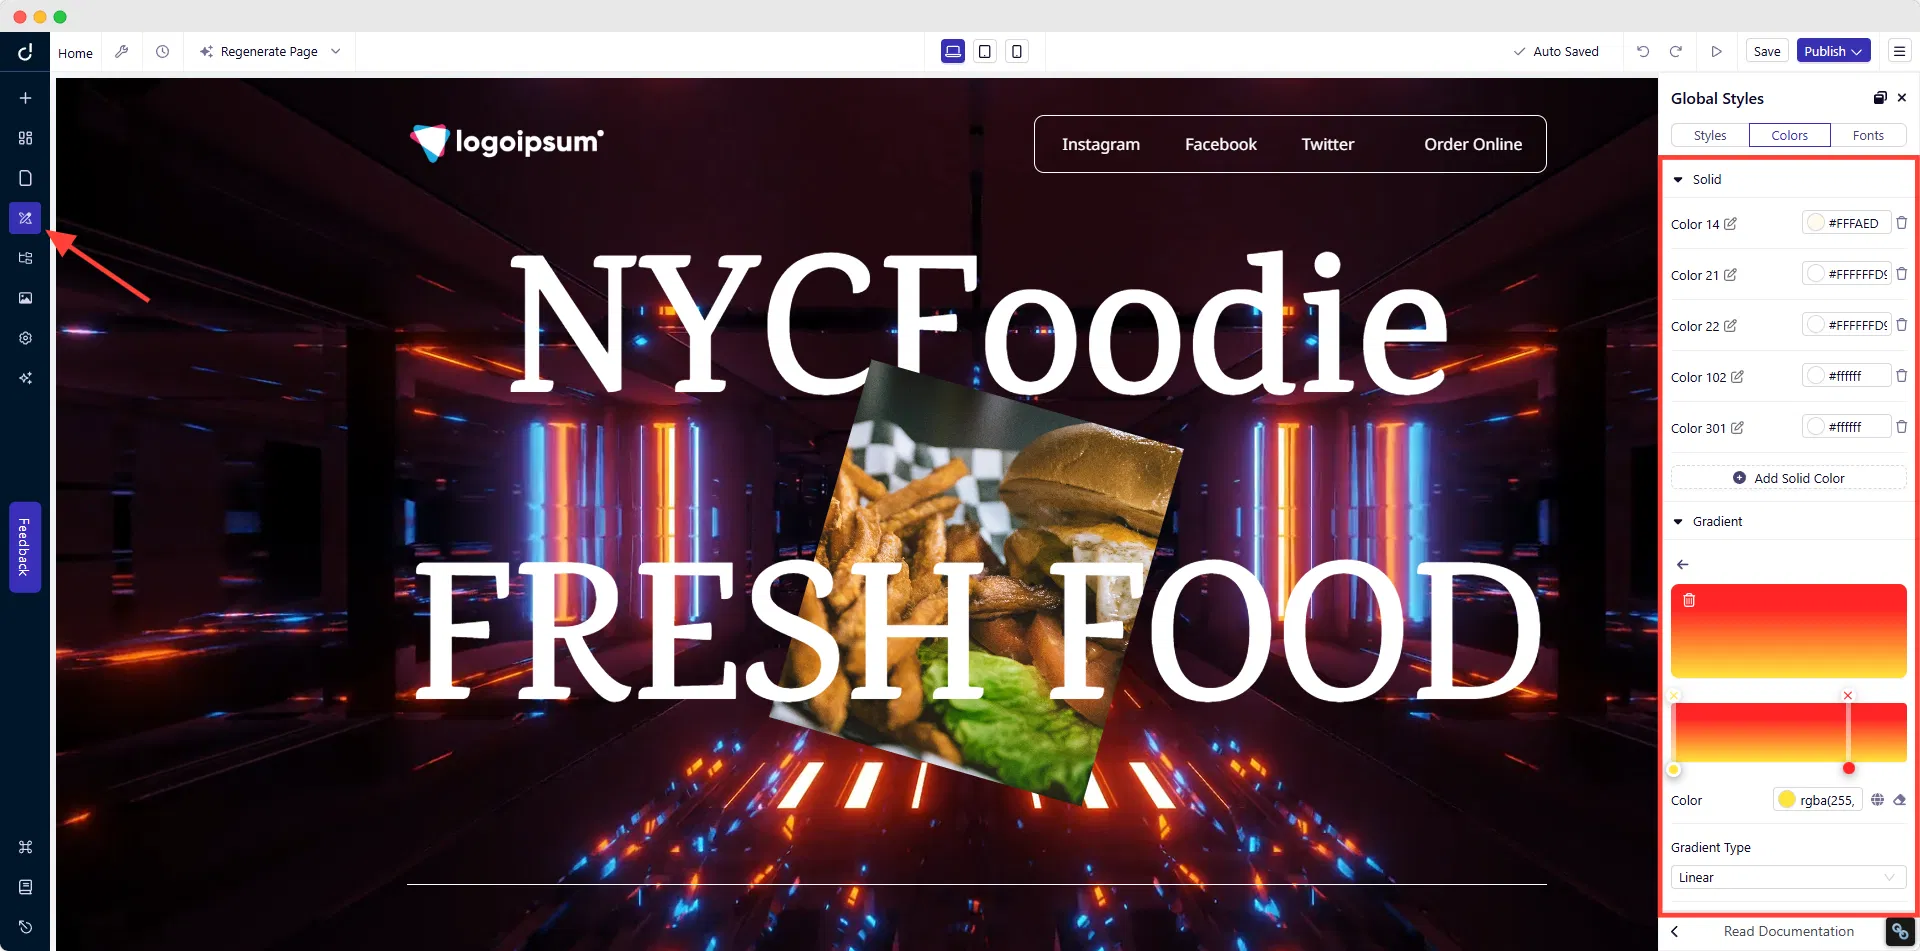
Global Settings
Left sidebar → Global Styles
-
Set a primary color and a secondary accent.
-
Choose one heading font and one body font from the built-in list or upload a custom font.
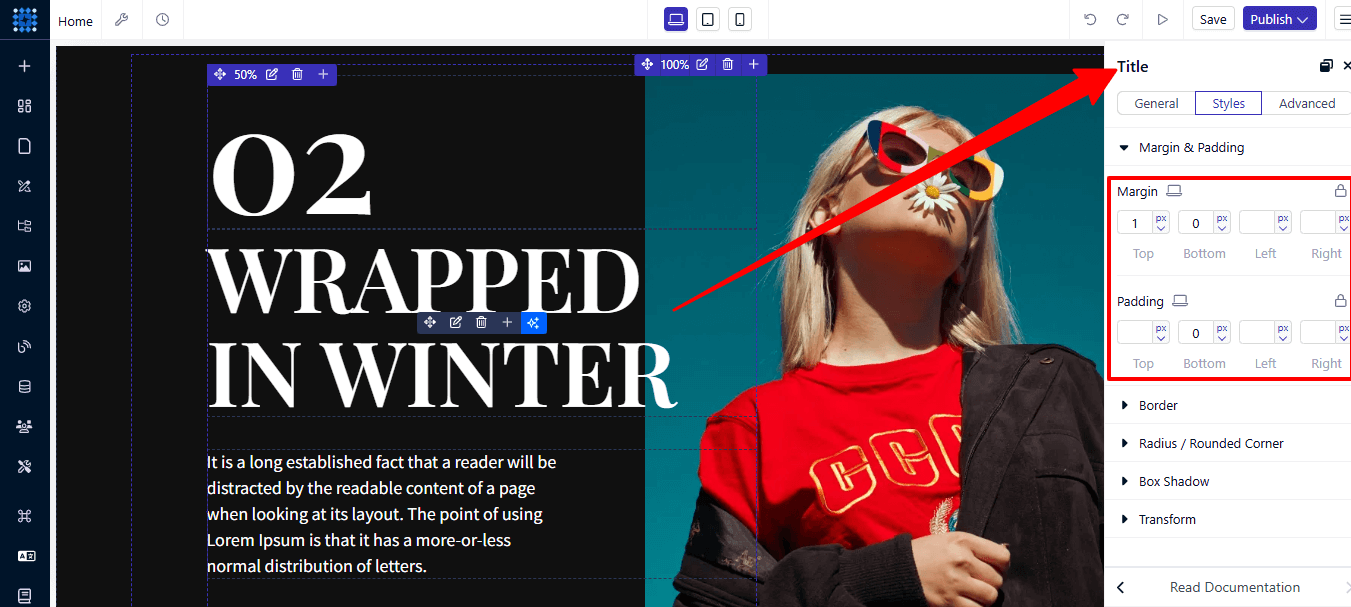
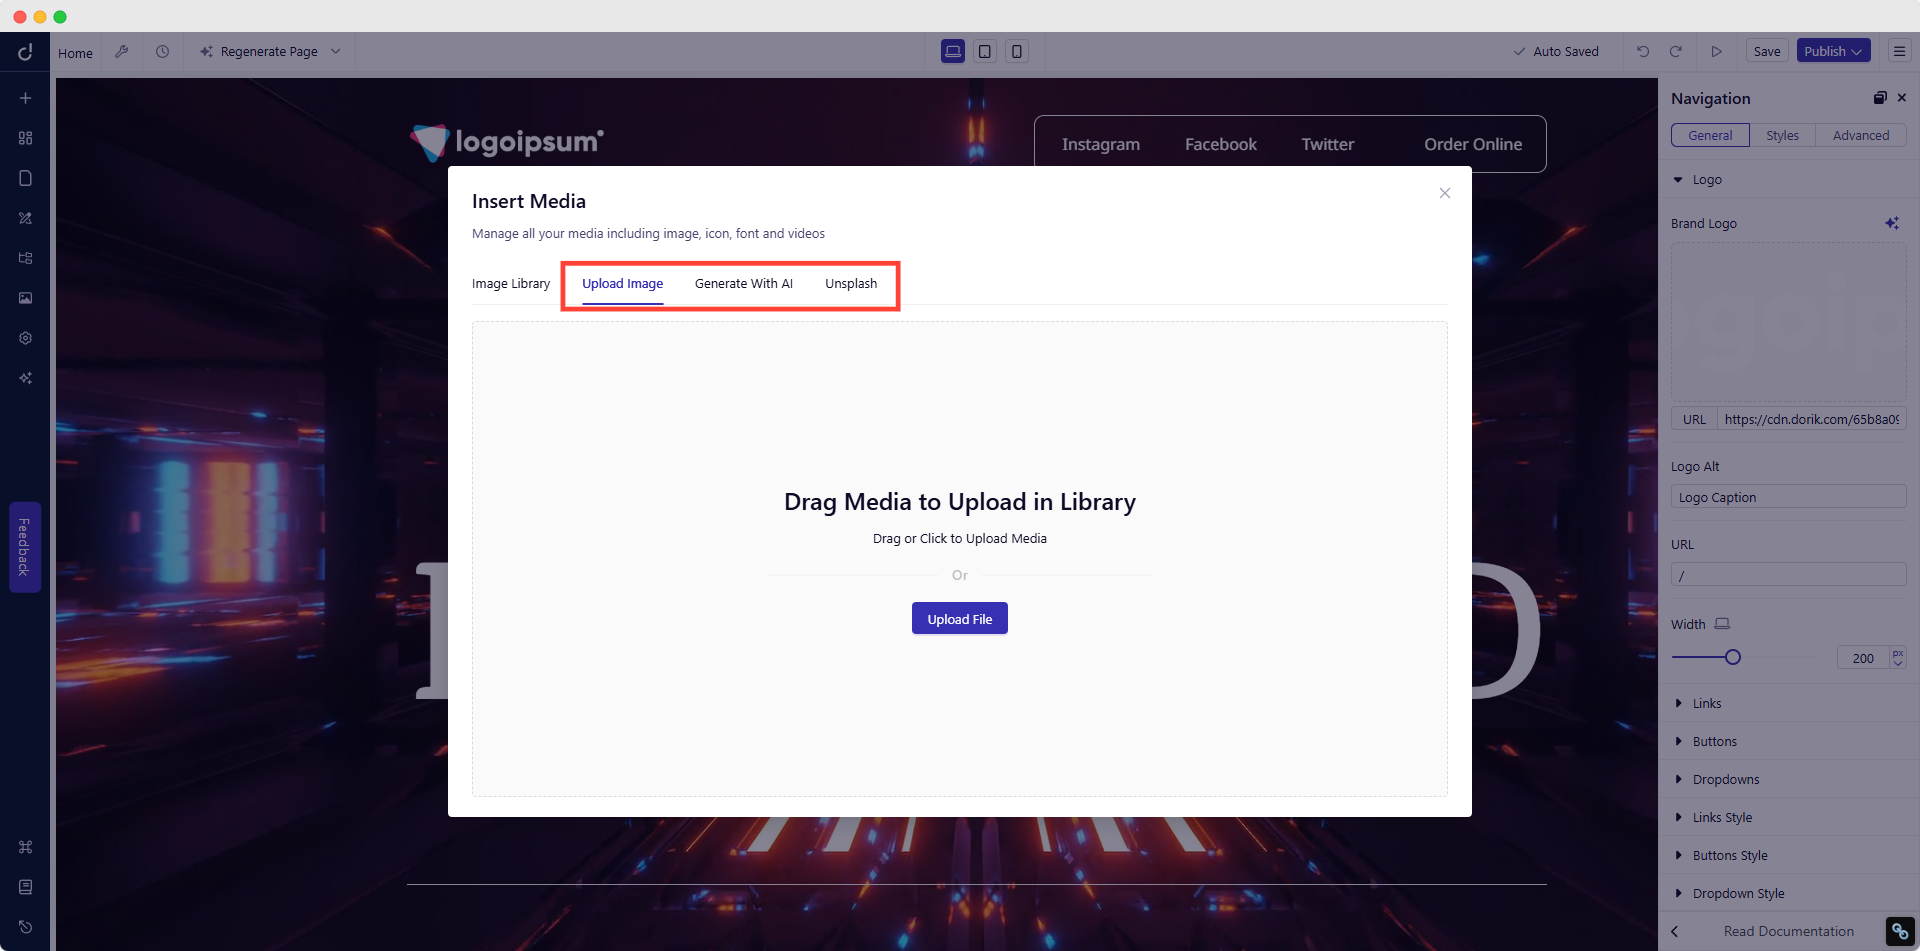
Section & Images Edits
For Sections: Click any section → adjust Padding/Background/Overlay in the sidebar.
For Images: Click any image → Upload, Unsplash, or Generate with AI (Dorik auto-compresses images for speed).
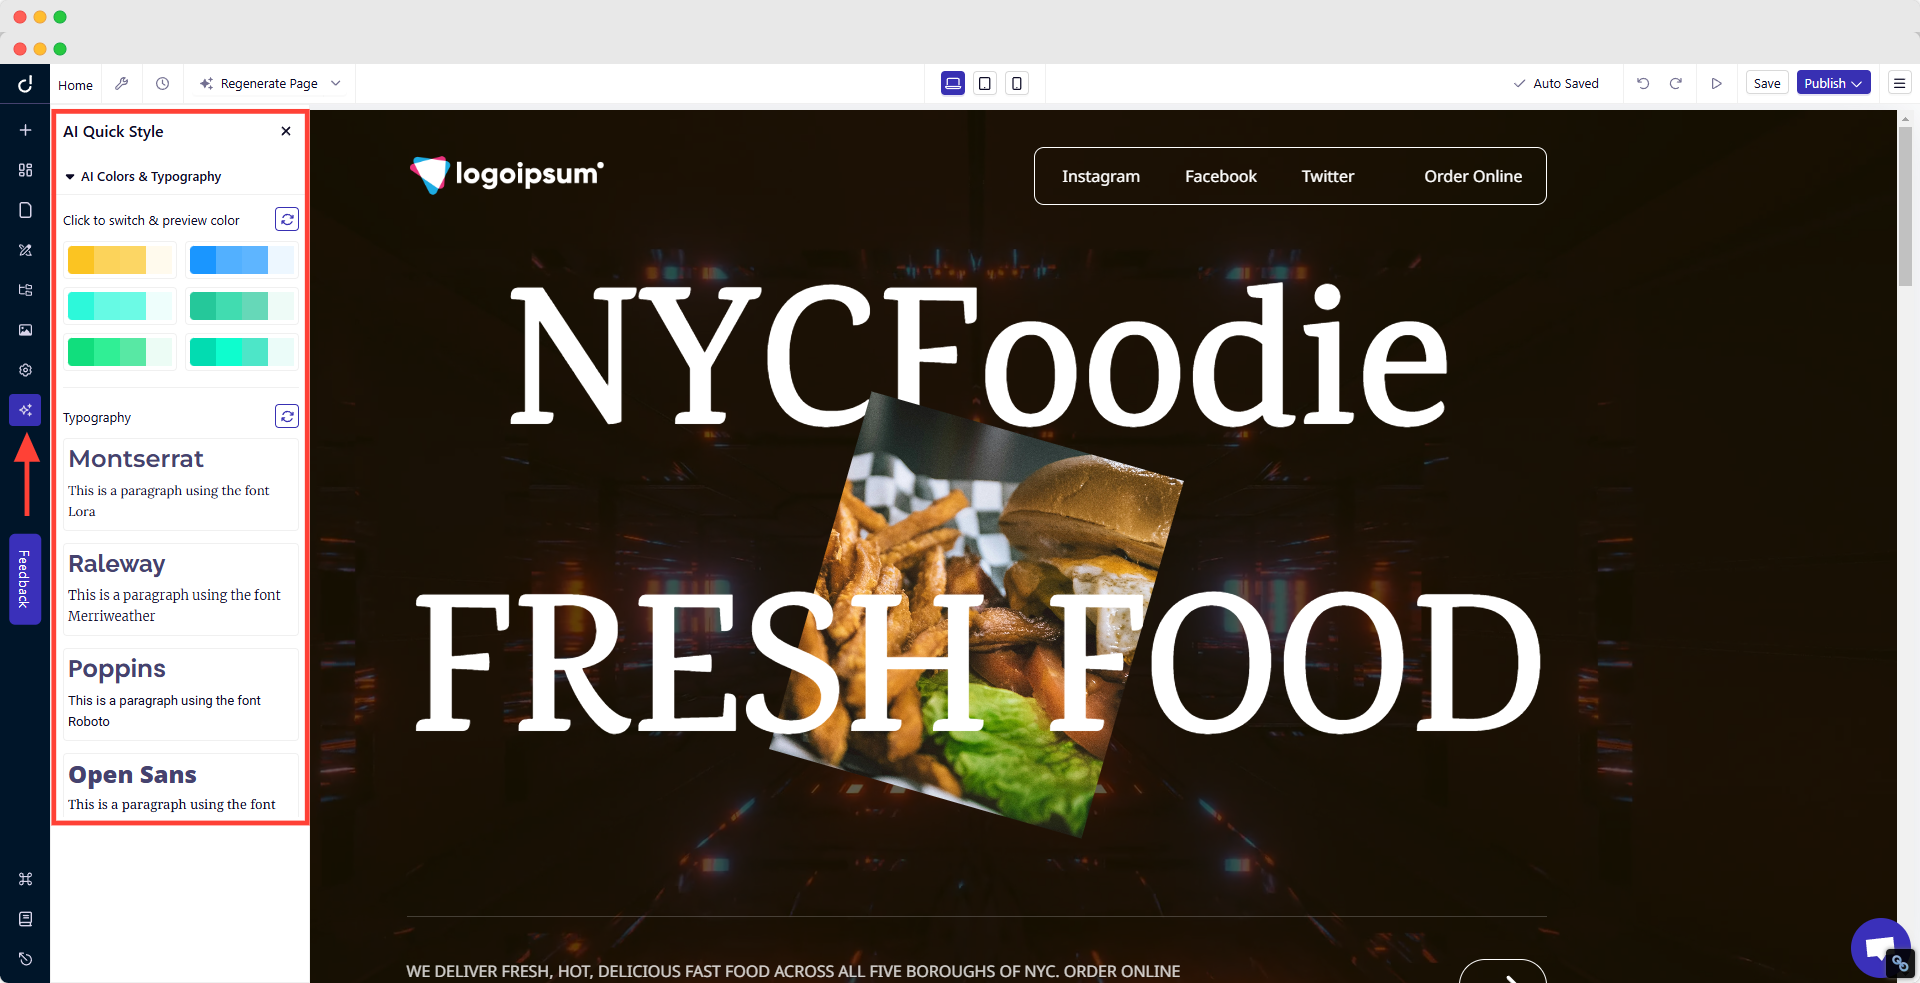
With Dorik’s AI Quick Style feature, experiment with different looks by instantly changing fonts and color schemes across your site.
Layout Tweaks
-
Use empty space: click section → Padding 40 px top/bottom.
-
Emphasize key items: select text → H1 for headline, H2 for sub-points.
Clear Calls to Action
CTAs serve as visual cues that encourage users to take a specific step, whether it's making a purchase, signing up for a newsletter, or contacting customer support.
So, make your call-to-action buttons stand out with the following:
-
Contrasting colors
-
Clear, action-focused text
-
Enough space around them
-
Consistent style across pages
Place these buttons where visitors naturally look. Put your main call to action above the fold - the part visitors see without scrolling.
Designing effective CTAs in Dorik is straightforward and flexible.
Choose from a library of pre-built CTA components designed for conversion,

or craft custom buttons using Dorik's Element feature.
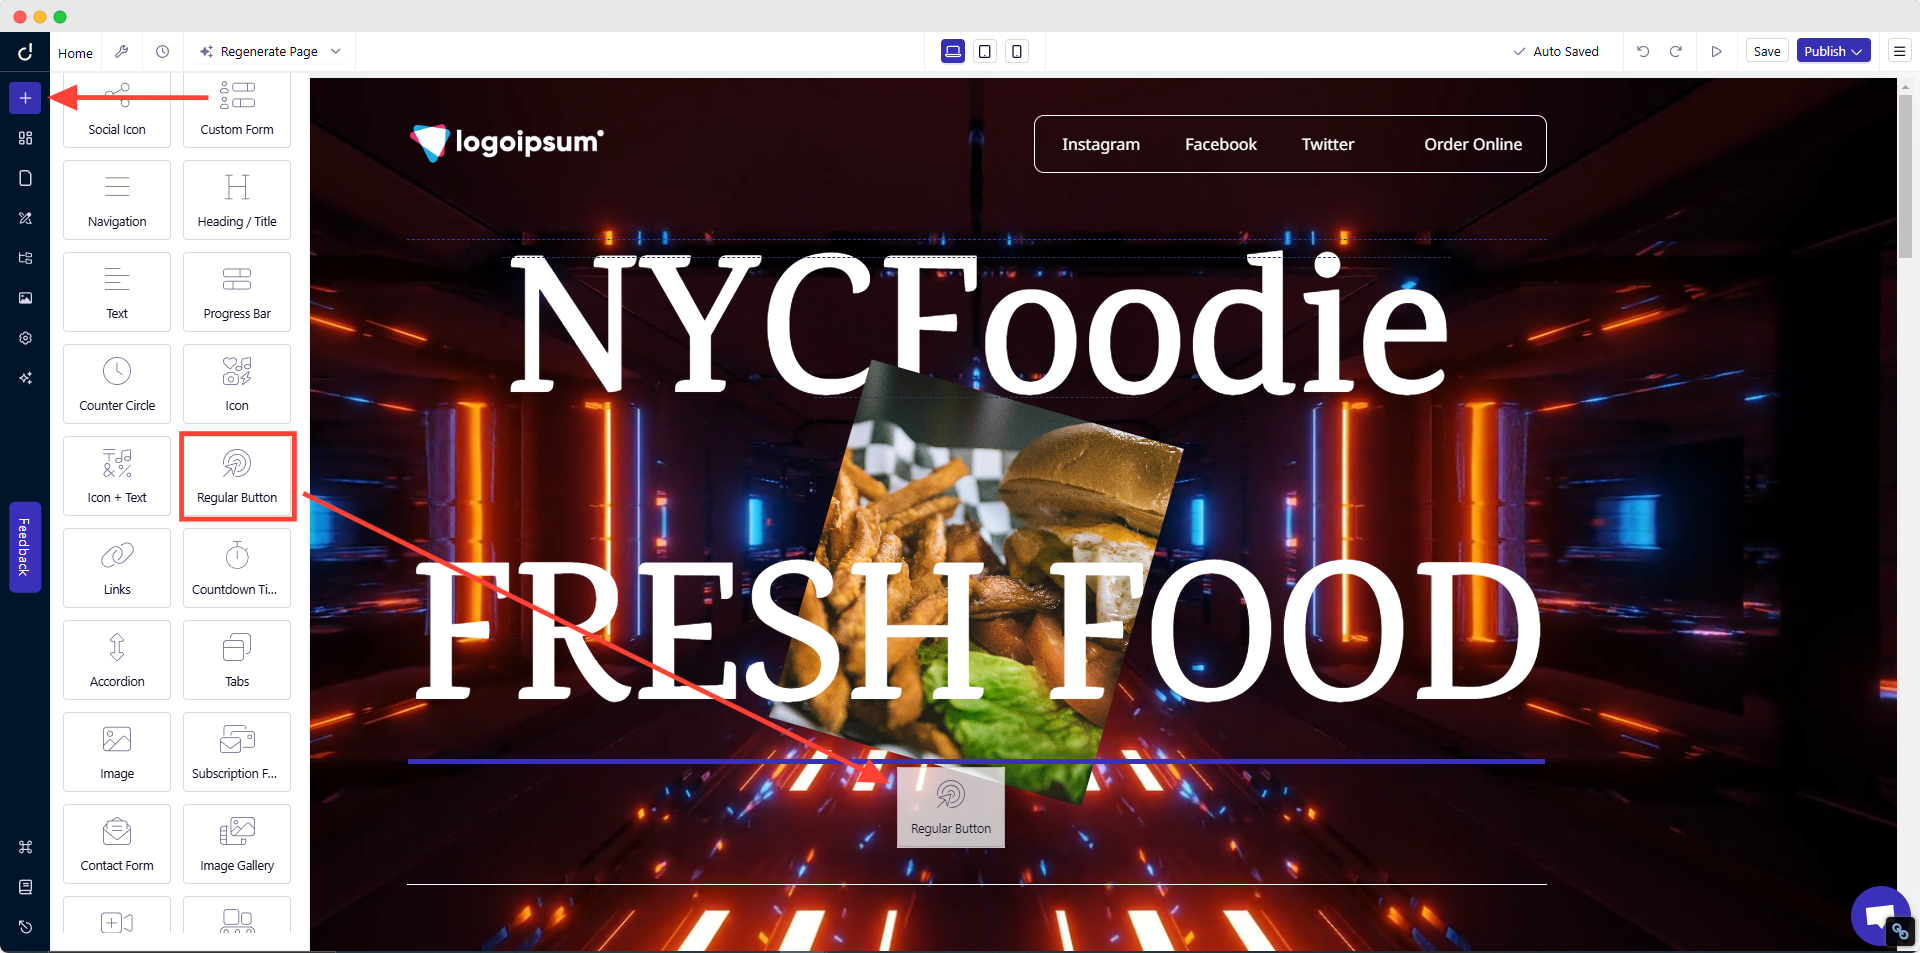
Either way, you'll have full control over styling and placement to ensure your calls-to-action capture attention and drive results.
Remember, good design puts your visitors first. Every element should help them find information or complete tasks.
Learn more about designing a website.
Add Optional Features as Needed
E-commerce Essentials
If you sell products online, your success depends on making it easy for customers to browse and buy.
-
Add secure payment gateways that your customers trust.
-
Make sure to offer payment methods your target customers prefer - credit cards, digital wallets, or buy-now-pay-later options.
-
Your shopping cart should save items when customers leave and return.
Integrate your e-commerce platforms like Shopify and Ecwid to Dorik with just a few clicks.
Booking and Appointment Systems
An online booking system will save you from endless email chains and phone calls if you run a service-based business. Your clients can schedule appointments when it's convenient for them, even outside your business hours.
A good booking system should:
-
Show your real-time availability
-
Process payments or deposits
-
Send automatic confirmations
-
Remind clients about upcoming appointments
A booking system might seem like a big step, but it often pays for itself by freeing up your time for more important tasks.
Here's how to create a booking website for your reference.
Membership and Course Areas
A membership section can create new revenue streams. You can host online courses or premium content here. Include features like progress tracking and downloadable resources. Make sure the system works well on mobile devices.
Configure your membership area in a way so that it runs well on phones and tablets, as many people prefer to learn on their mobile devices during commutes or breaks.
Contact and Lead Generation Forms
Keep forms simple yet effective. Include basic fields like name, email, and message space in your contact forms. Add spam protection to filter out unwanted submissions.
For lead generation, collect only essential information to increase completion rates.
Keep your forms short - every extra field reduces the chances of someone completing your form.
Analytics and Tracking Tools
Website analytics help you understand visitor behavior. Tools like Google Analytics track important metrics. These include traffic sources, popular pages, and time spent on the site. This data helps improve your website over time.
Dorik's built-in analytics add-on offers a privacy-focused alternative that's GDPR-compliant and cookie-free. It provides essential metrics, such as page views, visitor counts, bounce rates, and average visit times, without compromising user privacy.
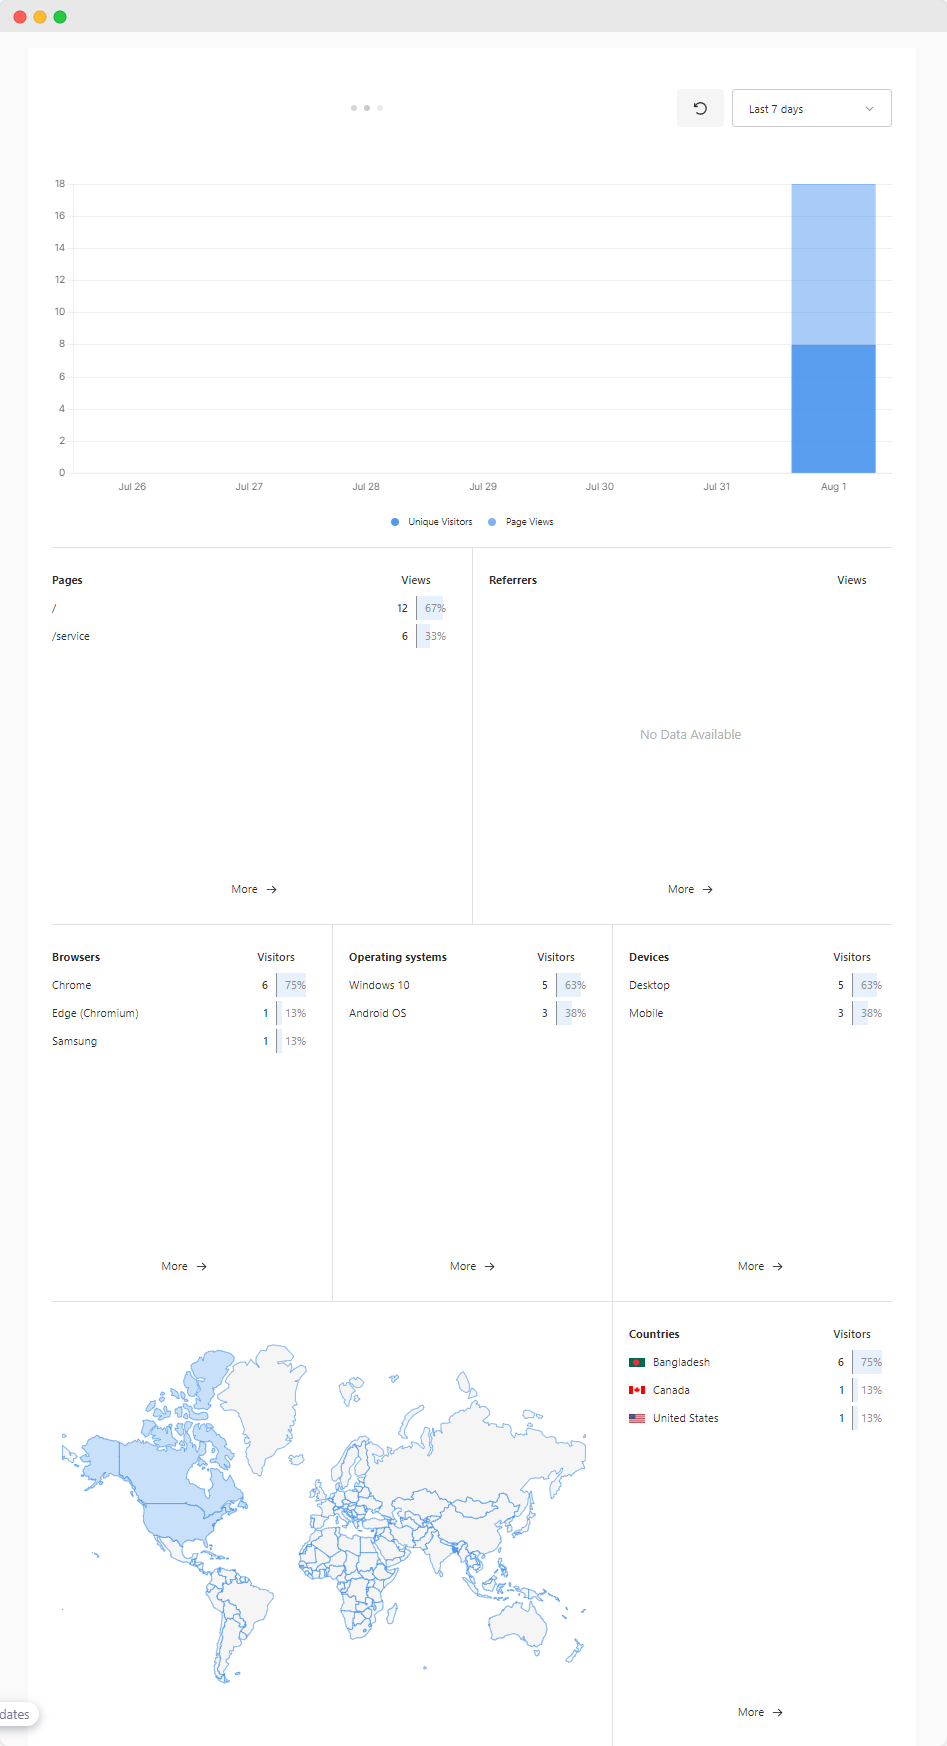
Setting up analytics early gives you a baseline against which to measure improvements. When you make changes to your site, you'll know if they actually help your visitors or just look nice.
Don't get lost in the numbers. Focus on metrics that matter for your goals. If you run a local business, tracking how many people look up your address matters more than total worldwide visitors.
Social Media Integration
Connect your website with your social platforms. Display customer reviews and testimonials to build trust. Real feedback from satisfied customers works better than self-promotion.
Interactive Elements
Small interactive features can make your website feel more dynamic and engaging. Add features that make navigation easier.
Accordions, for instance, help organize detailed information without overwhelming visitors.
They work well for:
-
Frequently asked questions
-
Product specifications
-
Service package details
-
Complex pricing information, etc.
Move to Top Button: Small additions to your website can make a big difference in how people interact with it. Think about the last time you visited a website with a long page - wasn't it nice to have a "back to top" button instead of scrolling all the way up?
Pop-ups: Pop-ups can be useful when used carefully. The key is timing - don't interrupt someone reading your content. Instead, wait until they show signs of leaving or finishing an article.
Use pop-ups to:
-
Offer helpful resources
-
Share special deals
-
Collect feedback
-
Build your email list
But remember - too many pop-ups might feel like spam. One well-timed, relevant offer works better than multiple random interruptions.
Search Option: Search functionality becomes essential as your site grows. If you have more than a few pages, help visitors find specific information quickly. A good search function can mean the difference between a frustrated visitor leaving and a happy customer finding exactly what they need.
Custom Features
Sometimes, you need to add features that don't come built-in with your website platform. Custom code lets you add unique elements that set your site apart from competitors.
Dorik offers custom code integrations by default.
Start with essential features that solve real problems. Add more as your business grows. Test each new feature to ensure it improves the user experience. Always prioritize mobile compatibility and ease of use.
But before adding any new feature to your website, ask yourself:
-
Will this help my visitors?
-
Does it solve a real problem?
-
Can people figure it out easily?
-
Will it work on phones and tablets?
Start small and test one feature at a time. Watch how visitors use it. Do they interact with it as you expected? Does it make their experience better or just add complexity?
Mobile Check
Top toolbar → Phone icon
-
Ensure buttons are at least 44 px tall for thumb taps.
-
Menu auto-converts to a hamburger icon; tweak colors if needed.
On mobile devices:
-
Replace your standard menu with a hamburger menu – those three lines that expand to show navigation options.
-
Make sure menu items are large enough to tap with a finger.
-
Stack your content in a single column to prevent horizontal scrolling.
-
Place important information at the top
Test your mobile navigation thoroughly. Can visitors easily find and tap menu items? Does your content flow naturally on a small screen? These details make a big difference in how people experience your site on mobile devices.
Did I mention that all websites made with Dorik are 100% mobile-optimized?
Step 4: Pick a Domain Name
Your domain is your site’s web address (e.g, yourdomain.com). Choose one that’s short, relevant, and easy to type.
Checklist for a strong domain:
-
Under 3 words
-
No numbers or hyphens
-
Easy to remember
-
.com or country-specific (.co.uk, .de)
-
Avoid trademarked names
-
Add domain privacy and enable auto-renewal
Buy domains from registrars like GoDaddy or Namecheap
Step 5: Optimize Your Website for Search
Your site is live-ready; now give Google the right signals.
| Task | How to do it in Dorik | Resources |
| Add Meta Title & Description | Page → ⚙ Page Settings → Basic → expand Page Title & Description → fill both fields (50–60-char title, ≤155-char description). | https://help.dorik.com/en/article/title-and-description-page-settings-rwbi55/ |
| Structure Content with Headers | Select text → set H1 once per page, H2/H3 for subsections. | https://help.dorik.com/en/article/global-styles-basics-1gcjxxw/#2-heading-typography |
| Speed Check | Dorik auto-compresses images & serves via CDN; still remove unused blocks and large videos. | https://pagespeed.web.dev/ |
| Mobile Preview | Toolbar → 📱 → scan each page; enlarge any tap target < 44 px. | https://help.dorik.com/en/article/responsive-settings-xwzrzr/ |
| Internal Links | Highlight text → Link → choose existing page; use descriptive anchor like “web-design services,” not “click here.” | https://help.dorik.com/en/article/links-4hzl2n/ |
| Submit Sitemap | Your site auto-generates yourdomain.com/sitemap.xml. 1. Open Google Search Console → add property. 2. Copy meta tag → Site Settings → Advanced → Header Code → paste → Save. 3. In Search Console, click Verify then Sitemaps → enter sitemap.xml. |
https://developers.google.com/search/docs/crawling-indexing/sitemaps/build-sitemap |
Blog-Post SEO
When writing a post: Post Settings → SEO Settings → add meta title, description, focus keywords, and (if needed) canonical URL or no-index toggle.
Stay consistent: fresh articles or page updates every few weeks keep rankings climbing.
Step 6: Test & Polish Before You Publish
-
Device sweep: Open your site on Chrome, Safari, and Firefox on both iOS and Android.
-
Content scan: Read every page; correct typos, missing images, or dead links.
-
Form check: Submit a test message; confirm receipt in your inbox.
-
Navigation test: From Home, reach any page in ≤ 3 clicks.
-
Speed check: Run Google PageSpeed Insights; aim for 80+ on mobile.
-
Second-pair review: Ask a friend to click around and note any confusion.
Invite one friend to click through; fresh eyes spot what you miss.
Step 7: Connect Your Custom Domain & Publish The Website
-
Add Your Domain in Dorik: Dashboard → Styles & Settings → Custom Domain → enter yourdomain.com.
-
Copy DNS Records: Dorik shows one A record (IP) and one CNAME value; copy both.
-
Update Your Registrar: In Namecheap, GoDaddy, etc., add the matching A and CNAME records → Save; DNS can take a few hours to propagate.
-
Publish: Finally, hit Publish. Dorik pushes files to its CDN and issues an SSL certificate automatically.
Congratulations! Your site is now live, indexed, and ready for visitors.
Read the detailed documentation on how to connect a custom domain to your website.
You’re Live—Now What?
Publishing your site is just the start. Here’s how to attract your first visitors and keep your website performing at its best.
Bonus Step 1: Get Visitors to Your Website
Start with People You Already Know
Your existing contacts are your first traffic source.
-
Send a personal email to friends, clients, or subscribers.
-
Include a brief intro, key features, and a direct link.
-
Offer something small—like a free download, discount, or demo.
If you already have an email list, write a short launch announcement. Use a subject line like: “Just Launched: [Your Site Name]—Get Early Access”
Share on Social Media
-
Focus on platforms where your audience already spends time.
-
Post clear, benefit-driven updates paired with images, screenshots, or short videos.
Good formats:
-
A carousel showing features
-
A teaser video walkthrough
-
A "before vs after" comparison (for redesigns)
Tip: Link to a high-converting page like Services or Book Now—not just your homepage.
Consider Small Paid Campaigns
To speed up reach:
-
Use Facebook Ads to target by interest, job title, or location.
-
Use Google Ads to capture people searching for what you offer.
Start small—$5–$15 per day—to test.
Each ad should include:
-
A clear value (what’s in it for the visitor)
-
One focused CTA (e.g., "Book Free Demo")
Track What’s Working
Set up Google Analytics (or use Dorik’s built-in analytics) to track:
-
Where your visitors come from (email, social, search)
-
Which pages they visit most
-
Where they leave
Use this data weekly to improve what you promote and where you promote it.
Bonus Step 2: Keep Your Website Fresh
Update Your Content Regularly
Add or revise at least one thing every few weeks:
-
Update service descriptions
-
Add new testimonials or case studies
-
Post short blog articles (200–400 words)
This shows Google your site is active and gives visitors a reason to return.
Monitor Site Performance
Use your analytics dashboard to review:
-
Pages with high bounce rates → improve clarity or CTA
-
Conversion rates → simplify forms or add testimonials
-
Mobile performance → test on iOS and Android
Check Technical Health Monthly
Use tools like Ahrefs, Semrush, or PageSpeed Insights to:
-
Fix broken links or missing images
-
Update expired plugins (if using custom code)
-
Maintain fast load times
-
Backup your site data
-
Test your forms
Dorik handles most of this automatically, but it's good practice to do a monthly check-in.
Adapt Based on What Works
If 80% of leads come from email, double down on your list. If social underperforms, experiment with formats or timing.
Create a simple checklist:
-
Update at least one page
-
Check Google Search Console for issues
-
Review top/exit pages in analytics
-
Respond to all new messages or reviews
-
Backup your site
Your website is a living asset; treat it like one, and it will keep delivering value over time.
Your Website Journey Doesn’t End, It Grows
You’ve launched your site. You’ve taken the first step toward visibility, credibility, and growth. Now build momentum.
Set one small action for this week:
-
Publish a blog post
-
Run a short email blast
-
Post a site link on LinkedIn or Twitter
Your audience is out there. Invite them in.
Just getting started?
📌 Save this guide and refer back whenever you update, test, or promote your site.
🧠 Bookmark Dorik Docs for technical walkthroughs.
💬 Need help? Live support is available 24/7 inside your dashboard.
FAQs
How to create a website for free?
You can create a website for free using platforms like Dorik, WordPress.com, Wix, or Carrd. Most offer free plans with basic features and subdomains (e.g., yoursite.dorik.io). To get a custom domain or advanced tools, you’ll need to upgrade to a paid plan. Free sites are ideal for personal projects or testing ideas.
What are the website design trends in 2025?
In 2025, expect design trends to focus on minimal interfaces, bold typography, micro-interactions, and AI-generated visuals. Accessibility, fast load speeds, and mobile-first layouts remain essential. Dark mode, neumorphism, and personalized user experiences will also shape how modern websites look and feel.
How much does it cost to build a website?
Building a website can cost $0 to $5,000+, depending on your tools and goals. DIY platforms like Dorik start at $18/month. Custom-coded sites from agencies range from $1,500 to $10,000+. Domain names typically cost $10–$20/year, and hosting ranges from $3 to $30/month if not bundled.
How to build an e-commerce website?
To build an e-commerce website, start with a platform like Dorik, which supports Stripe, PayPal, and Gumroad for selling products directly. For a full-featured store with carts, inventory, and order tracking, integrate Dorik with Shopify or Ecwid. Choose Shopify or WooCommerce only if your store requires advanced operations like multi-location fulfillment or dynamic pricing.
What is the difference between using a website builder and hiring a developer?
Website builders let you launch in 1–3 hours using drag-and-drop tools for $10–$40/month. Hiring a developer takes 2–6 weeks and costs $1,500–$10,000+, depending on complexity. Builders are faster and budget-friendly; developers provide full customization and advanced features at a higher cost and timeline.
How to optimize a website for SEO?
Optimize your website by using relevant keywords in titles, meta descriptions, headers, and URLs. Structure content clearly with H1–H3 tags. Improve site speed, add internal links, and ensure mobile responsiveness. Submit your sitemap to Google Search Console and keep content fresh for higher visibility.
How to promote a new website?
Promote your site by sharing it with your email list and social media followers. Post valuable content, run small ad campaigns, and list your site on relevant directories. Use SEO to attract organic traffic and consider partnerships or guest posts to reach new audiences.
Can I use AI to create my entire website?
Yes, you can use AI tools like Dorik AI to build a complete website. AI can generate layouts, sections, images, and text based on your input. You can then tweak any part manually. This speeds up launch time and is perfect for beginners or fast-paced projects.
What are some common website mistakes to avoid?
Avoid cluttered layouts, slow loading times, missing CTAs, and poor mobile design. Don’t use vague content or outdated information. Ensure contact forms work and that SEO basics are in place. Test navigation thoroughly so visitors can find what they need in a few clicks.
Let’s Make Your Dream Website!
Building a website has never been more accessible than it is today. It’s a journey made simple with the right tools and guidance. Put these best practices to work and watch your website vision come to life.
Ready to build something amazing? Get started with Dorik now.
