

Staring at a blank screen but not sure how to start your first blog post? You're not alone. Many aspiring bloggers struggle with turning their ideas into engaging content.
This comprehensive guide will walk you through every step of the process, from choosing a topic to promoting your finished post.
Ready to transform your blogging frustrations into a polished article? Let's find out how to write a blog post that captivates your audience.
Key Takeaways
-
Set clear goals for your blog post to guide topic selection, writing style, and promotion strategies, ensuring your content aligns with reader needs and search intent.
-
Conduct thorough keyword research, create a comprehensive outline, and ensure logical flow and complete coverage.
-
Focus on value and simplicity when writing, starting with the body of the post, using an engaging introduction, and optimizing for SEO through strategic keyword placement and linking.
-
Edit rigorously for readability using tools and techniques like reading aloud, then promote your content widely through online communities, email lists, and social media.
-
Track key performance metrics and repurpose your content in different formats to maximize its reach and impact over time.
How to Write a Blog Post
To write a blog post -
-
Define Your Goal
-
Select An In-demand Niche/Topic
-
Research Keywords
-
Identify The User's Intent
-
Understand Your Target Audience
-
Find & Cluster Relevant Sub-topics (Secondary Keywords/LSI Terms, etc.)
-
Perform An In-depth Research
-
Create an Outline
-
Write Your Blog Post
-
Write The Heading (Title) and Fine-Tune The Sub-Headings
-
Edit and Proofread Your Initial Content
-
Optimize The Content for SEO
-
Publish Your Content
That's just the tip of the blogging pyramid. I've explained each step in so much detail that you won't ever need to search anywhere else to master blog writing.
Plus, we've prepared some really useful pre-made blog post templates, editing checklists, and on-page ranking factor guides that will save you tons of hours.
That's not all. I've also added three bonus steps at the end to get the most out of your blog post.
Already have a topic in mind? Skip ahead to the "Identify The User's Intent" section to jumpstart your writing process.
Step 1: Define Your Goal
Decide what you want to accomplish by writing your blog post. It’s about understanding the "why" behind writing your blog post.
What purpose do you want it to serve? Do you want to share knowledge on a topic? Attract new customers? Express yourself creatively? Knowing your goal upfront will guide all the other decisions like topic selection, writing style, promotion strategies, etc.
For example, if your goal is to attract customers, you'll likely use industry terminology, cite credible sources, and include calls to action leading to your products/services. But if creative expression is the goal, you have more freedom to get inventive with formats and writing styles.
Your goal shapes what you write about and how you promote the post. With a clear goal in mind from the start, you can make sure your blog post achieves what you want it to.
Step 2: Select An In-demand Niche/Topic
A niche is a specific segment of a larger market with its own unique needs and characteristics. Sub-niches, in contrast, are even more specialized, targeting a smaller group within the broader niche.
Here's a step-by-step guide to choosing a blog niche:
-
First, pick a topic you are knowledgeable or genuinely interested in.
-
Then, research if it is currently trending and in high demand by looking at Google Trends data.
-
Evaluate the total addressable market size.
-
Assess the niche size to ensure it's large enough to sustain your efforts but not too broad to stand out.
-
Analyze the existing competition, their strengths, weaknesses, and any gaps you could potentially fill better.
-
Then, consider the target audience demographics, seasonality patterns, and earnings potential.
-
Finally, if it involves sensitive topics like finance or health, ensure you have the expertise and authority to provide accurate advice.
Still feeling stuck on specific niche ideas? Check out our list of Blog Niche Ideas In 2025 for inspiration on hot topics to explore.
Step 3: Research Keywords
Keywords or queries are the words and phrases that people type into search engines like Google when looking for information online. In blogging, keyword research is the process of identifying and analyzing the specific keywords/queries that your target audience is using to search for content related to your blog's topics.
The goal of keyword research is to understand exactly what words and phrases your potential readers are typing into Google so that you can create content that directly answers their search queries.
This helps ensure your blog shows up in the search results when people look for information on those topics.
Steps for Effective Keyword Research
-
Start with Broad Topics (Seed Keywords): Brainstorm categories relevant to your niche and expand them with related terms using Google’s autocomplete, People Also Ask, and related searches.
-
Analyze Keyword Metrics: Use tools like SEMrush or Ahrefs to evaluate search volume, keyword difficulty, traffic potential, and user intent. Choose keywords with balanced metrics for better ranking opportunities.
-
Prioritize BOFU Keywords: Bottom-of-Funnel keywords target purchase-ready users, providing faster results and higher ROI.
-
Explore Compact Keywords: Compact keywords are highly specific, have low-competition terms, and have high conversion rates, requiring less effort to rank.
By combining BOFU and compact keywords with strategic research methods, you can maximize visibility, create content that resonates, and ensure long-term SEO success.
Read our detailed guide to get an in-depth, step-by-step process to do keyword research.
Step 4: Identify The User's Intent
A user’s/searcher's intent is the main goal or desired outcome he/she aims to achieve when entering a query into a search engine. It goes beyond the literal words used in the query and focuses on the underlying reason or motivation behind the search.
Understanding the search intent accurately helps you provide truly relevant and helpful information to the readers. Simply listing surface-level answers often fails to satisfy the searcher's actual needs.
For example, if someone searches "my 6-month-old baby keeps crying at night." You may assume that the reader needs tips for immediately soothing the baby. But the word "keeps" implies this is a recurring issue. The searcher's actual aim is likely to find preventative measures to avoid nighttime crying episodes altogether, not just in-the-moment soothing tips.
Types of Search Intent
There are primarily 5 types of search intent:
1. Informational Search Intent
This refers to when the searcher wants to find information to learn about or better understand a particular topic. There are several sub-types within informational intent:
-
Knowledge
Simple knowledge-based queries to learn facts. Ex: "What is a blog?", "History of blogging," "Different types of blogs," etc.
-
Methods
Looking for specific solutions or methods to solve a problem. Ex: "How to start a blog in 2025," “How to optimize content for SEO,” etc.
-
Reasons
Wanting to understand the causes or reasons behind an issue Ex: "Why are blogs important for businesses?", “Content not ranking on Google,” etc.
-
Comparisons
Researching to compare different options/products Ex: "Organic vs direct traffic," “Difference between blog and vlog,” etc.
2. Commercial Search Intent
The searcher is researching and gathering information before making a purchase decision on a product or service. Ex: “Best website builders for blogging,” “Top themes for fashion blogs,” etc.
3. Transactional Search Intent
The user intends to complete an actual transaction or purchase after their research. Ex: "Godaddy domain," "Dorik pricing," etc.
4. Navigational Search Intent
The searcher wants to locate and navigate to a specific location or online platform they have in mind. Ex: "Dorik login," "Facebook," etc.
5. Job to Be Done (Utility) Intent
The user needs a specific tool, utility, or online resource to help accomplish a task. Ex: “AI text generator," “Image background remover,” etc.
You know what search intent is, its importance, and its types by now. So, let’s find out how you can identify it.
How to Identify The Search Intent of A Particular Query/Keyword?
Follow these steps to identify the search intent of a query:
Step 1: Follow Your Personal Instinct by Putting Yourself on The Reader’s Shoe
The first step is to tap into your personal instinct by imagining yourself as the person conducting that search query. Ask yourself - “what specific information or task would I be looking to accomplish with this query”? Understanding the underlying motivation behind the query is key.
Step 2: Analyze The Keyword Modifiers
Certain keyword modifiers in the query can provide clues about the searcher's intent. These are some common KW modifiers that, in most cases, indicate the types of search intent. Look for the words provided in the table below in your keywords. These modifiers often indicate the search intent behind a query:
| Informational | Commercial | Transactional | Navigational | Job to be Done |
|---|---|---|---|---|
| What Who When Where Why How to Guide Tutorial Resources Ideas Tips Examples Process Examples |
Comparison Alternatives Review Best Software Plugin App |
Buy Sale To rent Quote Book Price |
Login (for SaaS) Sign In (for SaaS) Contact Hours Customer service Where to Route to |
DIY Builder Calculator Generator Framework Planner Template |
Note: These are just some common examples. There might be numerous other variations and modifiers used in search queries. So, don’t rely solely on the modifiers listed in the table above.
Step 3: Perform An In-Depth SERPs (Search Engine Result Pages) Analysis
Studying the current top-ranking search results can reveal insights into what Google deems the most relevant intent. While exploring the SERPs, try to find out the following patterns:
-
Content Type- Identify the dominant content format (blog posts, videos, product pages, etc.)
-
Content Format- Note the common structures (how-to guides, listicles, news articles, opinion pieces, etc.)
-
Content Angle- Determine if there's a prevailing perspective (freshly updated, beginner-focused, in-depth expert views, etc.)
For example, for the query "SEO best practices," the top results show blog post listicles with a "beginner-friendly" angle.

To best align with user intent, your content should likely follow a similar format and angle.
However, simply matching the format is not enough. Your content must strive to be remarkably better and more valuable than the existing top results through a fresh, uniquely helpful perspective.
The goal is to fully satisfy the searcher's intent behind the query. Try to provide all the relevant information they need without leaving any gaps that lead them to look elsewhere. Pack your content with thorough, easy-to-acquire information directly relevant to the search query and intent.
Step 5: Understand Your Target Audience
Every person searching online has a different reason for their search. Some people are experts, while others are beginners. Some want simple facts, while others need step-by-step guides.
For example, if you've been following this content so far, you've likely found it engaging because it was written with you - the target audience - in mind. The target audience for this particular content is people who have little to no prior experience writing blog posts.
To define your target audience, try to understand who would be most interested in reading your blog posts. What kind of information are they looking for? How much do they already know about the topic?
Use appropriate words and real-life examples they can relate to. Organize your content in a clear, easy-to-follow way with headings, bullet points, and images. This will help different audience groups find the specific information they need.
This will keep them engaged and coming back for more.
Step 6: Find & Cluster Relevant Sub-topics (Secondary Keywords/LSI Terms, etc.)
Secondary keywords are additional words or phrases closely related to your primary keyword. They help search engines understand your content's context and allow you to rank for a wider range of search queries.
How to Find Secondary Keywords:
1. Think Like Your Reader: Put yourself in the searcher's shoes. What questions would they ask about your main topic? List down all potential angles and subtopics that might interest them.
2. Use Search Engine Research Tools: Start typing your primary keyword in Google. Pay attention to:
-
Autocomplete suggestions
-
"People also ask" section
-
Related searches at the bottom of search results
These reveal common related searches people perform.
3. Analyze Competitor Content: Review top-ranking content for your target keyword. Use SEO tools to identify keywords for which their content ranks. Spot opportunities you might have missed.
4. Conduct a Content Audit: Scan current top-ranking results. Identify:
-
Key subtopics they cover
-
Information gaps you can fill
-
Different perspectives on the main topic
After collecting potential secondary keywords, you'll need to organize them effectively through clustering—a strategic process of grouping related keywords to create a logical, comprehensive content structure that matches user search intent and improves your content's relevance and searchability.
How to Cluster Secondary Keywords:
1. Categorize by Search Intent: Separate keywords into intent buckets:
-
Informational
-
Navigational
-
Commercial
-
Transactional
Keep keywords with similar intent together.
2. Clean Up Your Keyword List: Remove:
-
Duplicate keywords
-
Irrelevant terms
-
Overly similar phrases
3. Group by Search Result Similarity: Cluster keywords that return similar search results. These indicate queries seeking comparable information.
4. Prioritize Keyword Clusters: Consider:
-
Search volume
-
Relevance to your primary topic
-
Potential to provide valuable information
5. Map Clusters to Content Outline: Assign each keyword cluster to a specific section or subsection of your content. This ensures comprehensive coverage of the topic.
Pro Tips:
-
Don't force keywords. Integrate them naturally.
-
Focus on providing value, not just hitting keyword targets.
-
Use secondary keywords to answer potential reader questions.
By strategically finding and clustering secondary keywords, you create content that's more comprehensive, engaging, and search-engine friendly.
Step 7: Perform An In-depth Research
To produce a comprehensive and authoritative blog post, thorough research is crucial. Follow these guidelines to explore your topic from all angles:
In-depth Topic Exploration
The key to in-depth research is to cast a wide net and leave no stone unturned.
Use Google search to explore every aspect and angle of your core topic, going beyond the first few pages of results. The internet is vast, so dig deeper to uncover lesser-known yet insightful and authoritative sources of information.
Adopt a questioning mindset and don't take anything at face value, even for widely accepted "facts." Credible sources should back up claims with solid evidence and explanations.
Advanced Search Techniques
When researching a topic for your blog post, you want to continually expand your understanding until you can confidently cover it from all angles. Here's an easy step-by-step approach:
Step 1: Start With the Main Keyword
Let's say your blog topic is "My ceiling fan running slow" Begin by simply searching for that exact phrase. The initial results will give you an overview of the most common reasons like dust buildup, faulty capacitors, motor issues, etc.
This lays the basic foundation, but there's more to uncover. You don't want your post to just restate surface-level info that's already out there.
Step 2: Use Similar Search Variations
Now take it a step further by searching variations like: "Ceiling fan slow speed problem", "Why is my ceiling fan spinning slowly?", "Reasons for a sluggish ceiling fan", etc.
These small tweaks can surface new perspectives and resources you may have missed. The more quality sources you can tap into, the more comprehensive your coverage will be.
Step 3: Diagnose the Root Causes
Once you have a handle on all the potential reasons a fan could be running slow, dig even deeper by researching things like:
"Signs your ceiling fan capacitor needs replacing", "How to test ceiling fan motor for faults", "Troubleshooting tips for a slow ceiling fan"
Now you're getting into the nuts and bolts of actually diagnosing and remedying each possible issue. With this level of mastery, you can provide readers with clear, actionable guidance no matter the underlying cause.
Step 4: Expand Scope If Needed
During your research, you may also identify helpful peripheral areas to include, like ceiling fan maintenance best practices, energy efficiency tips, smart fan options, and more. Don't be afraid to expand your scope to craft a piece that leaves no stone unturned.
The key is using an iterative process - start broad, then cycle through progressively more refined and targeted searches. This systematic approach ensures you deeply understand every aspect of the topic inside and out.
That's what allows you to create detailed, authoritative content that answers every possible question a reader may have and position you as a trusted expert. With no gaps remaining, they leave satisfied without having to look elsewhere.
Collecting Reliable Resources
When researching online, prioritize gathering resources from authoritative and trusted websites with a strong reputation like:
-
Government (.gov) and educational (.edu) websites
-
Respected research journals, publications, and databases like Google Scholar
-
Reputable non-profit organizations in your niche
Leverage advanced search operators like "inurl:," "site:," quotations, wildcards, etc., to find precise and relevant information. Avoid websites with excessive spelling/grammar errors - a red flag for unreliability.
In addition to articles and publications, don't overlook other valuable content formats like:
-
News articles for recent events
-
High-quality videos and podcasts
-
Downloadable guides, whitepapers or e-books
Analyzing Competitors
To gain a competitive edge, conduct a thorough analysis of the top-ranking content for your keyword or topic. Look for gaps, missed angles, light, or outdated information that you can fill with deeper insights. Identify if competitors are publishing unique data, original research studies, or authoritative industry reports that you can replicate or build upon.
Furthermore, monitor relevant forums, communities, and influencers in your niche to spot emerging trends and content opportunities. Subscribing to reputable industry publications, newsletters, and blogs can also help you stay ahead of the curve.
Filling in Content Gaps
After auditing the competition, look for any gaps, weak points, or surface-level coverage that you can address with superior and more valuable information. Build out unique insights, examples, statistics, or original data to make your content stand out.
Additionally, create a "trusted sources" list of go-to authoritative websites to rapidly find credible information in your niche.
Taking Help from AI
There are a number of AI websites that can be used for research purposes when it comes to content writing.
Some of the most popular AI platforms include:
| AI Platform | Unique Characteristics | Best Use Cases | Address (URL) |
|---|---|---|---|
| ChatGPT | Large Language Model for text-based use cases | Generating content, customer service, language translation | https://chat.openai.com/ |
| Google Gemini | AI-powered chatbot for conversational queries | Generating summaries, answers, content creation | https://gemini.google.com/ |
| Perplexity | Uses AI to answer your research questions along with sources | Conducting research and generating content | https://perplexity.ai/ |
| ForeFront | Platform to train multiple large language models for specific tasks | Deploying AI chatbots, creating unique persona AIs | https://forefront.ai/ |
| AskYourPDF | AI tool for extracting text and data from PDFs | Analyzing and organizing research papers | https://askyourpdf.com/ |
Now that you know how to research your blog post, let’s find out how you can use your research data to make a comprehensive content outline.
Step 8: Create an Outline
An outline is a structured framework that organizes and breaks down the main topic of your blog post into smaller sections, subsections, and key points. It serves as a blueprint or a roadmap that guides you through the writing process and ensures your content is well-organized, logical, and covers all the necessary information.
Creating an outline before writing helps organize your thoughts, ensures logical flow, and prevents missing important information.
Here are some key benefits of creating an outline before writing the content:
-
Improves content structure and flow
-
Helps you stay focused on the main topic
-
Ensures no important points are missed
-
Makes the writing process more efficient
-
Enhances the readability of your content
-
Allows you to easily rearrange or modify sections
How to Create a Content Outline
Here is a step-by-step guide on how to create an outline for your blog post:
Step 1: Compile The Topics, Subtopics, and Research Findings in A Blank Document
Start the outlining process by consolidating all the relevant topics, subtopics, and information you've gathered through your comprehensive research phase.
First, transfer over the clustered secondary keywords and subtopic themes you identified in Step 6. These will form the core components of your outline structure.
Next, review the in-depth findings from your topical research conducted in Step 7. This includes key points, statistics, examples, authoritative sources, and any unique angles or perspectives you discovered.
Compile all this valuable information into the same document alongside the secondary keyword clusters.
Step 2: Organize The Topics, Subtopics, and Research Findings Into a Logical Order
With all the topics, subtopics, and research findings compiled, now it's time to arrange them into a cohesive, easy-to-follow outline structure. This involves:
Removing Irrelevant/Duplicate Information - Go through and eliminate any subtopics, data points, or research findings that are irrelevant or duplicate/repetitive in nature. Your outline should only contain focused, unique content.
Identifying Your Main Content Categories - From the compiled list, determine which topics are the main overarching categories or chapters. These will form the major sections or pillars of your outline and blog post structure.
Assigning Subtopics as Subsections - Under each main category, group and assign the relevant subtopics as subheadings or subsections. The subtopics that relate most directly to a main category become H3 subsections under that H2 category heading.
Organizing The Topics & Subtopics in A Logical Flow - Arrange the main points and sub-points you listed into a logical and natural sequence that will make sense to the reader. The order should follow a coherent narrative or progression that guides the reader through the topic seamlessly.
For example, you arrived here seeking guidance on how to write a blog post effectively. However, we are now at Step 8 of the process, and you have not yet encountered any information directly related to the actual writing portion.
This is because the preceding steps, such as defining the topic and goals (Step 1), researching and compiling information (Steps 6 and 7), identifying user intent (Step 4), and creating an outline (current step), are necessary foundational elements. Completing these steps first will ultimately make the writing process smoother, and more efficient, and lead to a higher-quality end product.
If the writing advice was provided prematurely before addressing these crucial preparatory steps, the information would lack proper context and flow, diminishing its overall helpfulness.
Establishing a Clear Hierarchy of The Headings & Sub-headings - Determine which points should be top-level headings (H2s) and which should fall under subheadings (H3s, H4s, etc.) or supporting details. This hierarchy will visually represent the relative importance and relationship among the different sections.
To use headings and subheadings in your blog post, you need to get familier with H-tags.
H-tags are denoted as H1, H2, H3,......, etc. in most document editing software (e.g., Google Docs, Microsoft Word, etc.) and content management systems (CMS) like Dorik CMS, WordPress, etc.
H1 represents the main heading of content and carries the most weight. And the weight of the H-tags decreases as the number after the H (e.g.: 2, 3, 4, etc.) increases.
The rules of thumb for H-tags in SEO content are as follows:
-
H1- Only for the primary heading (Title). There must be a single H1 tag in an article. All other sections and/or sub-sections will fall under other H-tags except the H1.
-
H2- For all other independent sections except the title.
-
H3- For any topic that falls under the preceding H-tags (H2 is the preceding H-tag for H3).
-
H4- For any topic that falls under the preceding H-tags (H3 is the preceding H-tag for H4).
That’s how the H-tags should be organized in content.
However, you can use other H-tags like H5 or H6 in content but try to limit your H-tags within H4.
You can turn your intended headings and subheadings into actual ones using different platforms. Here are some common software you can use to write your content and assign proper heading tags.
Assigning Heading Tags in Dorik CMS:
Step 1: Login or Sign Up to Dorik.

Step 2: Create your website without writing any code using Dorik CMS. It shouldn’t take you more than 30 minutes to create a basic website on Dorik, even if you have zero coding experience.

Step 3: Head over to “Blogs” and click on the “+ New Post” button to write your blog post.

Step 4: Add your title in the “Title” field. This will work as your H1.
Step 5: Press “⭾Tab” or click on the “+” icon and select “Heading” to add a section to type your heading.

You can then click on the six dots to tune your heading.

That’s how easy it is to assign proper heading tags in Dorik CMS.
Assigning Heading Tags in Google Docs:
Step 1: Log in to your Gmail account on the browser you’ll be using Google Docs.
Step 2: You can create a blank document from your Google Drive or Google Docs. But I prefer the shortcut method to open a new Google doc. Just type in “docs.new” in the search bar and a new document will be created for you.
Step 3: You can assign heading tags from the “Style” dropdown.

You can also use the shortcuts. The shortcut to assign a heading in Google Docs is “Ctrl+Alt+1/2/3/4, etc.” For H2, it will be “Ctrl+Alt+2” and so on.
Once you’re done with assigning proper H-tags to your outline, you can see your outline on the left side of the doc file.

So it’s that easy to assign H-tags in Google Docs. However, if you want to follow my workflow, I’d suggest writing your content in Google Docs because it lets you collaborate with your teammates and you get some really cool features like commenting and tracking version history.
After finalizing the content on Google Docs, I copy and paste the entire content on Dorik. Don’t worry, you don’t need to reformat your content on Dorik. Dorik keeps all the formatting like headings, bullets, numbers, tables, images, links, etc. intact when you paste the content from a different platform.
Step 3: Consider User Intent and Journey
Revisiting the user intent you identified in Step 4, ensure your outline addresses the specific queries, pain points, and information needs of your target audience at each stage of their journey. The structure should align with how they think about and consume this topic.
Step 4: Review for Comprehensiveness
Go through your outlined structure and ensure that you have covered all the key aspects of the topic based on your research. Check if any important points are missing or if any sections need further expansion or supporting details.
Step 5: Get A Second Opinion
Once you've developed your initial outline, ask someone to review it. This could be a colleague, supervisor, or even just sharing it online for feedback. An outside perspective can identify gaps or areas that need clarification.
Step 6: Refine and Adjust
Don't be afraid to revise, rearrange, add, or remove sections from your outline based on the feedback you receive. The outline is meant to be an iterative process to produce the best possible content framework before writing.
You can even refine the outline as you go through the writing process. You may need to reorganize, consolidate, or expand certain sections based on the flow of your content or any new information that emerges.
Now you may ask, “Do I need to create an outline from scratch for every content I write”? Well, after writing and exploring thousands of content, I’ve found some common outline patterns of blog posts. Hence, I’ve created some blog post outline templates for those common blog post types that will save you tons of hours in your writing journey.
All of these outline templates are proven to perform well on search engines and are super helpful in speeding up your writing.
So, here are the 10 most common blog post types with outline templates:
Now that you have your outline ready, it’s time to write the content.
Step 9: Write Your Blog Post
Generally, blog posts have four distinct segments. These are:
-
Introduction
-
Blog post body
-
Conclusion
-
FAQs (Optional)
I always write the introduction after writing the body of the blog post, and I recommend this to my writers. Here’s why:
Writing the body content before the introduction helps you better understand your main points and makes it easier to create a strong introduction that accurately previews the content. It also allows you to craft a more engaging opening that hooks readers.
Here are some benefits of writing the introduction after the body content:
-
Better understanding of your content
-
More precise preview of main points
-
Easier to craft an engaging hook
-
Saves time by avoiding rewrites
-
Ensures consistency between intro and body
-
Helps identify the most important information
-
Allows for a more natural flow of ideas
This method helps you write a stronger, more focused introduction that accurately represents your article's content.
So, let’s start with the content body.
Write Your Blog Post Body
The blog post body is where you deliver on the promise made in your headline and introduction. This is where you provide valuable content that solves your readers' problems or answers their questions. An effective body keeps readers engaged and encourages them to take action.
Here's how to write an impactful blog post body:
-
Make it scannable: Use self-explanatory subheadings that clearly convey the topic of each section. This helps readers quickly find the information they need, enhancing user experience and increasing your chances of winning featured snippets.
-
Put yourself in the reader's shoes: Consider what information your audience needs and how they might consume it. Address their pain points and anticipate their questions.
-
Satisfy the searcher’s intent: As discussed earlier, this is the single most important aspect of your blog post. No matter how engaging or well-written your content is, you need to make sure your content meets the searcher’s true intent.
Try to answer the main query of the content as early as possible in a most straightforward and easy-to-understand manner. Once you’ve thoroughly explained the main query, then logically move on to the surrounding topics.
-
Use simple, common language: Aim for a 6th to 8th-grade reading level in general. Break down complex ideas into easy-to-understand explanations using everyday terms and phrases.
However, you need to adapt your language to your target audience based on your readers' expertise.
For example, if your target audience is PhD holders, you can use more technical terms and complex concepts. However, always strive for clarity. Even for highly educated audiences, clear and concise writing is always appreciated. Use field-specific jargon when necessary, but explain complex ideas thoroughly.
-
Write short, focused paragraphs: Keep paragraphs to 2-3 sentences. This improves readability, especially on mobile devices.
-
Use active voice whenever possible: Instead of "Our team wrote the report," say "Our team wrote the report." This makes your writing more direct and engaging.
-
Keep it conversational: Write as if you're talking to the reader. Use contractions, ask questions, and inject your personality to connect with readers.
-
Ensure logical flow: Organize your content in a pleasing, logical way. Use transition words to connect ideas smoothly.
-
Make sure the readers understand the topic in one go: Write in a manner that ensures readers understand the topic in one go. This applies to every sentence, paragraph, and section of your content.
Craft your writing so that readers never need to reread any part. Use clear language, logical flow, and concise explanations to make your content instantly understandable. Avoid ambiguity or confusing language that might require re-reading.
This is the single most valuable piece of advice I give to my writers.
-
Include relevant examples: Illustrate your points with real-life scenarios or case studies. This helps readers apply concepts to their own situations.
-
Optimize answer targets for NLP: NLP (Natural Language Processing) optimization helps search engines better understand your content and increases the chances of appearing in featured snippets. Here's how to optimize for NLP:
-
Answer questions clearly and directly
-
Use simple, everyday language
-
Organize content with descriptive headings
-
Write short, focused paragraphs, ideally within 320-400 characters
-
Include lists and bullet points for key information
-
Remember to write naturally, focusing on providing valuable information to your readers.
-
Use visuals strategically: Add relevant images, charts, or infographics to break up text and reinforce key ideas.
-
Incorporate bullet points and numbered lists: Use bullet points for unordered lists where the sequence doesn't matter.
For example: Key features of a product; Benefits of a service; Random facts about a topic, etc.
Use numbered lists for sequential information or prioritized items. For instance:
-
Steps in a process
-
Ranked items
-
Chronological events
Use sub-bullets or sub-numbers for hierarchical information. For example:
-
Main point 1.1 Sub-point 1.2 Sub-point
-
Main point 2.1 Sub-point 2.1.1 Further detail
-
Back up claims with data: Use credible statistics and sources to build trust and authority. Always cite your sources and link to original research when possible. This not only builds trust but also provides readers with opportunities for further learning.
-
Widen your content: Content widening means packing more valuable information into your writing without increasing word count. The key is to replace fluff, unnecessary words, and surface-level explanations with specific, actionable insights.
A well-widened 500-word segment can provide far more value than a 2000-word piece filled with generalities. The goal is to satisfy user intent comprehensively while keeping your content concise and information-dense.
Let's compare basic and widened versions of two blog topics. Note how the widened versions provide more specific, actionable information within the same or less word count.
Example:
Basic version (47 words):
“Writing a blog post involves choosing an interesting topic and creating an outline. Use engaging language and include a catchy headline. Add relevant images to make your post visually appealing. Proofread your work before publishing. Remember to include a call-to-action at the end to encourage reader engagement.”
Widened version (43 words):
“Craft high-performing blog posts by researching high-volume, low-competition keywords. Structure content with H2/H3 tags, write scannable paragraphs and include data-backed claims. Optimize meta descriptions, interlink related posts, and incorporate multimedia with alt text. Update content regularly to maintain freshness signals for SEO.”
The widened versions offer more value by providing specific, actionable insights instead of general information. They cover more aspects of the topic concisely, satisfying user intent and potentially ranking for more search terms. This demonstrates effective content widening— maximizing information while minimizing word count.
-
Avoid fluff: Remove irrelevant or unnecessary information. Every sentence should serve a purpose and contribute to the reader's understanding.
-
Vary sentence length: Mix short, punchy sentences with longer, more detailed ones to create rhythm and maintain interest.
-
End sections with a hook: Conclude each major section with a teaser or transition that compels readers to continue.
For example: "Now that you understand the importance of keyword research, let's explore how to effectively implement these keywords in your content without compromising quality."
Or:
"With these basics covered, we're ready to dive into more advanced techniques. In the next section, we'll reveal a little-known strategy that could double your blog's traffic."
These hooks create curiosity and momentum, encouraging readers to stay engaged throughout your post.
Aim to provide clear and valuable information that engages your audience and helps them solve problems or learn something new.
Write The Introduction
Craft the opening paragraphs, AKA introduction, that hook readers and set the stage for your content. It's your first chance to grab attention, establish relevance, and convince readers to continue.
A compelling introduction can significantly boost engagement, reduce bounce rates, and improve overall content performance.
Let's break down how to write an effective blog post introduction:
There are two main types of SEO-friendly introductions:
-
Featured Snippet Friendly (FSF) Introduction
-
PPP (Preview, Proof, Preview) Introduction
Let's break down the FSF introduction structure:
The following are the distinct segments an FSF introduction contains:
-
Agree: Start by relating to the reader's situation or pain point. Example: "Staring at a blank page, wondering how to start your blog post? You're not alone."
-
Keyword: Include your target keyword, preferably as a question. Example: "So, how do you write an effective blog post introduction?"
-
Answer Paragraph: Provide a concise, direct answer to the keyword question. Keep it under 320 characters for potential featured snippet optimization. Example: "To write an effective blog post introduction, start with a hook to grab attention, clearly state the topic, address the reader's pain point, and preview your solution. Keep it concise, under 3-5 paragraphs, and use a conversational tone to engage readers immediately."
-
Invite: Encourage the reader to continue reading for more details. Example: "Let's dive deeper into each of these elements to help you craft introductions that captivate your audience and keep them reading."
The FSF structure is designed to increase your chances of appearing in Google's featured snippets, potentially boosting visibility and click-through rates.
Alternatively, you can use the PPP introduction structure:
The following are the distinct segments an PPP introduction contains:
-
Preview: Introduce what the post will cover, giving the reader a reason to keep reading.
-
Proof: Provide evidence or a benefit to build credibility.
-
Preview: Give a brief overview of the specific points or tips the post will address.
Here's how it might look:
Preview: "This post will teach you how to write irresistible blog introductions that keep readers glued to your content."
Proof: "I've used these techniques to grow my blog from 0 to 100,000 monthly readers in just 18 months."
Preview: "You'll learn specific formulas, see real-world examples, and get actionable tips you can implement immediately."
For both approaches, remember these key points:
-
Keep it concise: Aim for 3-5 paragraphs or about 100-120 words.
-
Be direct: Use active voice and conversational tone.
-
Establish credibility: Briefly mention why readers should trust your advice.
Now, let's explore how to make the conclusion of your blog post just as compelling as your introduction.
Write The Conclusion
Your blog post's final section leaves a lasting impression and encourages reader engagement.
Here's how to craft an effective conclusion:
-
Use a transition phrase: Signal the end with phrases like "In conclusion," "To sum up," or "Wrapping things up."
-
Summarize key points: Briefly recap your main ideas.
-
Provide a key takeaway: Offer one main insight readers should remember.
-
Ask a specific question: Encourage comments with an easy-to-answer question related to your topic.
-
Include a call-to-action (CTA): Guide readers on what to do next, such as:
-
Subscribe to your newsletter
-
Download a related resource
-
Share the post on social media
-
Try a product or service
-
-
Try to use some alternative phrases for "conclusion", such as:
-
Final Thoughts
-
Putting It All Together
-
The Bottom Line
-
Wrapping Up
-
Parting Words
-
You can now write some related frequently asked questions (FAQs) or jump onto the next step. Since this guide aims to cover everything you may need to know while writing a blog post, I’ll not skip even the optional segment. So, here it goes.
Write Frequently Asked Questions (Optional)
Sometimes you won’t be able to address every relevant topic of your content in the main body. In that case, you can keep the less important/relevant topic to cover in the frequently asked questions segment.
Here’s how to approach the FAQs segment:
-
Start the answer as directly as possible mimicking the question.
-
Complete the answer comprehensively within 320-400 characters.
-
Write in a manner so that a 6th to 8th-grade student can understand the entire message within one go and he/she doesn't have to search elsewhere.
This is all about writing your content. Now, you can start fine-tuning your headings and sub-headings to make them more scannable to the readers and the search engines.
Step 10: Write The Heading (Title) and Fine-Tune The Sub-Headings
The main title grabs attention and summarizes your post, while sub-headings break down the content into digestible sections.
This structure helps readers quickly understand what your post is about and find the information they need. It improves readability, keeps readers engaged, and helps search engines understand your content better.
Now, let's dive into crafting an effective headline for your blog post:
Write The Headline (Title) of Your Blog Post
Creating a compelling headline helps in attracting readers and encouraging them to click on your post. A great headline can make the difference between a widely-read article and one that gets overlooked.
Here are some best practices for writing attention-grabbing headlines:
-
Use powerful phrases, such as:
-
"How to..." - Promises a solution or guide
-
"X Ways to..." - Offers multiple actionable tips
-
"The Ultimate Guide to..." - Suggests comprehensive coverage
-
"Why You Should..." - Provides reasons or benefits
-
"X Secrets of..." - Implies insider knowledge
-
-
Aim for 12-18 words or 45-60 characters in your headline: This length typically performs best for social shares and search engine visibility. It's long enough to be descriptive but short enough to avoid truncation in search result pages.
-
Incorporate special characters: Use brackets or parentheses to boost click-through rates. For example: "10 SEO Tips (That Actually Work in 2025)" This technique adds extra information or intrigue to your headline.
-
Include power words: Emotionally charged words can evoke curiosity or urgency. Some wiedely used power words are:
-
"You/Your"
-
"Proven"
-
"Incredible"
-
"Surprising"
-
"Game-changing"
-
-
Consider your audience: For B2B audiences, focus on specific, value-driven headlines:
-
"How [Product] Increases [Metric]"
-
"X Strategies to Improve [Business Process]"
-
"The ROI of [Industry Trend]"
-
"Case Study: How [Company] Achieved [Result]"
-
-
Use numbers: Headlines with numbers often perform well, as they promise specific, quantifiable information: "7 Proven Ways to Boost Your Website Traffic"
-
Create curiosity: Pique readers' interest with headlines that hint at valuable information: "The Little-Known Secret to Doubling Your Productivity."
-
Make a bold statement: Capture attention with a strong claim (but ensure your content delivers): "Why Everything You Know About SEO Is Wrong."
-
Use active voice: Make your headlines more dynamic and engaging: "Boost Your Sales with These 5 Marketing Tactics" (instead of "5 Marketing Tactics That Will Boost Your Sales")
-
Optimize for SEO: Include your target keyword naturally in the headline, preferably near the beginning.
-
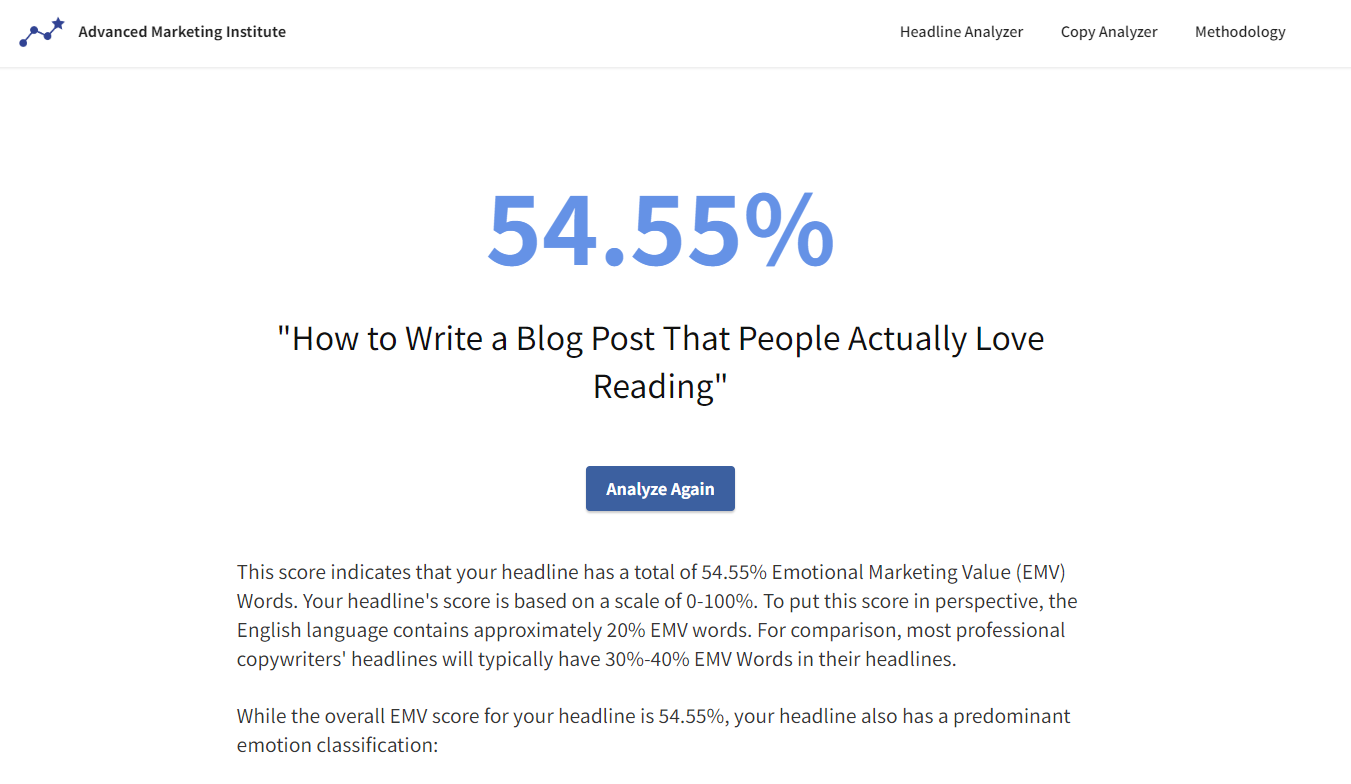
Test emotional marketing value (EMV): Use tools like the Advanced Marketing Institute's EMV Headline Analyzer to score your headline's emotional impact. Aim for at least 35-40% EMV, with top-performing headlines often reaching 70%+. For instance, the headline of this content has a score of 54.55% EMV.
-
A/B test your headlines: Create multiple versions and test them to see which performs best with your audience.
While these techniques can help create engaging headlines, always make sure your content delivers on the promise of your headline. Avoid clickbait that disappoints readers once they start reading your post.
Now that we've covered headline best practices, let's move on to crafting effective sub-headings for your blog post.
Fine-Tune The Sub-Headings of Your Blog Post
Subheadings help organize your content and guide readers through your article. They break up large blocks of text, making your post more scannable and easier to read.
Well-crafted sub-headings help readers quickly find the information they're looking for and keep them engaged throughout the post.
Best practices for writing impactful sub-headings:
-
Keep them descriptive and self-explanatory: Craft sub-headings that clearly convey each section's content without needing additional context. A reader should understand what the section is about just by reading the sub-heading. Example: Instead of: "More Tips" Use: "5 Advanced SEO Techniques for E-commerce Websites"
-
Use parallel structure: Keep your sub-headings grammatically consistent. If you start with a verb, continue that pattern throughout. Example:
-
Researching Your Target Audience
-
Creating Compelling Content
-
Optimizing for Search Engines
-
Promoting Your Content Effectively
-
-
Include keywords naturally: Incorporate relevant keywords in your sub-headings when they make sense, but prioritize clarity and relevance over keyword stuffing.
-
Keep them concise: Aim for sub-headings that are brief yet informative. Typically, 5-7 words work well.
-
Use question formats: Frame sub-headings as questions to pique curiosity and directly address reader concerns. Example: "How Can You Improve Your Website's Loading Speed?"
-
Incorporate numbers: Use numbers to indicate steps in a process or to list multiple points. Example: "3 Key Factors That Influence Conversion Rates"
-
Make them benefit-oriented: Highlight the value readers will gain from each section. Example: Instead of: "Social Media Marketing Tips" Use: "Boost Engagement with These Social Media Marketing Strategies"
-
Use power words: Incorporate compelling words to make your sub-headings more engaging.
-
Ensure consistency: Keep your sub-heading style consistent throughout your post. If you use the title case for one, use it for all.
-
Preview content: Give readers a taste of what's to come in each section, encouraging them to continue reading.
-
Use alliteration (sparingly): Alliteration is the repetition of the same sound at the beginning of multiple words in a phrase. It occurs when consecutive words start with the same consonant sound. For example: "Powerful Practices for Perfect Presentations." Occasional use of alliteration can make sub-headings more memorable.
-
Balance information and intrigue: Provide enough information to be clear, but leave some curiosity to encourage further reading.
Step 11: Edit and Proofread Your Initial Content
Editing your blog post ensures it's error-free, clear, and engaging. This process involves checking for grammar, spelling, and punctuation mistakes, improving sentence structure and flow, verifying facts, and enhancing overall readability.
A final edit polishes your writing, making it more professional and effective in conveying your message to readers.
Let's break down the key aspects of editing and proofreading your blog post:
1. Verify all facts and statistics for accuracy: Verify all facts, statistics, and claims in your content. This is important for maintaining credibility and providing accurate information to your readers.
Here's how to approach fact-checking:
-
Distinguish between primary and secondary sources. Primary sources (like original research or direct quotes) are generally more reliable.
-
Use reputable, trustworthy websites for information. Be wary of sources with potential biases.
-
Ensure your sources are up-to-date, especially for topics that are time-sensitive and change rapidly.
-
Cross-check information with multiple sources to confirm accuracy.
2. Make sure the content flows smoothly: Review the overall organization of your post to ensure it follows a logical progression:
-
Check if your content structure aligns with search engine results page (SERP) expectations.
-
Ensure your introduction hooks the reader and clearly states the post's purpose.
-
Verify that each paragraph flows smoothly into the next, using appropriate transition words or phrases.
Look at the end of each paragraph and see how it connects to the first sentence of the paragraph following it. If there’s no clear connection, you can improve the transition by clarifying your logic or rearranging the paragraphs.
Here are some transitional words you can use in your blog post to make the content flow smoothly:
| Relationship | Words/phrases to choose from for a smooth transition |
|---|---|
| Similarity | also, in the same way, just as, so too, likewise, similarly |
| Dissimilarity | however, in spite of, nevertheless, nonetheless, in contrast, still, yet |
| Sequence | first, second, third, next, then, finally |
| Time | after, at last, before, currently, during, earlier, immediately, later, meanwhile, now, recently, simultaneously, subsequently, then |
| Example | for example, for instance, namely, specifically, to illustrate, such as |
| Emphasis | even, indeed, in fact, of course, truly, more/most importantly |
| Position | above, adjacent, below, beyond, here, in front, in back, nearby |
| Cause/Effect | accordingly, consequently, hence, so, therefore, thus |
| Additional Support | additionally, again, also, as well, besides, equally important, further, furthermore, in addition, moreover |
| Conclusion | finally, briefly, in conclusion, in the end, in the final analysis, on the whole, to conclude, to summarize, in summary |
[Pro Tip: Read your content out loud. Reading your content out loud helps you catch awkward phrasing, run-on sentences, and areas where the flow isn't smooth. It's an effective way to identify parts that might confuse or lose your readers.]
-
Confirm that your conclusion effectively summarizes key points and provides closure.
3. Optimize your content for SEO (I’ve covered this in more detail in the next step): Fine-tune your content for search engines without compromising readability:
-
Verify that your focus keyword is naturally incorporated throughout the content, including headers and meta descriptions.
-
Check if secondary keywords and LSI terms are appropriately placed.
-
Ensure your meta description is within 145-160 characters and includes the main keyword and a call-to-action (CTA).
-
Confirm that your title is within 60 characters and includes the main keyword.
4. Make sure there are no grammatical or spelling mistakes in your content: Use tools like Grammarly to catch and correct errors, but also rely on your own careful reading:
-
Read your content out loud to catch awkward phrasing or errors your eyes might miss.
-
Pay special attention to commonly confused words (e.g., their/there/they're, its/it's).
-
Check for consistency in spelling, especially for brand names or technical terms.
5. Refine sentences for better readability: Refine your writing to make it more engaging and easier to read:
-
Break up long sentences and paragraphs for better readability. Essay Sentence Length Checker can be a great tool to find out the sentences’ length of your content.
-
Aim for a mix of sentence lengths to create a natural rhythm.
-
Use active voice wherever possible to make your writing more direct and engaging.
-
Ensure your content is at an appropriate reading level for your target audience. Use tools like Hemingway Editor to match the reading level of your content.
6. Use proper formatting and visuals: Enhance the visual appeal and scannability of your post:
-
Use headers (H2, H3, etc.) consistently to organize your content.
-
Incorporate bullet points or numbered lists where appropriate.
-
Add relevant images, infographics, or videos to break up text and illustrate key points.
-
Ensure all visual elements have appropriate alt text for accessibility and SEO.
Expert Recommendation: As a blogger, you can bring readers closer to events and ideas you want to convey by balancing a variety of multimedia elements such as audio, video, text, images, infographics, animations, etc.
7. Add and verify links and attributions: Verify all internal and external links:
-
Ensure you have at least 2 relevant internal links and 1 authoritative external link.
-
Check that all links are working and lead to the intended destinations.
-
Properly attribute any quotes, statistics, or ideas to their original sources.
8. Fine-tune your writing style to your target audience: Confirm that your writing aligns with your brand voice and the expectations of your audience:
-
Maintain a consistent tone throughout the post.
-
Ensure the level of formality or casualness is appropriate for your topic and audience.
-
Check that any industry-specific jargon is used correctly and explained if necessary.
9. Perform a final review for a polished end result: Before publishing, give your post a final once-over:
-
Read through the entire post one last time, looking for any last-minute tweaks or improvements.
-
Have a colleague or friend review the post for a fresh perspective.
-
Double-check your publish settings, including the scheduled date and time.
By thoroughly editing and proofreading your blog post, you'll ensure that your content is not only error-free but also engaging, informative, and optimized for both readers and search engines.
To help you simplify this process, we've created a comprehensive content editing checklist. This will guide you through each step of the editing process and make sure you don't miss any crucial elements.
Download our checklist to take your blog posts from good to great!
Step 12: Optimize The Content for SEO
Optimizing your content for SEO increases the chance of your blog post ranking higher in search results. It involves strategically using keywords, improving readability, and fine-tuning technical aspects to appeal to both search engines and readers. It boosts your content's visibility, drives organic traffic, and helps you reach your target audience more effectively.
Here’s how to optimize your content for SEO:
Meta Description
The meta description is a 150-160 character summary of your page's content. While not a direct ranking factor, it significantly influences click-through rates from search results. Include your primary keyword and a clear call to action.
Here's how to craft an effective meta description:
-
Include your primary keyword naturally.
-
Accurately summarize your content.
-
Include a clear call to action.
-
Make it unique for each page.
-
Stay within the 150-160 character limit to avoid truncation in search results.
Example: "Master SEO optimization with our comprehensive guide. Read this article to learn proven techniques to boost your website's visibility and drive organic traffic."
Keyword Optimization
Keyword optimization involves strategically placing your target keywords throughout your content to signal relevance to search engines.
We'll divide this into two key areas:
-
Primary keyword optimization and
-
Secondary/LSI keyword optimization
-
Primary Keyword Optimization:
-
In title: Place your primary keyword near the beginning of your title tag (H1). Keep titles under 60 characters. Example: "SEO Optimization: 10 Proven Strategies to Boost Your Rankings in 2025"
-
In the intro: Include your primary keyword in the first 100-150 words of your content. Example: "Mastering SEO optimization is necessary for any website looking to improve its search engine rankings and attract more organic traffic. In this comprehensive guide, we'll explore proven techniques to enhance your site's visibility in search results."
-
In URL: Include the primary keyword in your URL slug. Example: yourwebsite.com/seo-optimization-guide
-
In meta description: Naturally incorporate the primary keyword in your 150-160 character meta description.
-
In subheadings: Use the primary keyword in at least one H2 or H3 subheading.
-
Throughout content: Aim for a primary keyword density of 1-2% in your main content. But make sure to place the keywords naturally so that they don’t by any means sound forceful.
-
In conclusion: Reiterate your primary keyword in the concluding paragraph.
-
In image alt text: Include when relevant to the image content.
-
-
Secondary and LSI Keyword Optimization:
-
In subheadings: Use secondary keywords in other H2 and H3 tags to structure your content.
-
Throughout content: Naturally incorporate secondary and LSI keywords to provide context and depth.
-
In image alt text: Use secondary keywords when describing images, if relevant.
-
Vary keyword usage: Use synonyms and related phrases to avoid keyword stuffing. Example of secondary/LSI keywords for "SEO optimization":
-
"search engine rankings"
-
"organic traffic"
-
"on-page SEO"
-
"keyword research"
-
"content optimization"
-
-
Although you need to focus on keywords in your blog post, make sure you don't overoptimize. You need to make sure the keywords don't sound forcefull to manipulate the search engines at all.
-
Making keyword placement natural:
-
Use variations and synonyms of your primary keyword.
-
Include related terms and phrases (LSI keywords).
-
Answer questions related to your keyword.
-
Bold important keywords when used in the main body, but don't overdo it.
-
[Pro tip: Google understands context, so focus on creating high-quality, relevant content rather than exact keyword matches. For example, "SEO guide" and "guide to search engine optimization" signal similar intent to search engines.]
Linking
Effective linking strategies enhance your content's credibility, improve user experience, and distribute page authority.
Let's explore both internal and external linking best practices:
1. Internal Linking: Internal links connect different pages within your website. They help establish site architecture and spread link equity.
Here's how to optimize internal linking:
-
Use descriptive anchor text: Clearly indicate what the linked page is about.
-
Link to relevant content: Ensure the linked page adds value to the current context.
-
Distribute links evenly: Aim for 2-3 internal links per 1000 words.
-
Use a logical link structure: Create a hierarchy that guides users through your site.
Example: "For more in-depth information on SEO optimization, check out our comprehensive guide to the SEO best practices."
2. External Linking: External links point to pages on other websites. They can enhance your content's credibility and provide additional value to readers.
Here's how to use external links effectively:
-
Link to authoritative sources: Choose reputable sites within your industry.
-
Ensure relevance: The external content should complement your article.
-
Use sparingly: Aim for 1-2 external links per 1000 words.
-
Consider opening links in new tabs: This keeps users on your site while allowing them to explore external resources.
3. Anchor Text: Anchor text is the clickable text in a hyperlink. Here are best practices for both internal and external links:
-
Be descriptive: Use phrases that accurately describe the linked content.
-
Keep it natural: Avoid over-optimized anchor text that feels forced.
-
Vary your anchor text: Don't use the same phrase repeatedly for different links.
-
Avoid generic terms: Avoid generic phrases like "click here" or "read more."
-
Consider partial match anchors: Use variations of your target keywords.
Image Alt Text
Alt text (alternative text) describes the content of an image. It's crucial for accessibility and provides context to search engines.
Here's how to optimize your alt text:
-
Be descriptive and specific: Clearly explain what's in the image.
-
Keep it concise: Aim for 125 characters or fewer.
-
Include keywords when relevant: But don't force them if they don't fit naturally.
-
Avoid keyword stuffing: Focus on describing the image accurately.
-
Don't use phrases like "image of" or "picture of": Screen readers already indicate that it's an image.
Image Compression for Page Speed
Page speed is a crucial ranking factor, and large image files can significantly slow down your site.
Here's how to optimize your images:
-
Compress images before uploading: Use tools like TinyPNG, ImageOptim, or Squoosh.
-
Choose the right file format: Use JPEGs for photographs, PNGs for graphics with transparent backgrounds, and WebP for best overall compression.
-
Specify image dimensions: This helps browsers allocate space for images before they load.
-
Use responsive images: Serve different-sized images for different devices. However, most modern website builders automatically optimize your images for device responsiveness.
-
Implement lazy loading: Load images only as they come into view.
As mentioned earlier, you need to optimize your blog post images for better user experienc.
Here are the image optimization best practices you can follow for your content:
-
Aim for a maximum file size of 200KB per image.
-
Maintain a balance between compression and quality.
-
Use CDNs (Content Delivery Networks) for faster image delivery.
Short & Descriptive URLs
A well-crafted URL provides both users and search engines with clear information about your page's content.
Here are key principles for creating SEO-friendly URLs:
-
Keep it short: Aim for 50-60 characters maximum.
-
Use keywords: Include your primary keyword, preferably at the beginning.
-
Use hyphens to separate words: This improves readability for both users and search engines.
-
Avoid unnecessary words: Remove articles (a, an, the) and conjunctions (and, or, but).
-
Use lowercase letters: This prevents potential duplicate content issues with mixed-case URLs.
Example:
-
Good URL example: yourwebsite.com/seo-optimization-guide
-
Bad URL example: yourwebsite.com/post-123456-a-comprehensive-guide-to-search-engine-optimization-techniques-and-strategies
Mobile-Friendliness
With Google's mobile-first indexing, ensuring your blog post is mobile-friendly is crucial.
Here's how to optimize for mobile:
-
Use responsive design: Your content should adapt to different screen sizes automatically.
-
Ensure readable text without zooming: Use a minimum font size of 16px for body text.
-
Optimize tap targets: Make buttons and links large enough (at least 48x48 pixels) and well-spaced.
-
Avoid horizontal scrolling: Content should fit the width of the screen.
-
Optimize images for mobile: Use appropriately sized images to reduce load times.
-
Minimize pop-ups on mobile: They can be particularly disruptive on smaller screens.
-
Test your mobile site speed: Use Google's Mobile-Friendly Test and PageSpeed Insights tools.
[Pro tip: Look for a website builder that simplifies SEO and ensures mobile responsiveness. Dorik does exactly that, offering features like easy meta title management, optimized linking structures, responsive templates, and more. It's designed to help you create a site that performs well in search results and looks great on any device.]
Now that we've covered the essential SEO optimization strategies, you're ready to publish and promote your newly optimized content.
But before you publish, don't forget to download our comprehensive On-page SEO ranking factors guide:
Step 13: Publish Your Content
Now that you've crafted an engaging, informative, and SEO-optimized blog post, it's time to share it with the world. Publishing your content effectively is crucial for maximizing its impact and reaching your target audience.
Let's explore how to streamline this process:
Choose the Right Platform
Selecting the right platform for your blog is crucial. As a beginner, you need a solution that's easy to use yet powerful enough to grow with you. This is where Dorik shines:
-
User-Friendly Interface: Dorik's intuitive drag-and-drop builder lets you create professional-looking blogs without coding knowledge.
-
Built-in Blogging Platform: Enjoy an easy-to-use content writing experience that helps you create engaging content.
-
Built-in SEO Tools: Optimize your content effortlessly with Dorik's integrated SEO features, helping your posts rank higher in search results.
-
Responsive Design: Your blog will look great on all devices, enhancing user experience and boosting your SEO.
Prepare Your Content for Publication
Before hitting that publish button, take these final steps:
-
Final Proofread: Give your post one last read-through to catch any lingering typos or errors.
-
Format for Readability: Use Dorik's content blocks to add headings, blockquotes, and images, making your content easy to read.
-
Set Up SEO Elements: Utilize Dorik's SEO settings to optimize your content for search engines and social media.
Publish Your Blog Post
Now it's time to share your masterpiece with the world:
-
Schedule or Publish Immediately: Dorik allows you to schedule posts for optimal times or publish instantly.
-
Optimize for Search Engines: Take advantage of Dorik's built-in SEO settings, including meta titles and descriptions, to improve your post's visibility.
Leverage Dorik's Unique Features for Bloggers
As a blogger, you'll appreciate these Dorik features that make your journey easier:
-
Clean Blogging Experience: Dorik's simple writing interface lets you focus on creating content without distractions.
-
Content Blocks: Easily format your blog posts using headings, blockquotes, images, and more to enhance readability.
-
Embed Content: Incorporate content from platforms like YouTube, Vimeo, Codepen, and Github to enrich your posts.
Grow Your Audience with Dorik
Dorik isn't just about publishing; it's about growing your blog:
-
SEO Optimization: Use Dorik's built-in SEO settings, JSON-LD data structure, and automated sitemap generator to improve your search engine rankings.
-
Membership Options: As your blog grows, use Dorik's membership features to create gated content and turn your audience into paying subscribers.
-
Performance Optimization: Dorik's global CDN ensures your blog loads quickly, keeping readers engaged and improving your search rankings.
By choosing Dorik as your blogging platform, you're setting yourself up for long-term success. Its user-friendly interface, built-in blogging tools, and SEO features make it an excellent choice for beginners who dream of building a successful blog.
Ready to start your blogging journey? Try Dorik now and experience how easy and enjoyable blogging can be!
Bonus Step 1: Promote Your Content
Promoting your content helps in expanding your reach and attracting new readers. Even the most well-written blog post won't have much impact if no one sees it.
Let's see some effective strategies to get your content in front of your target audience.
Sharing Your Content In Relevant Online Communities Can Significantly Boost Your Visibility
Start by identifying Facebook groups, Slack channels, Discord servers, Reddit subforums, and niche-specific forums where your target audience gathers. When sharing your content, focus on providing value rather than just dropping links. Engage in discussions and share your content when it's genuinely helpful.
Always respect community guidelines about self-promotion to avoid being seen as a spammer.
Leverage Facebook's Advertising Platform to Re-Engage Your Website Visitors
Begin by installing the Facebook pixel on your website to track visitors. Share your blog post on your Facebook page to generate initial engagement, then set up a retargeting campaign. Create a custom audience of recent website visitors (e.g., last 30-60 days) and use a small budget to boost your post to this audience. Monitor your click-through rates and adjust your strategy as needed to optimize performance.
Your Email List Is A Powerful Asset for Content Promotion
Consistently grow your email subscribers through opt-in forms on your blog. When sending newsletters:
-
Keep the design simple and text-based
-
Focus on promoting one piece of content per email to avoid overwhelming readers
-
Only send your best content to maintain high open and click-through rates
-
Personalize your emails by using subscribers' names and segmenting your list for more targeted promotion.
For B2b Content, Linkedin Can Be An Excellent Platform for Organic Reach
Optimize your profile to accurately represent your expertise, then share your content consistently. Experiment with different formats such as text, images, and video. Engage with others by commenting on and sharing their posts to increase your visibility. Use relevant hashtags to help your content appear in topic searches. Pay attention to which types of posts get the most engagement and adjust your strategy accordingly.
Reaching Out to Influencers And Other Bloggers Can Help Amplify Your Content
Identify people who have shared similar content or whom you've mentioned in your post. Craft individual emails that show you've done your research and genuinely value the recipient's opinion. Explain why you think your content would be interesting or valuable to them. Include social media-ready snippets or quotes from your post to make it easy for them to share.
If you don't hear back, send a polite follow-up, but don't pester.
Content promotion is an ongoing process. Consistently apply these strategies, track your results, and refine your approach over time. With persistence and the right tactics, you'll steadily grow your audience and increase the impact of your blog posts.
Bonus Step 2: Track the Performace of Your Published Post
Tracking key metrics helps you understand what's working, what isn't, and how to improve future content.
Here are some essential blog KPIs to keep an eye on:
Total traffic per post: This gives you a clear picture of how many people are reading your content. Use Google Analytics, Google Search Console, or your content management system's built-in analytics to measure this.
Average CTR (Click-Through Rate): This shows the percentage of people who click on your post in search results. A higher CTR indicates that your title and meta description are effective. Google Search Console provides this data.
Average SERP position: This reveals where your post ranks in search results for various keywords. Monitor this in Google Search Console to track your SEO progress.
Traffic source breakdown: Understanding where your traffic comes from (search, social, referrals, etc.) helps you focus your promotion efforts. Google Analytics offers detailed traffic source reports.
Number of search queries per post: This indicates how many different keywords your post is ranking for. More queries usually mean better SEO performance. Check this in Google Search Console.
Average comments per post: Comments reflect reader engagement. Track this directly on your blog platform.
Social shares per post: This shows how shareable your content is. Use tools like BuzzSumo or native platform analytics to measure shares across different social networks.
New blog leads: Track how many new subscribers or leads each post generates. Set up goal tracking in Google Analytics or use your email marketing platform's analytics.
Conversion rate: This measures the percentage of visitors who take a desired action (like subscribing or making a purchase) after reading your post. Set up conversion tracking in Google Analytics to monitor this.
Regularly analyzing these metrics will help you understand what content resonates with your audience and guide your future content strategy.
Bonus Step 3: Repurpose The Content
Repurposing your blog content maximizes its value and extends its reach.
Here are three effective ways to reuse your post:
-
Email newsletters: Condense your blog post into a concise email format. Highlight key points and include a link to the full article. This keeps your subscribers engaged and drives traffic back to your blog.
-
YouTube video scripts: Transform your written content into a video script. Focus on the main ideas and add visual elements to enhance understanding. This taps into the growing video content market and caters to different learning styles.
-
Social media posts: Break your blog post into bite-sized, shareable content for various platforms. Create quote graphics, summarize key points in tweets, or share interesting statistics as LinkedIn posts. This increases your content's visibility and encourages engagement across multiple channels.
By repurposing your content, you're not only saving time but also reaching a wider audience through different mediums. Remember to adjust your content to suit each platform's unique characteristics and audience preferences.
Wrapping Up
We've explored the key steps to creating impactful blog posts, from research to promotion. The takeaway? Successful blogging combines strategy, audience insight, and continuous improvement.
Time to create content that leaves a lasting impact!
For ongoing blogging tips, join our newsletter.
