

Coaches without a professional website struggle to attract clients online. If you are a coach, you should have a website.
If you don’t have one, try building a clear, modern coaching website that showcases your expertise and converts visitors into clients.
That said, this article guides you step-by-step to create a website that grabs attention, builds credibility, and grows your business fast.
How to Make a Coaching Website: 8 Easy Steps
Below are all the steps related to building a professional coaching website. Ensure you thoroughly read these and take action accordingly.
Step 1: Plan Ahead
Before building your coaching website, take some time to plan. This step will help you create a clear and compelling site. Here's what you need to do:
Define Your Purpose: Decide what your website will achieve. Are you offering one-on-one coaching, group sessions, or resources? Be specific about your goals. This will guide the content and structure of your site.
Research Your Audience: Know who you want to reach. Are they beginners or experienced professionals? Understand their needs, challenges, and goals.
Think About Your Website Branding: Your website should reflect your coaching style. Choose colors, fonts, and a logo that match your brand. Maintain consistency throughout your site to establish a professional image.
Outline Your Site Design: Plan the layout of your website. Begin with the basic pages, including the homepage, about page, services page, and contact page. Think about how each page will look and make sure it’s easy to navigate.
Step 2: Select a Domain
Your domain name is the address people use to find your coaching website. Picking the right one is essential.
Tips to Choose a Domain Name
You can follow the below tips and tricks to choose a domain name.
Keep It Short and Simple: A short and simple domain is easy to remember and type. Select a name that’s clear and simple.
Use Your Brand Name: If possible, use your coaching business name in the domain. This helps strengthen your brand identity and makes it easier for clients to find you.
Pick the Right Extension: “.com” is the most common extension, but you might consider others like “.coach” or “.consulting.”
Related Read: .Com Vs .Org
Make It Easy to Remember: Choose a domain that sticks in people's minds. A catchy name encourages repeat visits. Avoid numbers or special characters that may confuse people.
Check If It’s Available: Before you get attached to a domain name, make sure it’s available. Use a domain search tool to verify that no one else owns it.
Pick a domain name that fits your coaching business. Ensure it’s clear, easy to remember, and available.
Step 3: Pick a Website Builder
After selecting your domain, the next step is to choose a website builder. A website builder allows you to design your site without needing coding skills. It’s important to find one that suits your needs and offers easy customization.
You should analyze the features of a website builder before selecting one. Look for a builder with drag-and-drop functionality if you're new to website creation.
Builders like Dorik AI offer built-in hosting, AI-driven website generation, user-friendly templates, and all the essential marketing tools that are well-suited for coaching websites.
Hence, you may choose Dorik as your website builder and follow the remaining steps outlined below.
Related Read: How to Choose an AI Website Builder
Step 4: Create a Coaching Website
Now comes the fun part: creating your coaching website. As we’ve said earlier, you need to choose a website builder, specifically, Dorik AI. Once you do that, the rest of the process is SUPER EASY.
Dorik AI allows you to build a fully professional website in minutes by following three techniques. Let’s learn about them.
Technique 1: Build a Coaching Website with AI
Dorik AI allows you to generate virtually any website within minutes just by writing a simple prompt! Here’s how.
1. Sign up in Dorik AI for free and create your account.
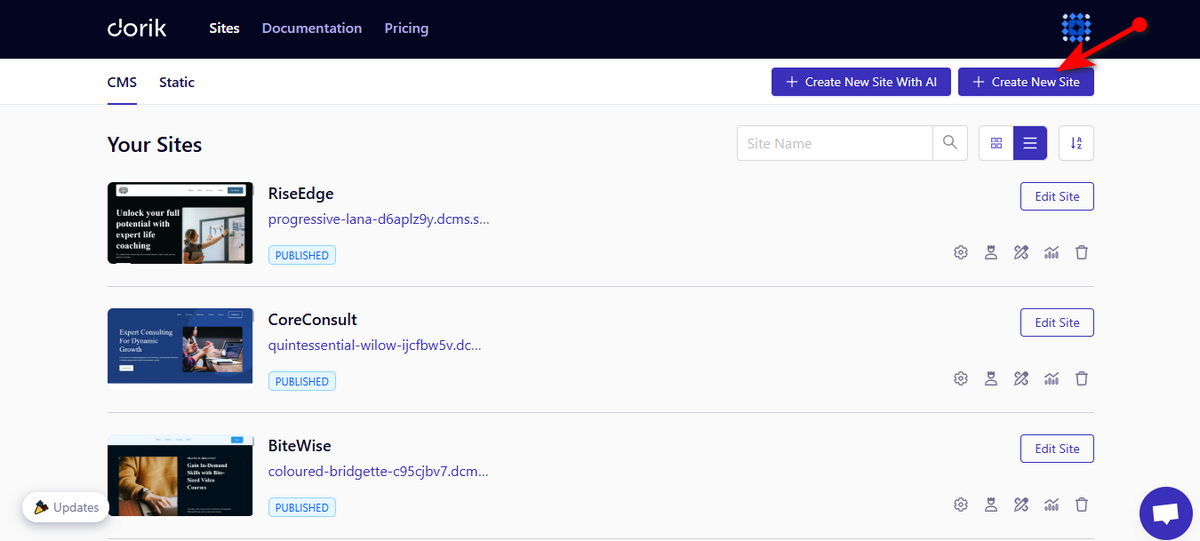
2. From your Dashboard, select your website type between CMS and Static. CMS websites have more functionality compared to static sites. Hence, choose cautiously.

3. Then, hit “+ Create New Site With AI” button.

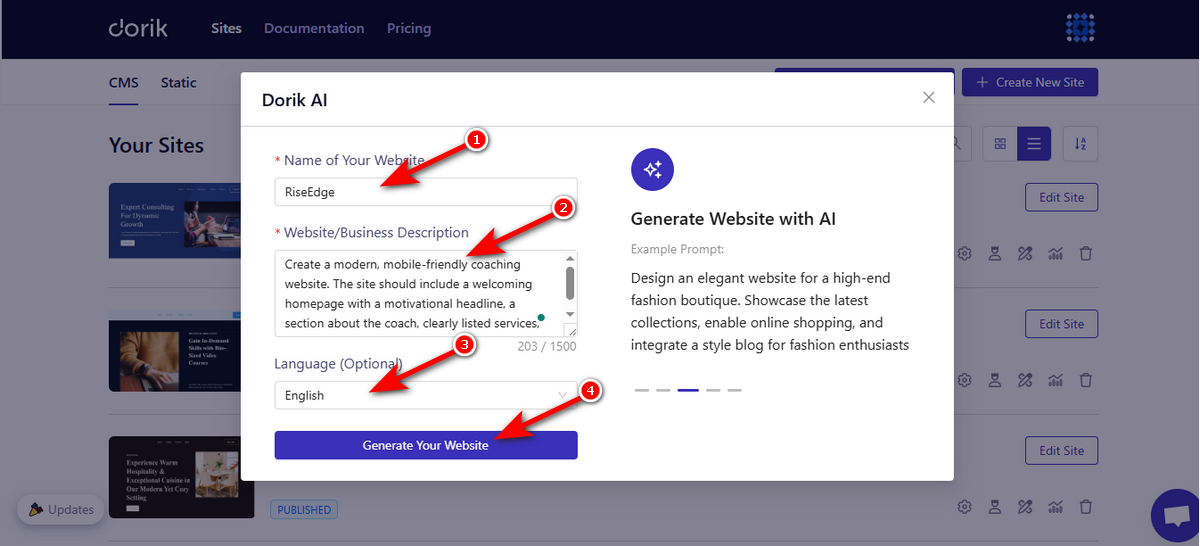
4. You’ll see a pop-up. You need to provide information related to your would-be coaching site in this pop-up.
For instance, write your site name in the “Name of Your Website,” type a simple yet well-defined prompt in the “Website/Business Description” box, select your website language, and lastly, press the “Generate Your Website” button.
Now, sit back and let Dorik AI work as your personal web developer and create your coaching website in minutes.
Here’s the prompt we used to generate the coaching website -
Create a modern, mobile-friendly coaching website. The site should include a welcoming homepage with a motivational headline, a section about the coach, clearly listed services, and client testimonials.
The Generated Output:

See! How fast Dorik can generate a professional website with AI. But what if you don’t like the website generated by AI?
You can always customize the site to suit your preferences. We’ll discuss the customization later in this article. So, keep reading, or you may try the AI website generation before heading to the end of this article.
Technique 2: Make a Coaching Website with a Template
Now, we’ll discuss the second website-building method that Dorik offers. It comes with the best coaching website templates, which you can use to create your own site. Follow the steps to utilize your chosen template.
1. Sign up/Log in to your account and select your website type: CMS or Static.
2. Press “+ Create New Site” button.
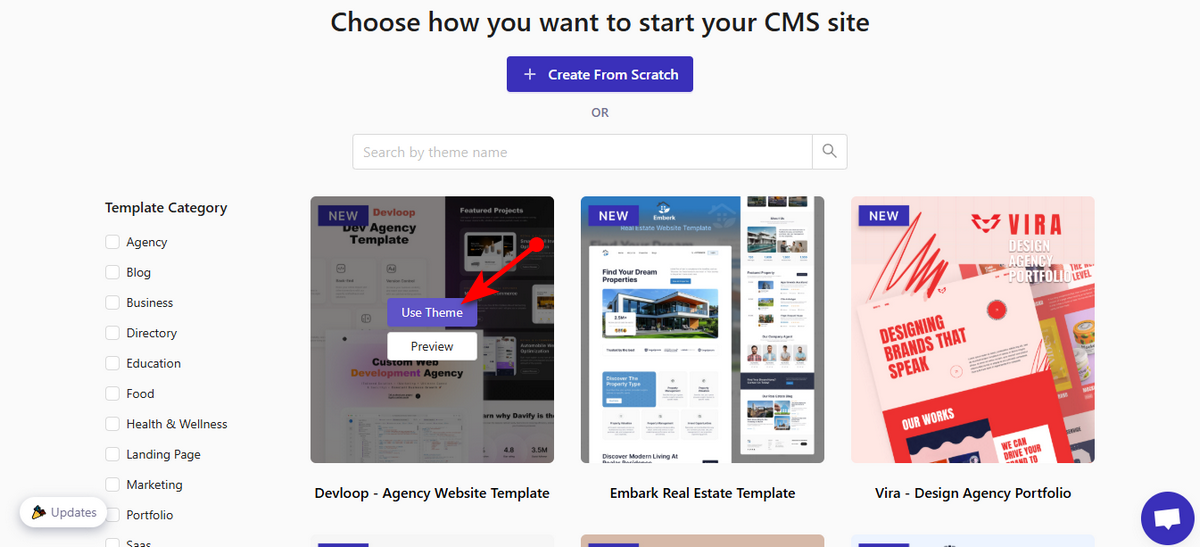
3. Now, you’ll notice a bunch of templates. Choose a template. For example, you can select the JB - Business Coach Template. To use it, hover the mouse pointer over that template and hit “Use Theme” button.
That’s it. You can now customize the template as you wish and publish your site.
Technique 3: Create a Coaching Website from Scratch
Okay, let’s talk about the last website-creation technique of Dorik. Suppose you don’t want to create a website using AI or a template. In this case, you can opt for building it from scratch. Here’s how.
-
Sign up/Log in to your Dorik account and select the website type.
-
After that, press the “+ Create New Site” button.
-
You’ll visit the template page. On top of the page, you’ll notice a button named "+ Create From Scratch". Click that button.
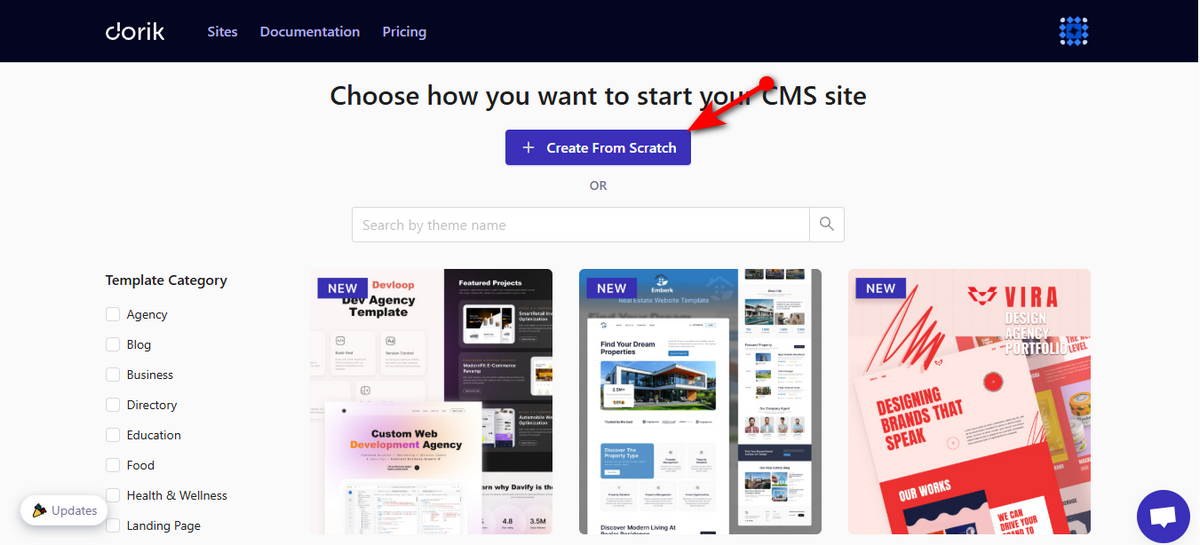
Then you’ll be redirected to the Dorik Editor, where you can customize and publish your coaching website.
Step 5: Customize Your Coaching Website
In this section, we’ll discuss how to customize your coaching website with the Dorik Editor. This editor lets you change your site logo, rework on some or all sections of a particular page, rewrite landing page copies using the AI Text Generator, regenerate images with the AI Image Generator, and many more things.
Let’s say you want to change the logo. To do so, open your website inside the editor and click on the logo. You’ll see a movable navigation panel on the right.
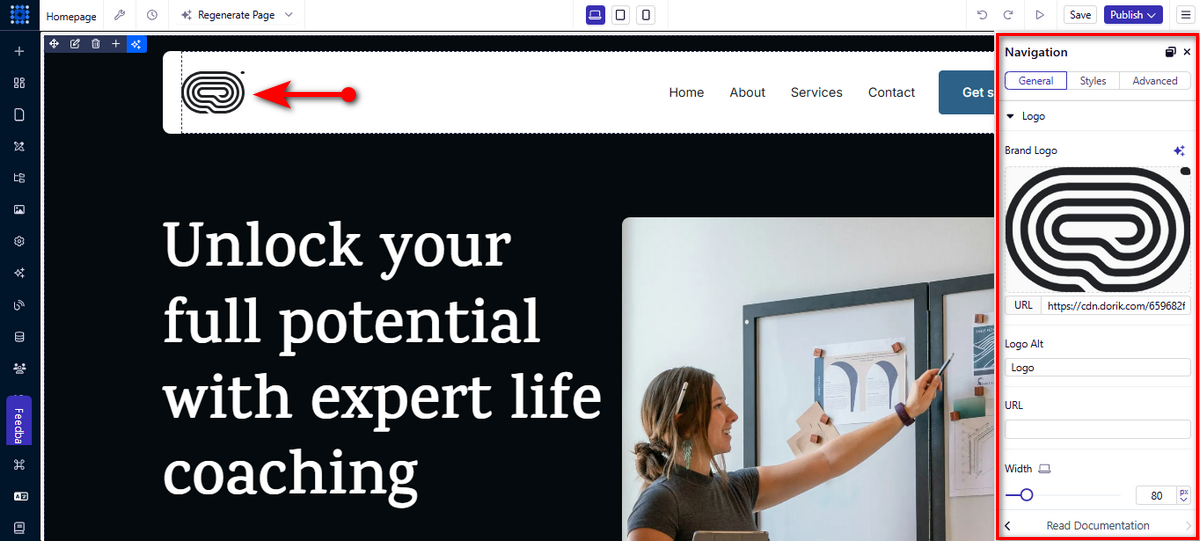
Now, click on the three-star icon on the navigation panel under ‘Logo’ to open the AI Image Generator.
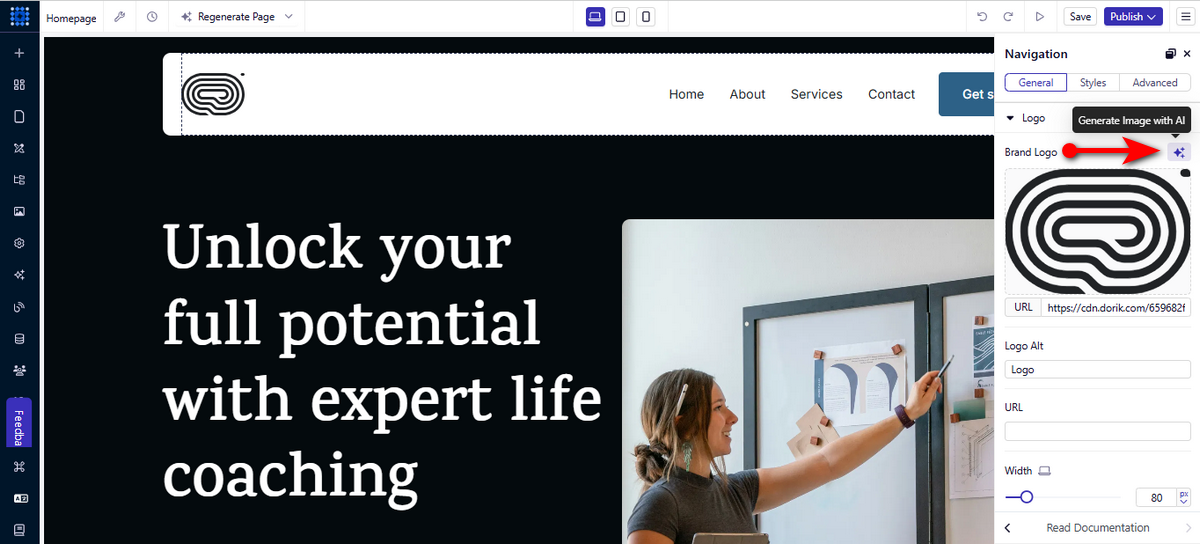
Now, write a simple prompt in the prompt field and click ‘Generate’ button to generate a logo for your coaching site.
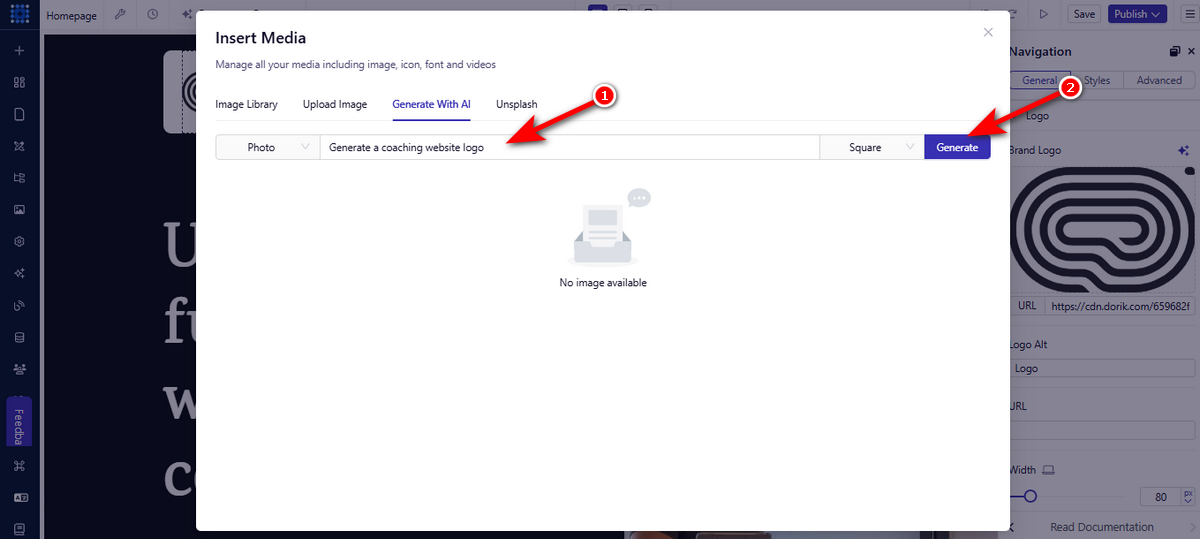
That’s how easily you can generate a logo and an image for a particular section using the AI Image Generator.
Okay, how do you write a landing page copy? Simple, just hover your mouse pointer over the copy and you’ll see editing tools. Click the three-star icon, and you’ll notice a couple of options: Rephrase, Improve, Paraphrase, etc. Choose the one you need.
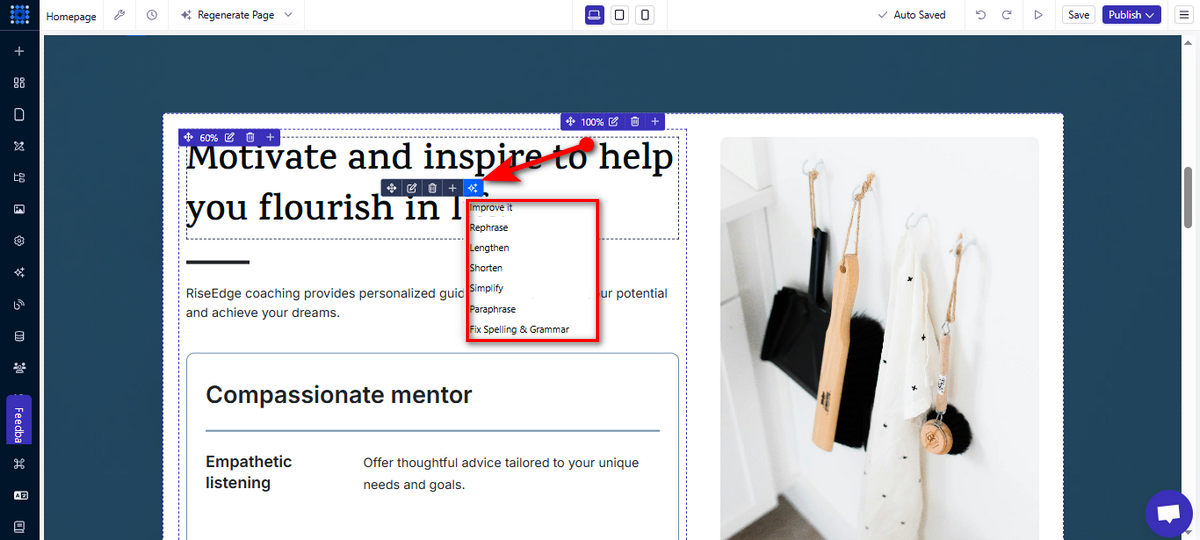
This is the way you can use Dorik AI's landing page copy generator to rewrite your landing page copy. Let’s now include a section on a page. To do that, follow the steps below:
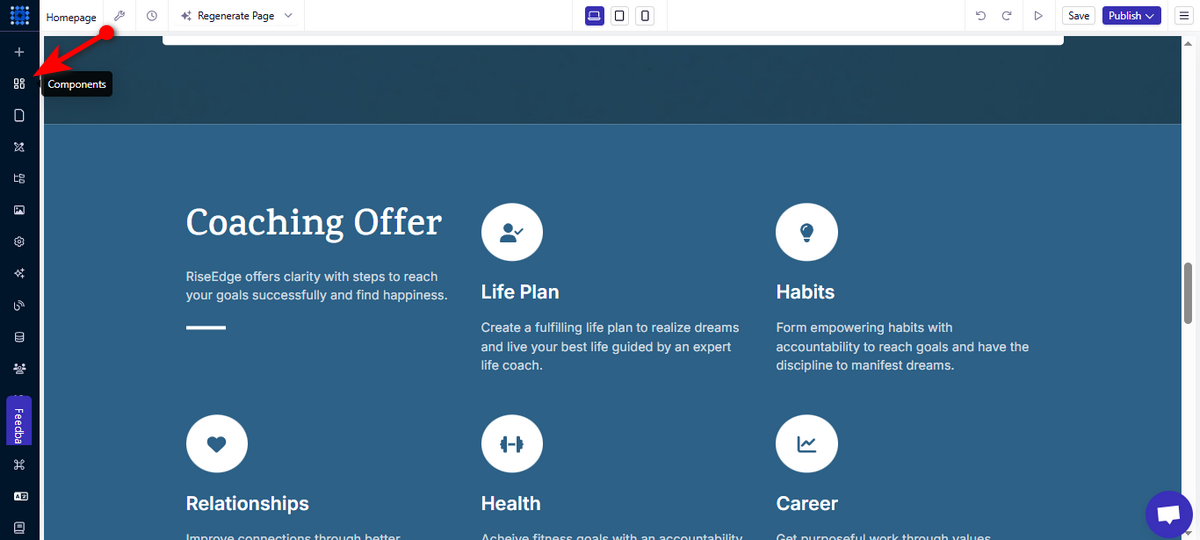
1. Head to the left side panel and click ‘Components’ menu.
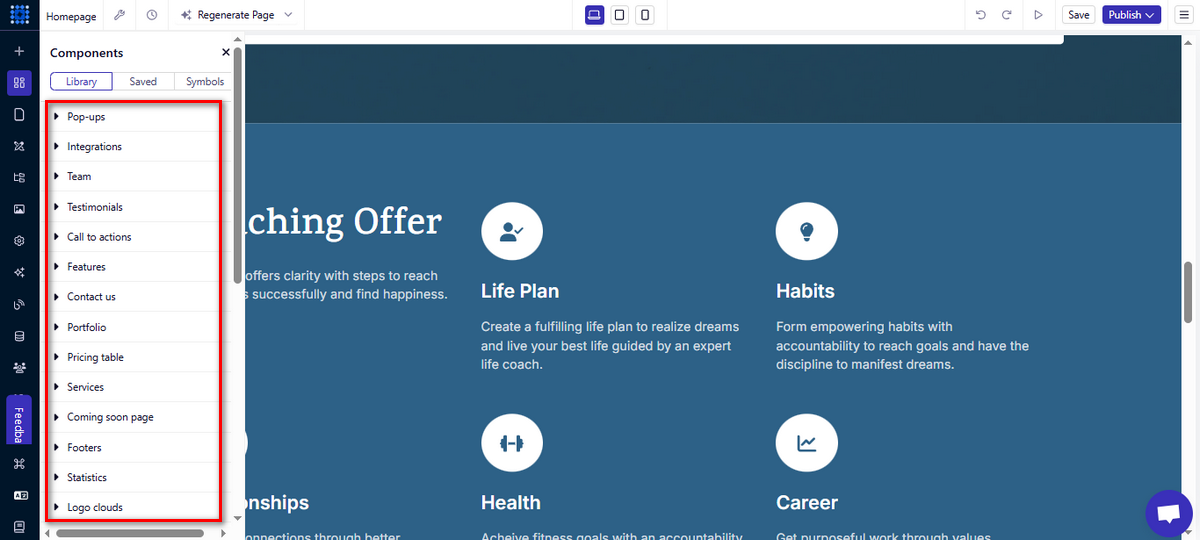
2. Determine what kind of component you want to insert from the ‘Library’ tab and click on it.
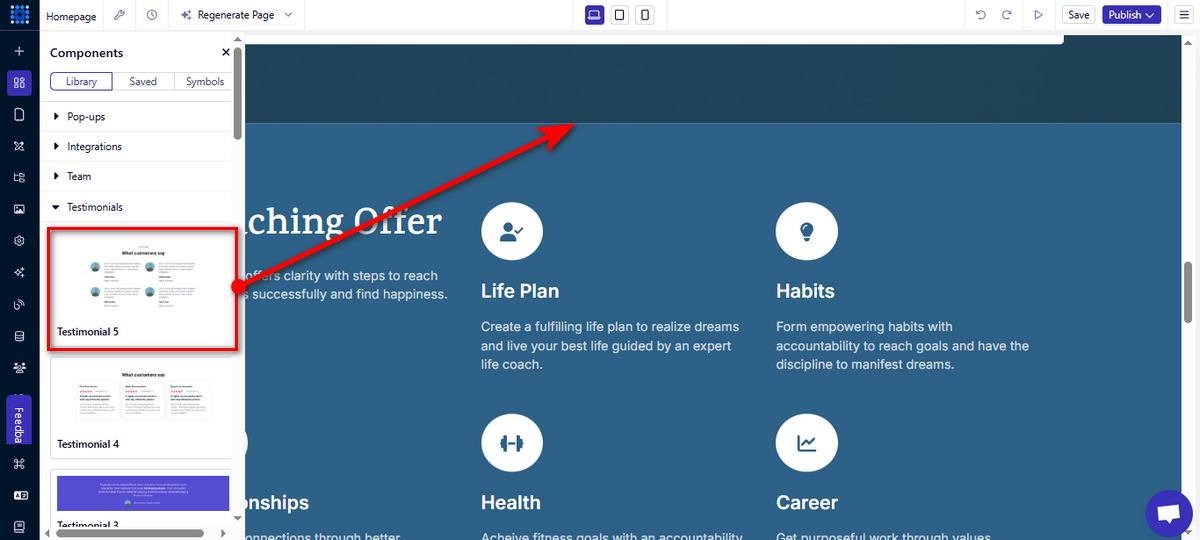
3. Lastly, drag and drop your desired component to your preferred area of a web page.
This is how you can add a component to a page with the Dorik Editor. So, it’s evident that challenging website customization jobs are easy with this editor. We encourage you to explore it and read the documentation for further help regarding customization.
Step 6: Create Essential Coaching Site Pages
To build a successful coaching website, include the following essential pages. These pages help visitors understand your services and connect with you.
Homepage
Your homepage is the first thing visitors see. It should clearly communicate what your coaching services are and how you can help.
Use a strong headline that tells visitors what you do, followed by a brief introduction to your coaching style. Include a call to action like “Book a Session” or “Learn More” to guide them through your site.
Good Read: How to Create a Homepage
Podcast and Media Pages
If you have a podcast or appear in the media, create dedicated pages to showcase them. A podcast page can include episode listings, summaries, and links to platforms where listeners can access the content.
Media pages can highlight interviews, guest spots, and articles. These pages help build credibility and provide more value to your audience.
About Us
The About Us page introduces you to visitors. Share your story, qualifications, and coaching philosophy. Explain why you became a coach and what drives you.
Add a personal touch here to build trust and make you relatable. Include a photo of yourself to make the page feel more personal.
Also Read: How to Create an About Us Page
Contact Us
The Contact Us page is essential as it allows visitors to get in touch easily. So, create a Contact Us page that includes your email address, phone number, and a contact form with straightforward fields.
Good Read: How to Create an Contact Us Page
Blog
A blog is a great way to share helpful content with your audience. Therefore, create a blog page and post articles, tips, and advice related to your coaching niche.
Also Read: How to Start a Blog
Testimonials
Testimonials are essential for building trust. Create a page that showcases client feedback, success stories, and reviews. Positive testimonials can convince potential clients of your expertise and the impact of your coaching services.
These essential pages create a professional, easy-to-navigate website that displays your coaching services and connects you with potential clients.
Also Read: How to Ask for a Testimonial
Step 7: Publish Your Coaching Website
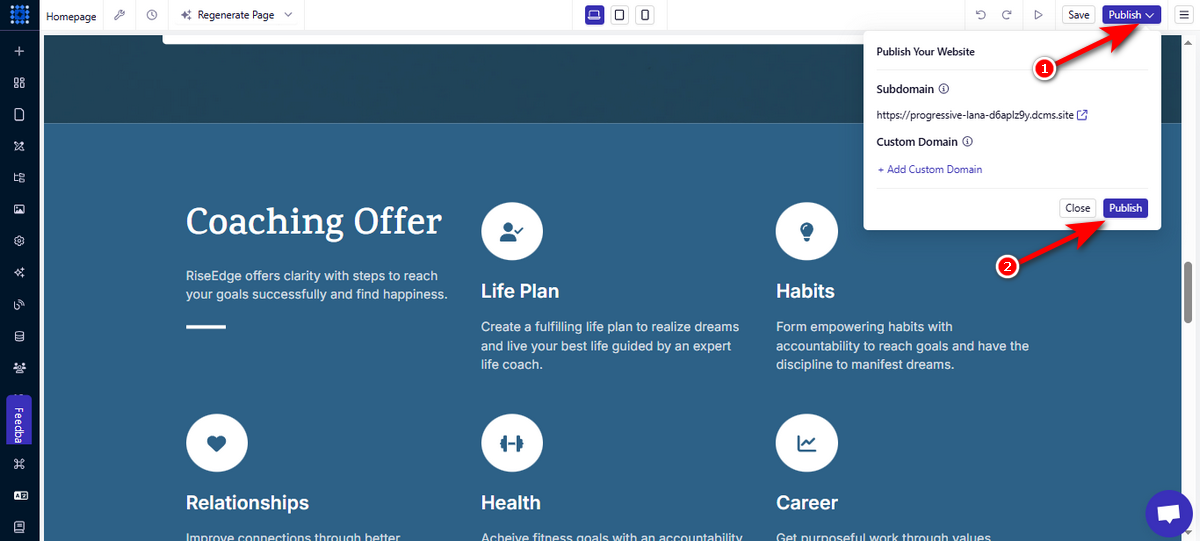
Once you’ve built your coaching website and added all the necessary pages, it’s time to publish. Before hitting the publish button, take a moment to review everything.
Double-check your content for any spelling or grammar errors, and make sure all links and buttons work correctly. Then, be sure to add a custom domain with Dorik and click the Publish button.
Step 8: Optimize for SEO
After publishing your coaching website, focus on optimizing it for search engines. SEO helps your site rank higher in search results, making it easier for potential clients to find you.
Start by adding clear titles and descriptions to each page. Use relevant keywords that match what people are searching for.
Next, organize your content with proper headings (H1, H2) to make it easy for both visitors and search engines to understand. Don't forget to add alt text to all images, which helps search engines index them.
Lastly, ensure your website loads quickly and works well on mobile devices. Regularly update your content to perform better in search results.
Good Read: SEO Best Practices
Bonus: Best Coaching Website Examples for Inspiration
Here we’ve compiled some of the best coaching website examples to help you brainstorm design ideas and other aspects before you build your website.
1. Marie Forleo

Marie Forleo’s website exhibits a modern and engaging design that reflects her vibrant personality and entrepreneurial spirit.
Her site’s homepage features bold typography and a dynamic color palette, creating an energetic atmosphere that captures visitors' attention.
Navigation is straightforward, guiding users to various resources. Personalized elements, including videos and testimonials, add authenticity and build trust with the audience.
It's a great example of a coaching website, and you may follow this one to take design ideas.
2. Gabby Bernstein
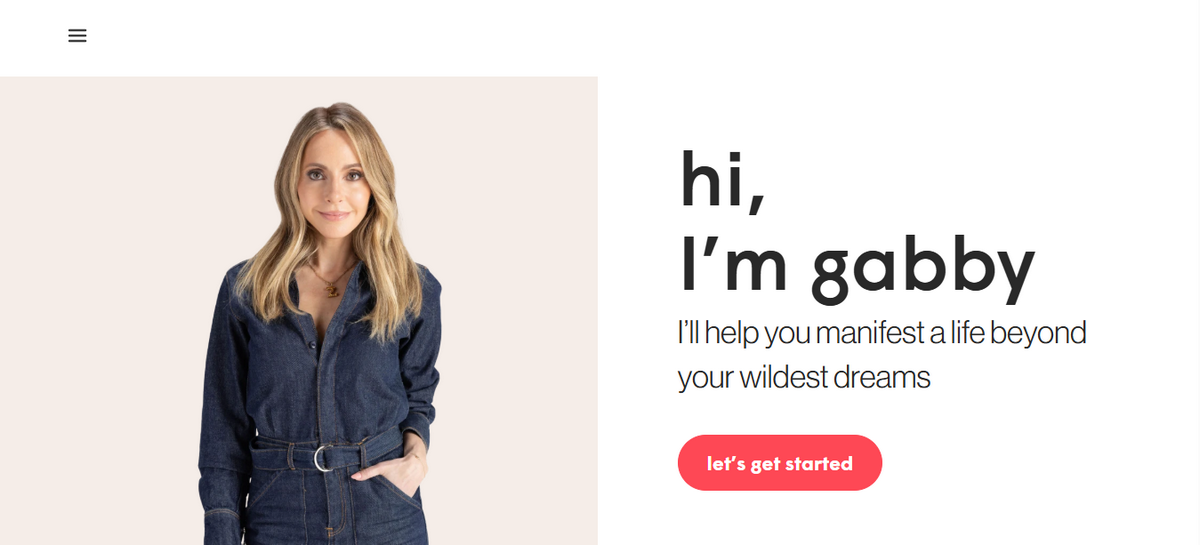
Gabby Bernstein's website features a clean, modern design with a bold, high-contrast color scheme that reflects her energetic and spiritual brand.
The homepage prominently displays a large, welcoming photo of Gabby, immediately establishing a personal connection with visitors.
Navigation is straightforward, guiding users to her coaching programs, books, podcasts, and free resources. Strategic calls to action are placed throughout the site, encouraging engagement and conversion.
The layout is minimalist, allowing the content to shine and providing a seamless user experience across devices. Overall, the design effectively communicates Gabby's message and encourages visitors to explore her offerings.
Some Other Ideas for Your Inspiration
FAQs
What Are the 3 C's of Coaching?
The 3 C's of coaching are Clarity, Communication, and Commitment. Clarity helps define goals, Communication ensures understanding, and Commitment drives consistent progress. These principles guide the coaching process, creating a strong foundation for success.
What Are the 7 P's of Coaching?
The 7 P's of coaching are Purpose, Passion, Planning, Patience, Practice, Perseverance, and Performance. These principles enable coaches to create effective strategies, maintain motivation, and effectively track progress.
What Are the ABCs of Coaching?
The ABCs of coaching are Attitude, Behavior, and Communication. These key elements guide the coaching process by shaping a positive mindset, encouraging productive actions, and ensuring open and transparent dialogue.
What Are the 5 R's of Coaching?
The 5 R's of coaching are Rapport, Respect, Responsibility, Results, and Reflection. Rapport and respect help build trust in the coaching relationship. Responsibility, results, and reflection support growth and positive change.
Wrapping Up
Building a coaching website doesn’t have to be complicated. Here’s a recap regarding how to make a coaching website. You can start by figuring out what you want to offer and who you want to help.
Then, pick a domain and website builder. Afterward, generate the site and build key pages like the homepage, About Us, and testimonials. Try to keep things simple and ensure that visitors can easily navigate your website.
Lastly, check everything and publish your website. It’s that simple!